
Voyager V6-3.3L VIN 3 Flex Fuel (2003)
12. Remove two nuts attaching master cylinder to power brake booster.
13. Slide master cylinder straight out of power brake booster. Lay master cylinder with primary and secondary tubes to the side, out of the way.
CAUTION: A seal on the rear of the master cylinder is used to create the seal for holding vacuum in the power brake vacuum booster. The
vacuum seal on the master cylinder MUST be replaced whenever the master cylinder is removed from the power brake vacuum booster.
14. Disconnect vacuum hose from check valve located on booster. DO NOT REMOVE CHECK VALVE FROM POWER BRAKE BOOSTER.
15. Under the instrument panel, remove booster input rod trim cover.
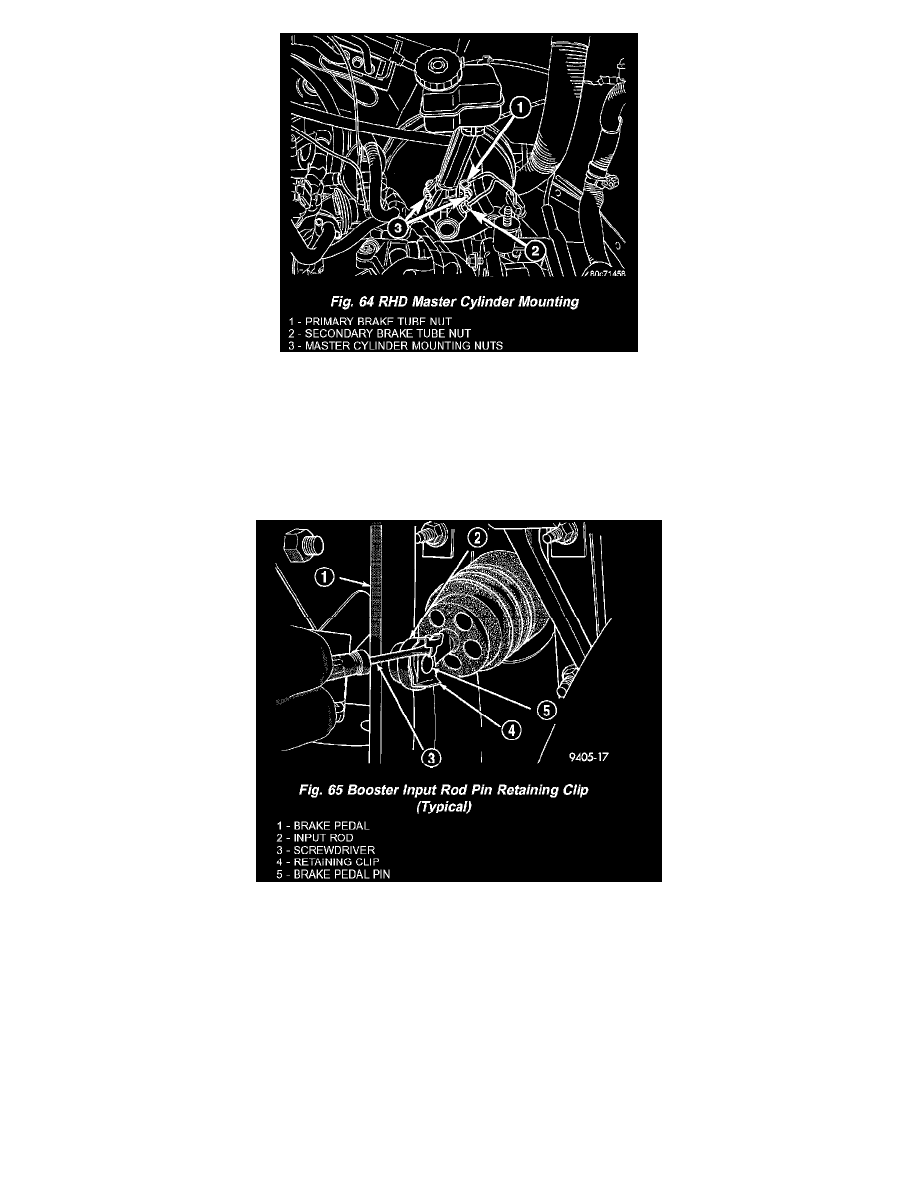
16. Locate the booster input rod to brake pedal torque shaft connection under the instrument panel. Position a small screwdriver between the center
tang on the retaining clip.
17. Rotate screwdriver enough to allow retaining clip center tang to pass over end of brake pedal pin. Then pull retaining clip off brake pedal torque
shaft pin. Discard retaining clip. It is not to be reused. Replace only with a new retaining clip when assembling.
18. Remove booster input rod from pedal torque shaft pin.