
Voyager V6-3.3L VIN R (2000)
Expansion Valve: Service and Repair
WARNING: THE REFRIGERATION SYSTEM MUST BE COMPLETELY EMPTY BEFORE PROCEEDING WITH THIS OPERATION.
REMOVAL
1. Disconnect the battery negative cable.
2. Recover A/C system refrigerant.
3. Remove the accessory drive belt.
4. Remove upper generator bracket.
5. Disconnect generator field wire connector.
6. Push generator forward.
7. Remove ground wire at dash panel.
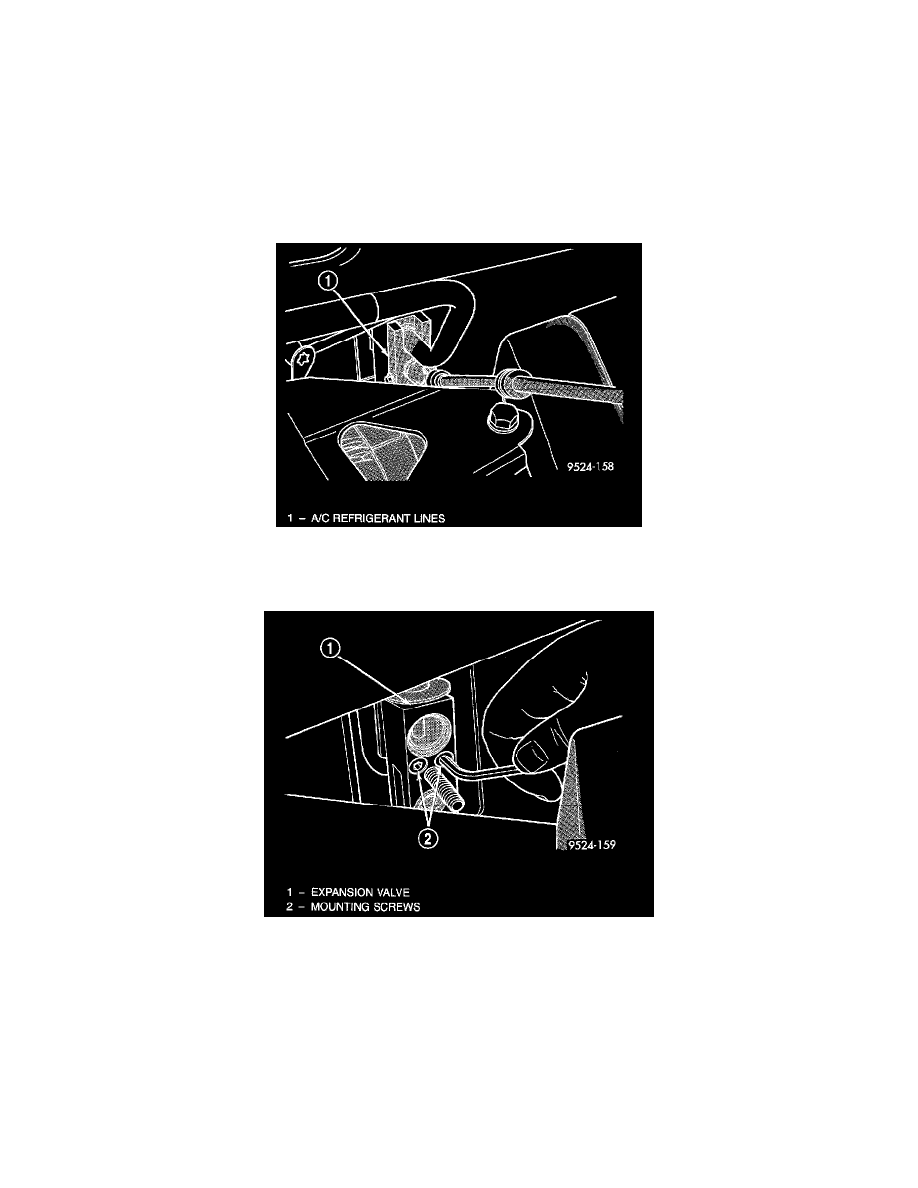
A/C Refrigerant Line Plate
8. Remove the nut retaining the refrigerant line sealing plate to the expansion valve.
Expansion Valve Stud and Mounting Screws
9. Remove the stud from the expansion valve.
10. Carefully pull the refrigerant line Sealing plate assembly from expansion valve towards the front of the vehicle. Use care not to scratch the
expansion valve sealing surfaces with pilot tubes.
11. Cover the openings to prevent contamination
12. Remove two screws securing the expansion valve to the evaporator sealing plate.