
Charade L4-1295cc 1.3L (1989)
Axle Shaft Assembly: Service and Repair
Front
Disassembly/Assembly, Front
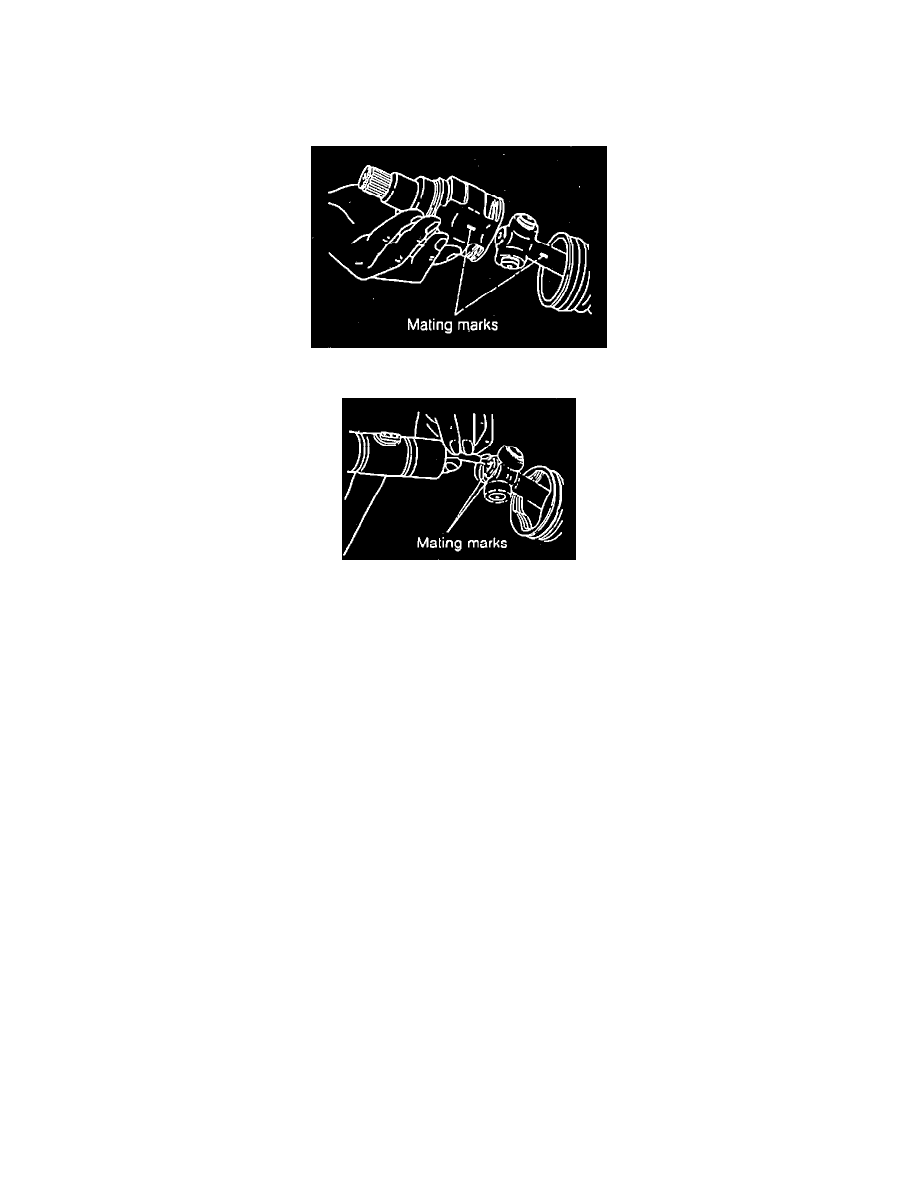
Fig. 7 Marking Inboard Joint.
Fig. 8 Marking Tripod Assembly.
1.
Remove inboard joint boot band and boot. Care should be taken not to damage boot.
2.
Scribe mating marks on inboard joint and shaft, Fig. 7.
3.
Pull inboard joint off shaft.
4.
Remove snap ring off end of shaft.
5.
Scribe mating marks on tripod assembly and shaft, Fig. 8.
6.
Remove tripod assembly using a suitable brass bar.
7.
Remove inboard boot.
8.
Remove dynamic damper using a suitable pry tool.
9.
Remove outboard boot bands, then outboard boot. The outboard joint is not a serviceable.
10.
Reverse procedure to assemble, noting the following:
a. Wrap tape around splined end of shaft to prevent damage to outboard boot during installation.
b. Align mating marks upon assembly of all inboard parts.
c. Pack inboard and outboard joints with suitable grease.
Removal/Installation, Front
1.
Raise and support vehicle
2.
Remove front wheels.
3.
Drain transmission fluid.
4.
Remove front wheel adjusting nut lock cap.
5.
Remove front wheel adjusting nut.
6.
Separate outer tie rod from steering knuckle.
7.
Remove engine splash shield.
8.
Remove the stabilizer bar.