
1500 4x4 Pickup V8-360 5.9L Magnum (1996)
Brake Caliper: Service and Repair
Disassembly and Assembly
DISASSEMBLE
1. Drain brake fluid from caliper, then remove brake pads.
2. Pad interior of caliper with minimum one inch thickness of shop towels to cushion and protect piston during removal.
3. Remove piston with several short bursts of low pressure compressed air directed through fluid inlet port.
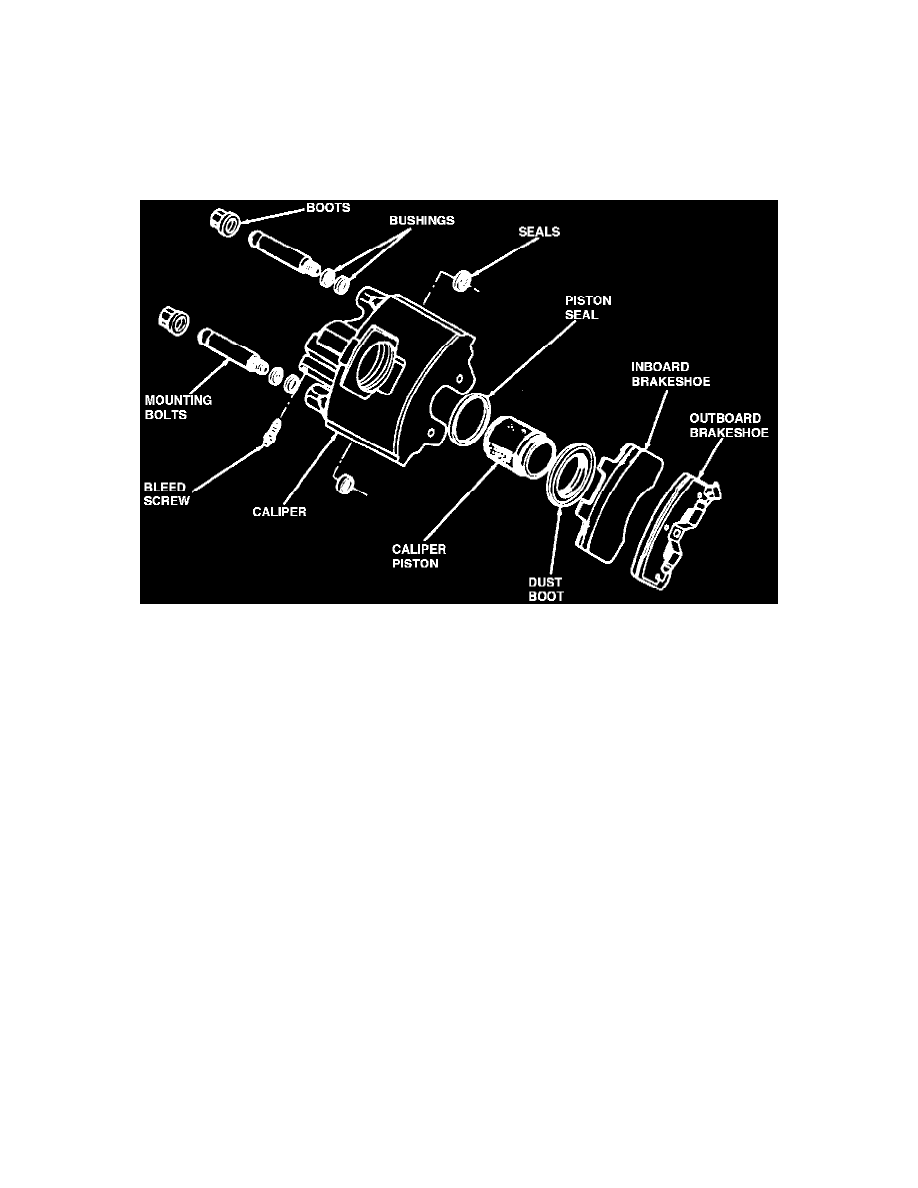
4. Remove piston dust boot with suitable pry tool and discard boot. Do not scratch piston bore while removing boot.
5. Remove seal from caliper piston and discard seal.
Fig. 12 Exploded View Of Caliper
6. Remove mounting bolts from calipers and inspect seals, boots and bushings. Remove these components only if cut, worn or damaged.
7. Remove caliper bleed screw.
INSPECTION
1. Inspect condition of caliper bore. A fiber brush can be used to clean the bore if needed. The bore should be free of corrosion, pitting, or scoring.
Discoloration of the bore is normal. The bore can be lightly polished by hand using crocus cloth only.
2. Inspect condition of piston and replace if corroded, pitted, or scored. Do not use any kind of abrasive material to restore surface finish of
piston.
3. Inspect condition of threads of inlet and bleed screw ports. Replace caliper if thread damage is evident. Do not attempt to salvage threads.
4. Inspect bushings in caliper mounting bolt bores. Replace bushings if necessary.
ASSEMBLE
1. Ensure assembly area is clean and dry to avoid any contamination to caliper unit.
2. Lubricate caliper piston seal, piston, and piston bore with liberal amounts of fresh, clean, brake fluid.
3. Install new dust boot on piston as follows:
a. Lightly lubricate lip of new boot with suitable silicone grease, then work boot lip into boot groove at top of piston.