
2500 4x2 Pickup V8-318 5.2L Magnum (1994)
EGR Control Valve: Testing and Inspection
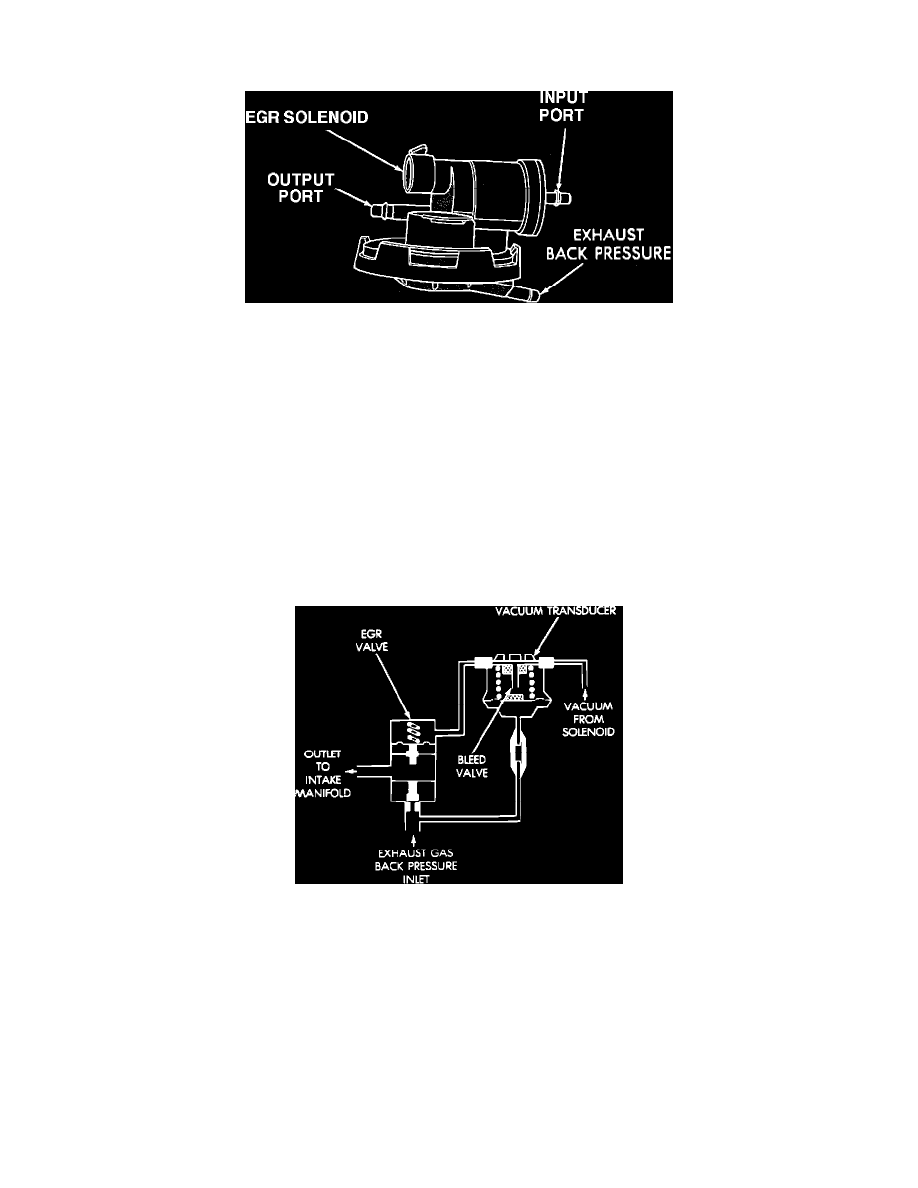
Electric EGR Transducer (EET)
TRANSDUCER ELECTRICAL SOLENOID TEST
1.
Start engine and allow to reach normal operating temperature.
2.
Allow engine to run at normal idle speed and set the parking brake.
3.
Verify that the EGR Solenoid has vacuum coming from its source (manifold vacuum).
4.
Disconnect vacuum hose at the EGR Solenoid and connect a vacuum gauge in its place. Vacuum should be at least 15 in. Hg. If vacuum is low,
check for twists, kinks or loose connections at the intake manifold or vacuum connectors. If vacuum is OK, remove gauge, Connect the vacuum
hose, and go to the next step.
5.
Disconnect the vacuum hose from the EGR Solenoid output port and connect a vacuum gauge to the same port. Vacuum should be zero at this side
of the solenoid.
6.
If vacuum is zero, go to the next step. If vacuum is present, SEE COMPUTERS AND CONTROL SYSTEMS for diagnosis of the system.
7.
Disconnect the EGR Solenoid electrical connector, and verify that vacuum is now present.
8.
If vacuum is present go to the TRANSDUCER VACUUM DIAPHRAGM TEST, if vacuum is not present replace ELECTRIC EGR
TRANSDUCER.
EGR Transducer
TRANSDUCER VACUUM DIAPHRAGM TEST
1.
Disconnect the transducer back-pressure line and the vacuum lines.
2.
Plug the output port of the transducer, and connect a hand held air pump to the back-pressure port. Apply 1 to 2 lbs of air pressure.
3.
Connect a hand held vacuum pump to the input port of the transducer and apply at least 12 in Hg vacuum.
4.
Verify that the transducer holds vacuum, if it does not, it is defective and needs to be replaced.