
2500 4x2 Pickup V8-5.9L VIN Z (1994)
Housing Assembly HVAC: Service and Repair
This procedure may require the removal and installation of the instrument panel and/or some its components. For these procedures, Refer to:
"Instrument Panel, Gauges and Warning Indicators : Instrument Panel : Service and Repair" See: Body and Frame/Interior Moulding /
Trim/Dashboard / Instrument Panel/Service and Repair
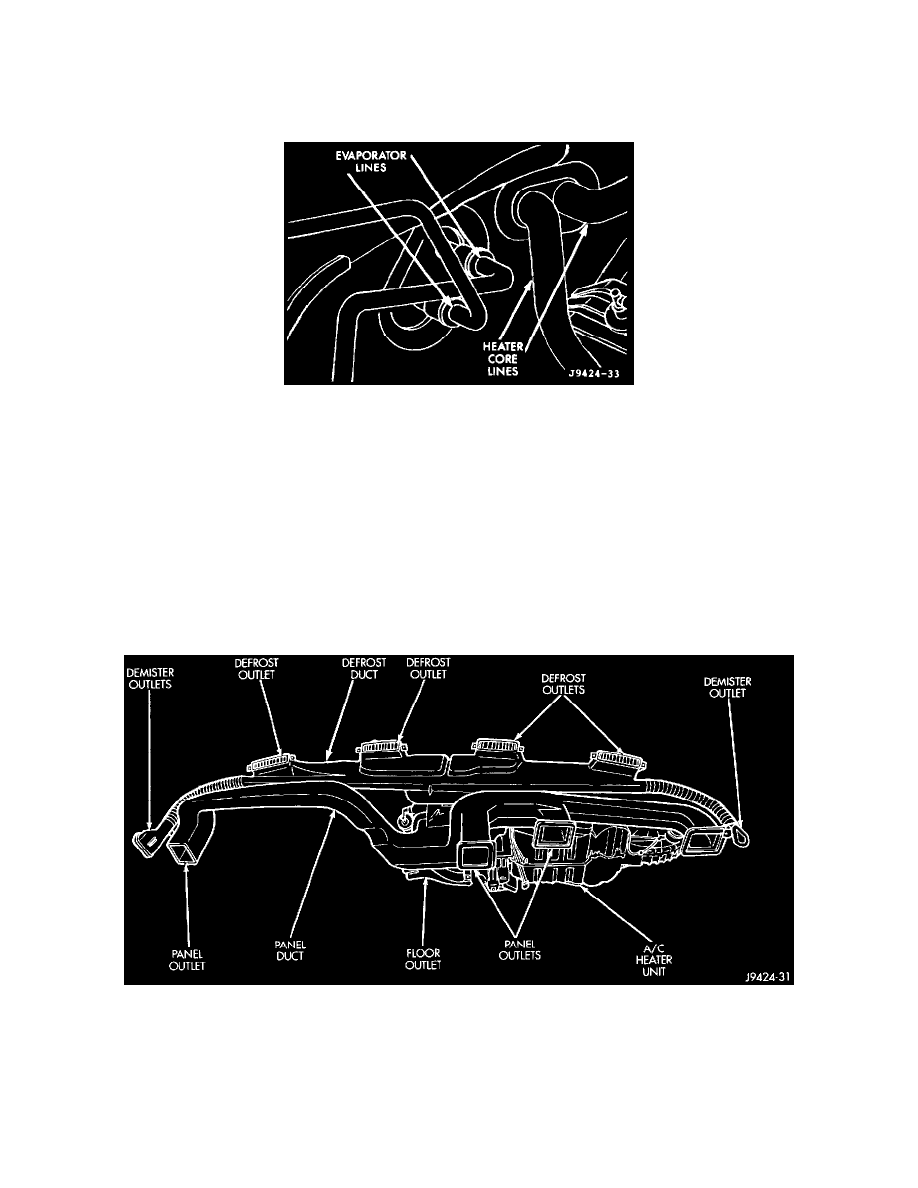
Fig 45 Evaporator And Heater Core Lines
REMOVAL
1. Disconnect and isolate the battery negative cable.
2. Recover the refrigerant from the refrigerant system.
3. Disconnect the refrigerant lines from the evaporator tubes. Install plugs in, or tape over all of the open refrigerant fittings.
4. Drain the cooling system. Refer to: "Engine, Cooling and Exhaust : Cooling System : Service and Repair" See: Engine, Cooling and
Exhaust/Cooling System/Service and Repair.
5. Disconnect the heater hoses from the heater core tubes.
6. Remove the coolant reserve/overflow bottle.
7. Remove the Powertrain Control Module (PCM) and set it aside. Do not unplug the PCM wire harness connectors.
8. Remove the nuts that secure the heater-A/C housing mounting studs on the engine compartment side of the dash panel.
9. Remove the instrument panel. Refer to: "Instrument Panel, Gauges and Warning Indicators : Instrument Panel : Service and Repair" See:
Body and Frame/Interior Moulding / Trim/Dashboard / Instrument Panel/Service and Repair
Fig 46 Defroster Duct
10. Remove the defroster duct from the heater- A/C housing.
11. Unplug the heater-A/C housing wire harness connectors.