
3500 4x2 Pickup L6-359 5.9L DSL Turbo (1994)
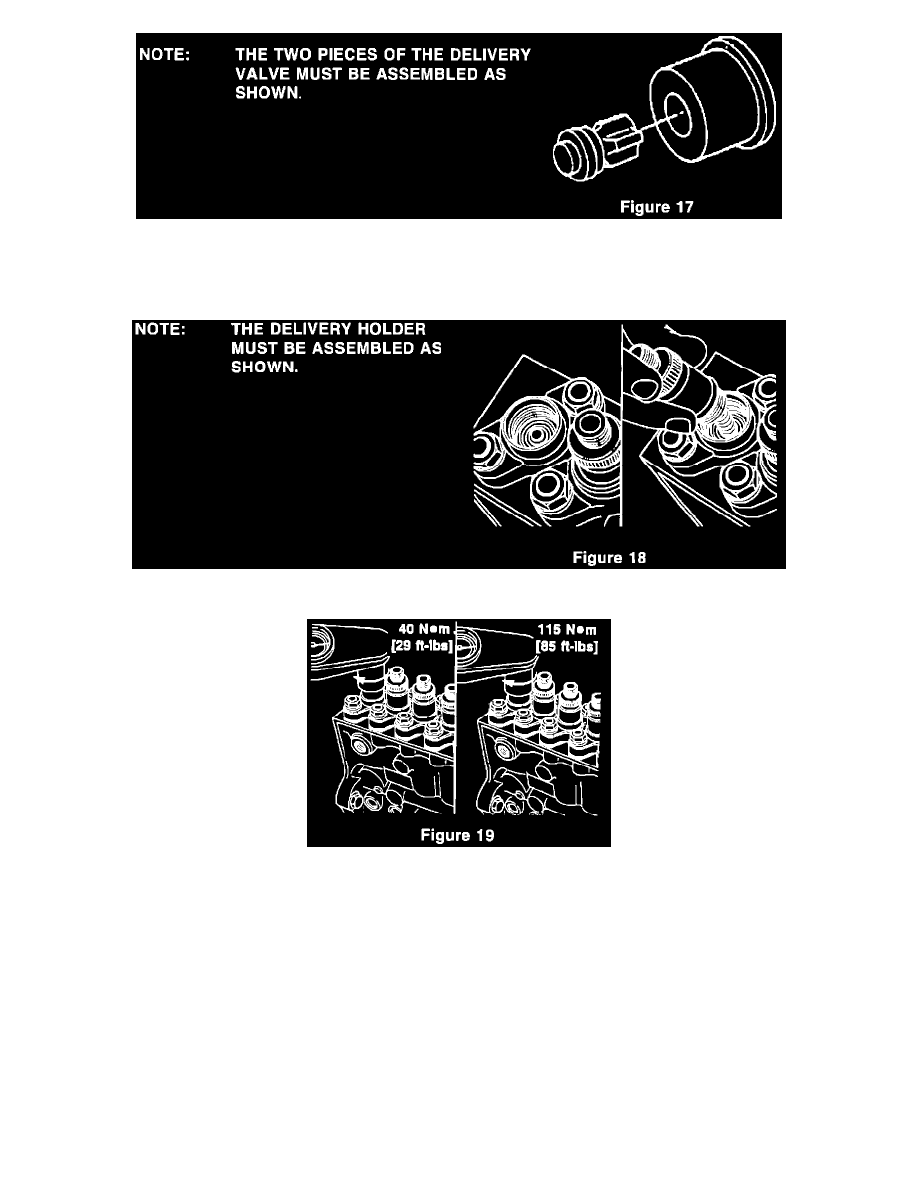
25.
Install the delivery valve assembly on top of the sealing washer (Figure 17).
26.
Lubricate the threads and clamping surface of the delivery valve holder with a few drops of SAE 90 hypoid gear oil. Do not lubricate the copper
delivery valve washer or its seating area.
27.
Install the delivery valve holder assembly taking care not to displace the delivery valve spring, fill piece, or any shims (Figure 18).
28.
Pre-torque the holder to 40 N-m (29 lb.ft.). NEXT, IN ONE MOTION, TORQUE THE HOLDER TO 115 N-M (85 LB.FT.). (Figure 19).
29.
Install remaining engine components removed during the timing process. Leave the injector side of the # 1 high pressure fuel lines loose to
facilitate "bleeding" the air out of the system.
CAUTION:
THE PRESSURE OF THE FUEL IN THE LINE IS SUFFICIENT TO PENETRATE THE SKIN AND CAUSE SERIOUS BODILY HARM.
30.
Crank the engine until fuel is observed at the # 1 injector. Tighten the high pressure line at the injector. Start the engine and check for leaks.
31.
Type the necessary information on the Authorized Modification Label and attach the label near the VECI Label.
POLICY:
Reimbursable within the provisions of the warranty.
TIME ALLOWANCE: