
3500 4x2 Pickup V8-360 5.9L Magnum (1994)
8.
Remove the two radiator upper mounting bolts
9.
Position the upper part of radiator towards the engine.
10.
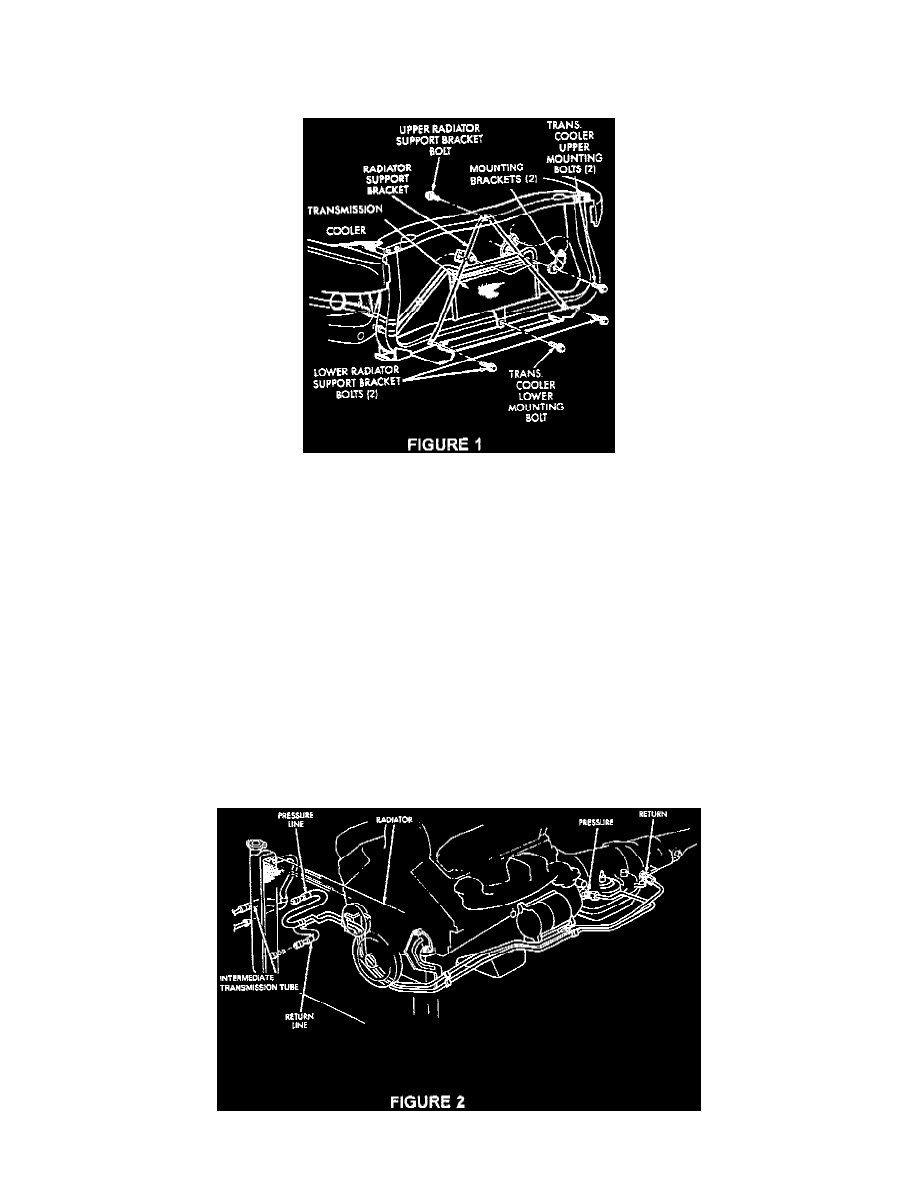
Attach the auxiliary cooler assembly (P/N 52027525) to the A-shaped radiator support bracket using the two upper mounting bolts and mounting
straps. Install the bolts but do not tighten at this time. Figure 1
11.
Install the radiator support bracket and cooler (as an assembly) to the vehicle.
12.
Install the two lower radiator A-shaped support bracket bolts. Do not tighten bolts at this time.
13.
Slide and position the auxiliary cooler on the A-shaped bracket until its lower mounting holes line up with the bolt hole on the vehicle body.
Torque the cooler mounting strap bolts to 6 Nm (50 in.lbs).
14.
Install the upper radiator A-shaped support bracket bolt. Torque all three radiator support bracket mounting bolts to 11 Nm (95 in.lbs.).
15.
Install the two radiator upper mounting bolts and torque to 11 Nm (95 in.lbs.).
16.
Install windshield washer reservoir tank.
17.
Install rubber shield to radiator.
18.
Remove the intermediate transmission tube coming from the upper right hand side of the radiator. Disconnect at the tube nut and discard.
19.
Connect the pressure line coming from the transmission into the upper line of the auxiliary cooler. Figure 2