
3500 4x2 Pickup V8-360 5.9L Magnum (1994)
Valve Body: Service and Repair
30RH/32RH/36RH/37RH 3-Speed
Lock-Up Module Replacement
Fig. 15 Lock-up Module Disassembly
1. Remove end cover, Fig. 15.
2. Remove lock-up spring and valve.
3. Remove fail-safe valve and spring.
4. Tag these springs as they are removed for reassembly.
Valve Body Replacement
1. Drain transmission and remove oil pan.
2. Loosen clamp bolts and remove throttle and/or gear selector levers from manual lever.
3. Remove neutral safety switch.
4. Place a drain pan under transmission and remove the ten valve body to transmission bolts. Hold valve body in place while removing bolts.
5. Carefully lower valve body. Pull valve body forward to disengage parking control rod. It may be necessary to rotate output shaft to permit parking
control rod to clear sprag.
6. Remove accumulator piston and spring from transmission case. Inspect piston for nicks, scores and wear. Inspect spring for distortion. Inspect
rings for freedom in piston grooves and wear or breakage. Replace parts as necessary.
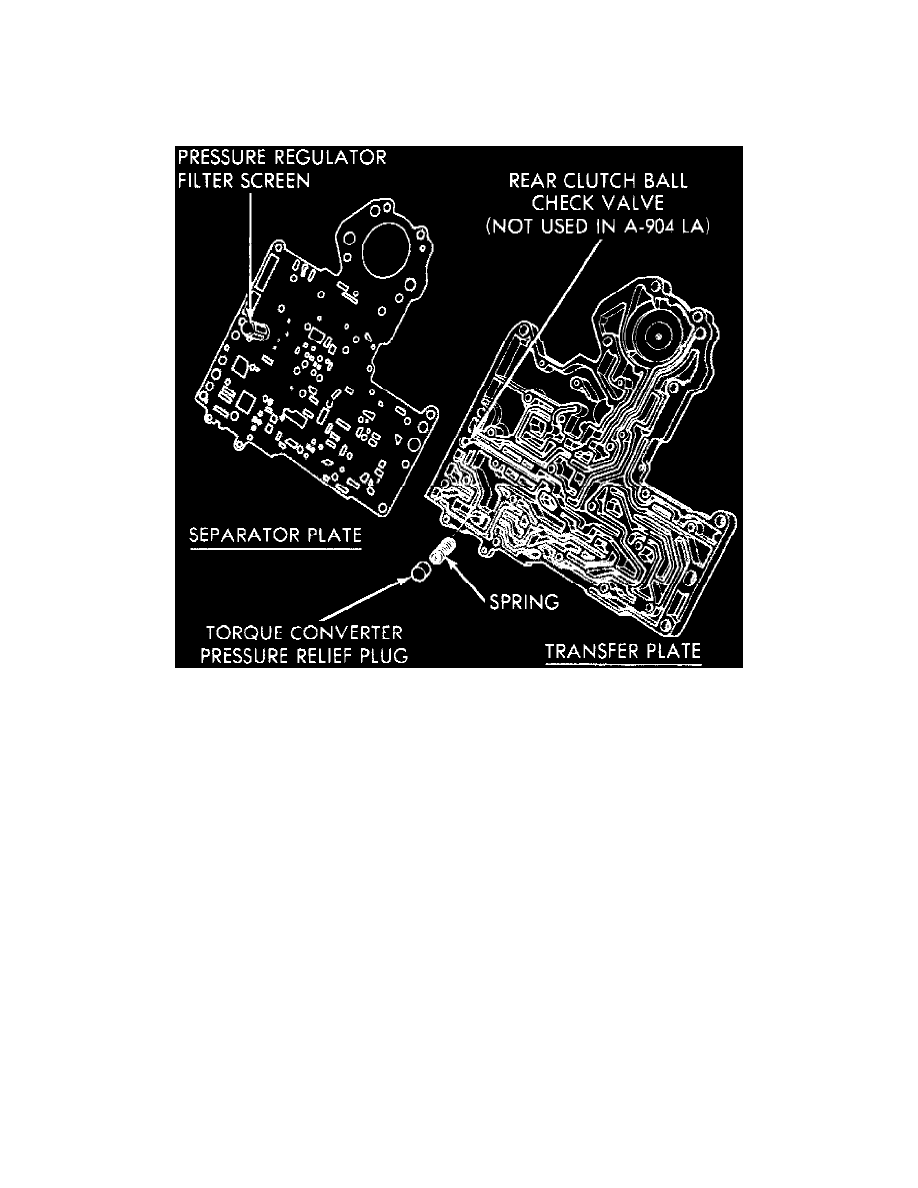
CAUTION: Never clamp any portion of the valve body or transfer plate in a vise. Any slight distortion of the aluminum body or the transfer plate
will result in sticking valves, excessive leakage or both. When removing or installing valves or plugs, slide them in or out carefully; do not use
force.