
600 L4-135 2.2L SOHC (1983)
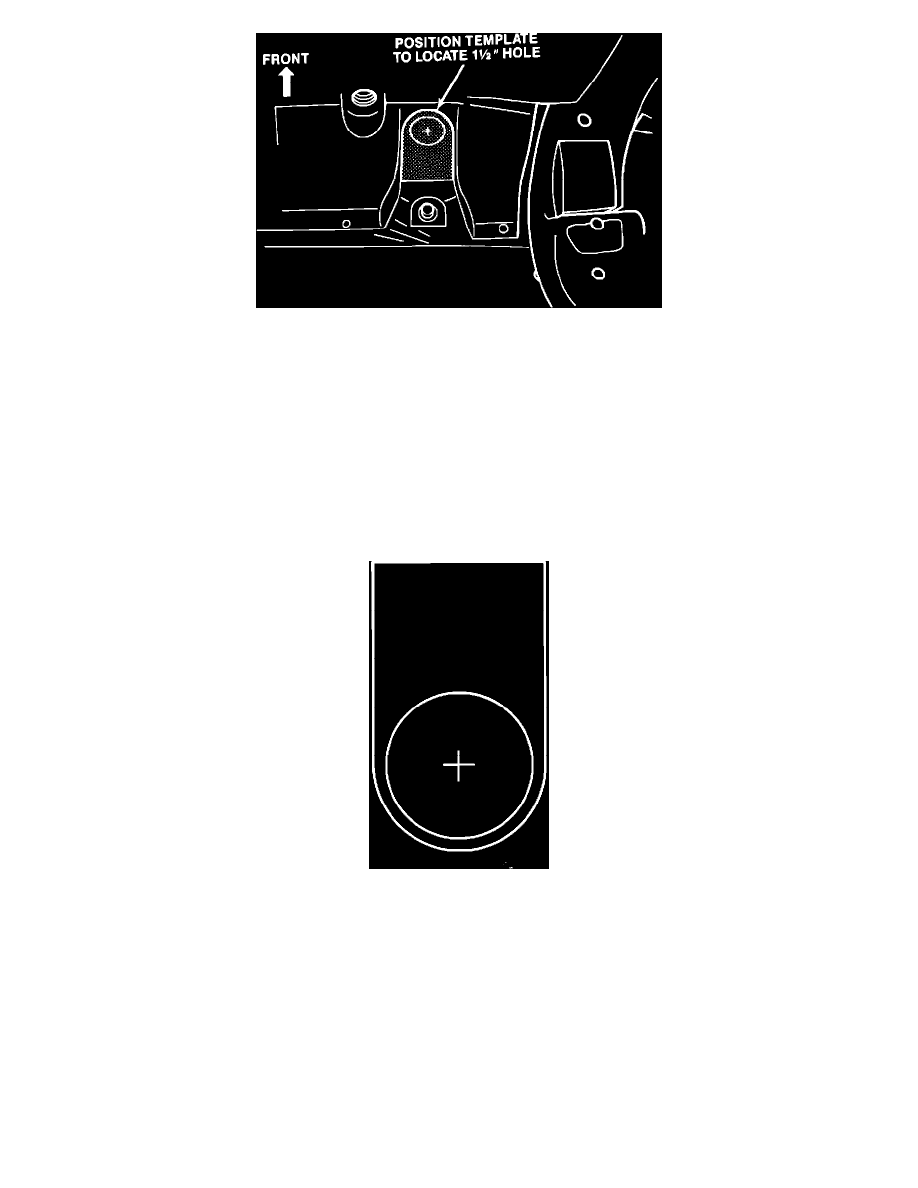
Figure 2.
6. To provide access for installing the new retaining nut at either or both of the two front locations of the crossmember, use a 1 1/2 inch hole saw to
cut a hole at the lower center of the crossmember as shown.
Use the template provided to locate the center of the access hole.
If the cross threaded or broken bolt is at either of the rear location it is not necessary to cut an access hole. The replacement nut can be installed
through the sway eliminator bar pocket opening.
NOTE:
ACCESS HOLES ARE REQUIRED AT THE FORWARD HOLE LOCATIONS AND ONLY AT THE PROBLEM LOCATION REQUIRING
REPAIR.
Access Hole center, Template
7. Position the steering gear on the crossmember and install new bolts in the positions NOT requiring repairs. Tighten the bolts to 29 N-m (21 ft. lb.)
torque. This will locate the steering gear on the crossmember and make the installation of the 10 mm replacement bolt(s) easier.
8. Select and install the proper length replacement bolt(s) as follows:
* If the replacement bolt is on the right (passenger) side, use PN 4636780 (35 mm [ 1 3/8 in.] long).
* If the replacement bolt is on the left (driver's) side, use PN 4636781 (45 mm [ 1 3/4 in.] long).
9. Select and install the proper replacement nut as follows:
* If the original nut is still in the crossmember, use the flange head nut PN 610O518.
* If the original nut is not in the crossmember, use nut/washer assembly PN 6100054.
10. Tighten the replacement bolt to 75 N-m (55 ft. lbs.) torque.