
600 L4-135 2.2L SOHC Turbo (1985)
7.
Lower vehicle.
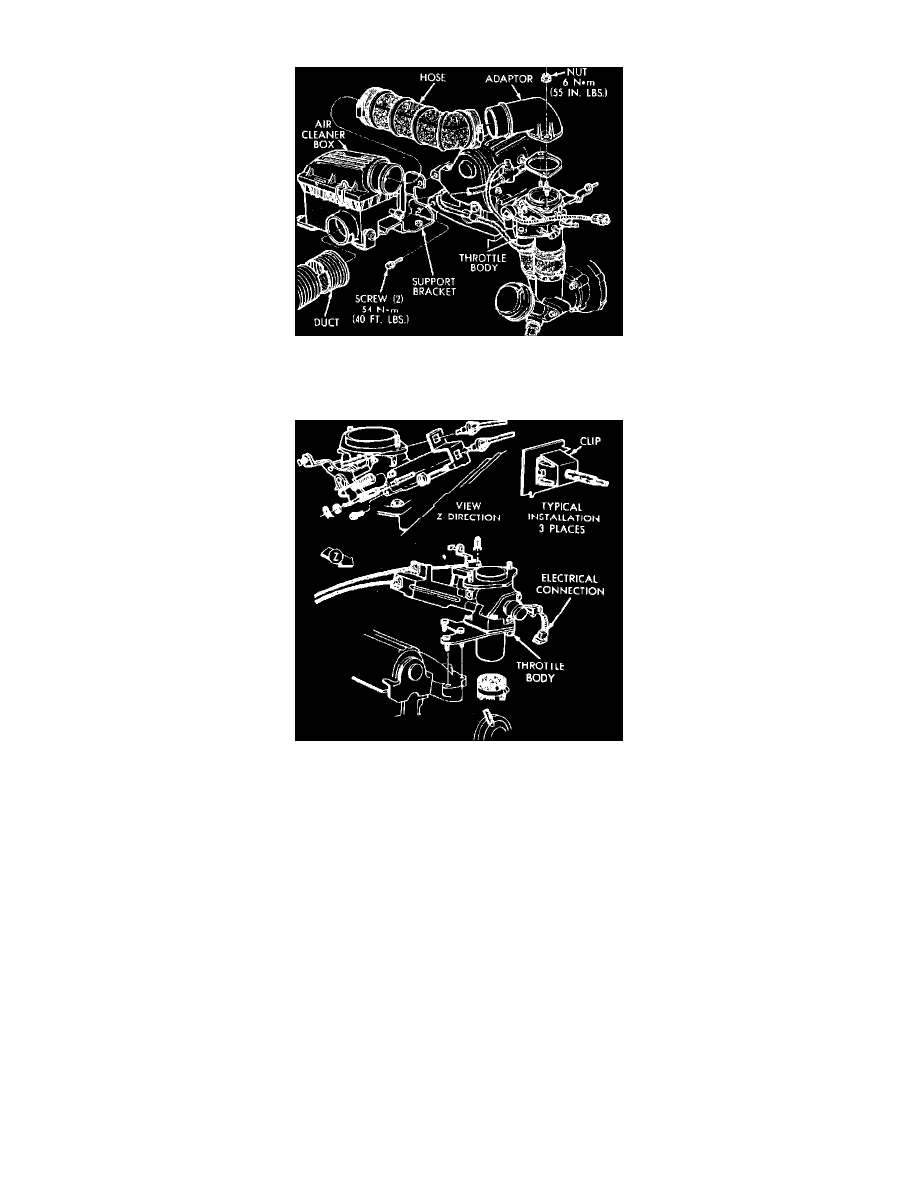
Fig. 27 Air cleaner box & support, hoses, & throttle body adapter
8.
Remove air cleaner assembly including throttle body adapter, hose, and air cleaner box with support bracket.
Fig. 28 Accelerator linkage & throttle body
9.
Disconnect accelerator linkage, throttle body electrical connector, and vacuum hoses.
10.
Remove four bracket to intake manifold screws and two bracket to heat shield retaining clips, then lift and secure fuel rail, with injectors, wiring
harness, and fuel lines intact, up out of the way.
11.
Disconnect turbocharger oil feed line at oil sending unit tee.
12.
Disconnect upper radiator hose at thermostat housing.
13.
Remove cylinder head with manifolds and turbocharger as an assembly as described under "Cylinder Head & Valve Assembly."
14.
With assembly on the bench, loosen upper turbocharger discharge hose end clamp DO NOT DISTURB CENTER DESIRABLE RETAINING
CLAMP. Remove 3 throttle body to intake manifold screws and remove throttle body assembly.
15.
Disconnect turbocharger coolant return tube at water box and retaining bracket on cylinder head.
16.
Remove 3 heat shield to intake manifold screws and remove heat shield.
17.
Remove 4 nuts attaching turbocharger to exhaust manifold and remove turbocharger assembly.
18.
Remove intake manifold retaining screws and washer assemblies and remove intake manifold.
19.
Remove exhaust manifold retaining nuts and remove exhaust manifold.
CLEANING & INSPECTION
1.
Discard gasket and clean all gasket surfaces on both manifolds and cylinder head.
2.
Test gasket surfaces for flatness with straight edge. Surface must be flat within .006 in. per foot (0.15 mm per 300 mm) of manifold length.
3.
Inspect manifolds for cracks and distortion.
INSTALLATION
1.
Install new two-sided Grafoil or equivalent, intake/exhaust manifold gasket. DO NOT APPLY SEALER.