
Avenger L4-2.4L (2009)
NOTE: When a PCM and the SKREEM/WCM are replaced at the same time, perform the following steps in order:
-
Program the new PCM.
-
Program the new SKREEM/WCM.
-
Program all ignition/transponder keys to the new SKREEM/WCM.
See: Keyless Entry/Keyless Entry Module/Testing and Inspection.
AVENGER
1. Disconnect battery negative cable.
2. Remove upper center instrument panel trim bezel.See: Body and Frame/Interior Moulding / Trim/Dashboard / Instrument Panel/Service and
Repair/Instrument Panel Bezel - Removal.
3. Remove the radio See: Radio, Stereo, and Compact Disc/Radio/Stereo/Service and Repair/Removal and Replacement/Radio - Removal.
4. Remove center console trim bezel See: Body and Frame/Interior Moulding / Trim/Console/Service and Repair/Center Console Bezel - Removal
5. Remove the three screws from the lower steering column shroud and remove the upper and lower shroud.
6. Remove the instrument cluster trim bezel See: Body and Frame/Interior Moulding / Trim/Dashboard / Instrument Panel/Service and
Repair/Instrument Cluster Bezel - Removal.
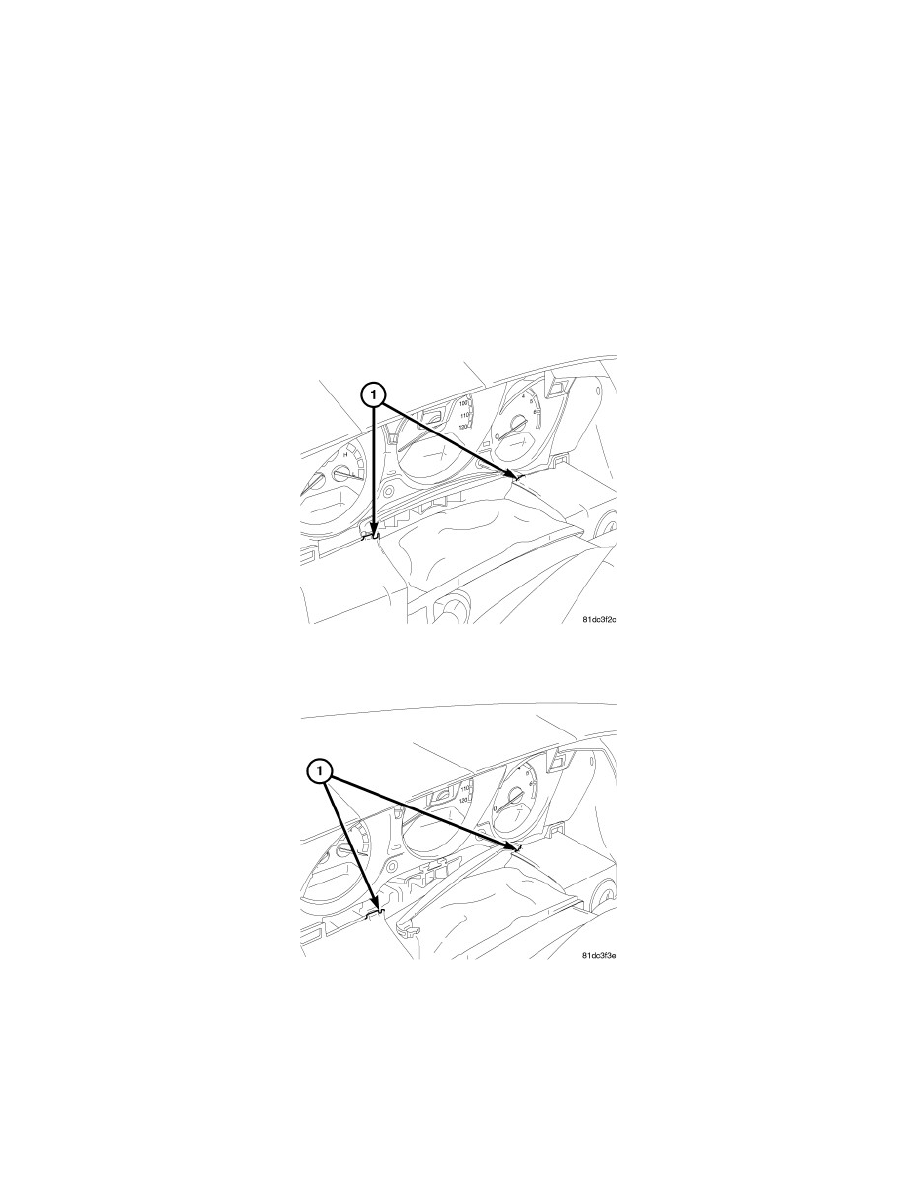
NOTE: Before the drivers surround bezel can be removed, it must be cut at two points (1) to allow removal without removing the steering
wheel, air bag and multi function switches.
7. Cut the trim piece at points (1) as shown and remove.
8. Remove the drivers surround bezel See: Body and Frame/Interior Moulding / Trim/Dashboard / Instrument Panel/Service and Repair/Instrument
Panel Bezel - Removal
9. Remove the instrument cluster See: Instrument Panel, Gauges and Warning Indicators/Instrument Cluster / Carrier/Service and Repair/Instrument
Cluster - Removal.