
Avenger L4-2.4L (2009)
Trunk / Liftgate Interior Trim Panel: Service and Repair
Trunk Trim Panel - Removal
REMOVAL
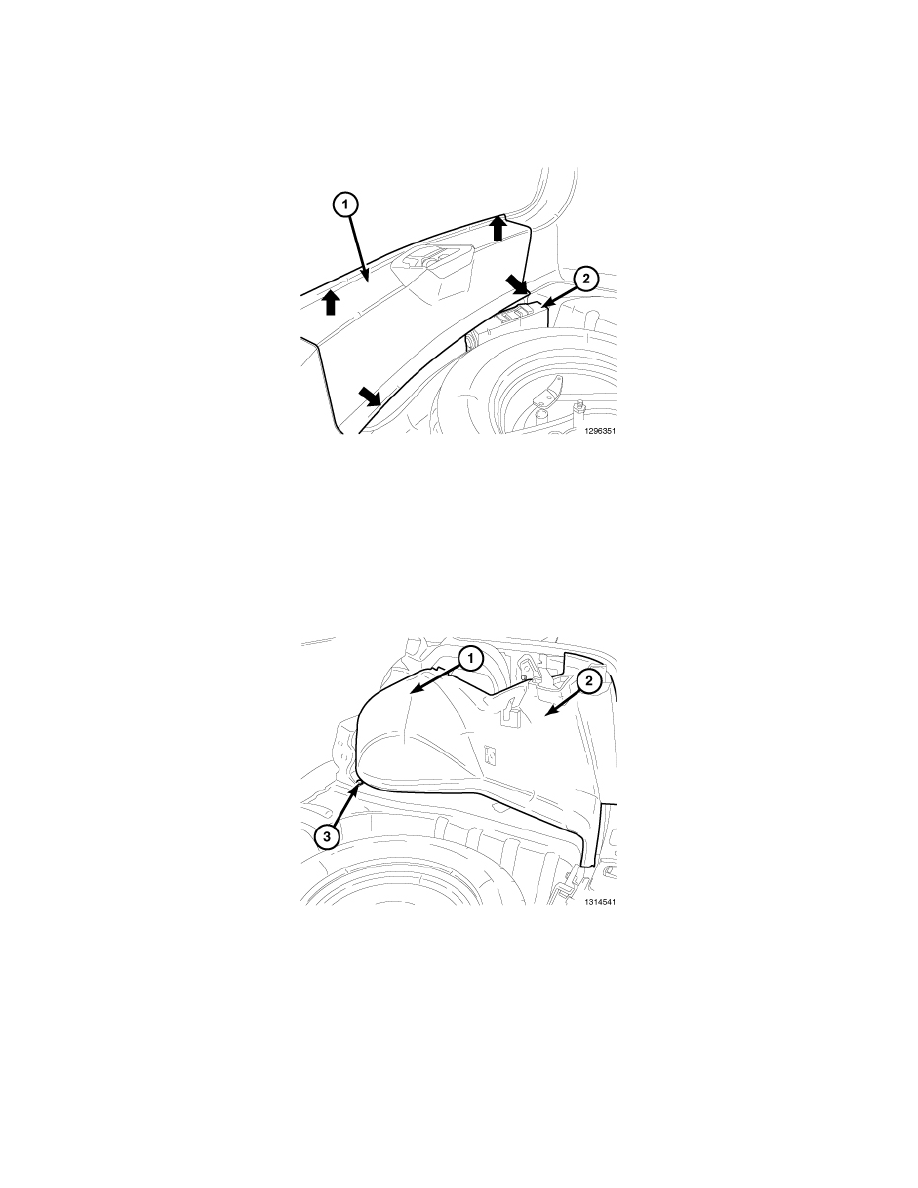
PANEL-REAR TRUNK TRIM
NOTE: Be sure the trunk trim panel is at room temperature. Cold will make the plastic brittle and may break upon removal.
1. Open trunk conventionally.
2. Remove the spare tire cover.
3. Using a trim stick or equivalent, gently pry the lower part of the trunk rear trim panel towards the front of the vehicle.
4. Using a trim stick or equivalent, gently pry underneath the sides of the top of the panel and use an abrupt force perpendicular to the surface of the
panel to remove the clips from the body
5. Maneuver the trim panel over the deck lid latch and remove from the vehicle.
PANEL-SIDE TRUNK TRIM
NOTE: Be sure the trunk trim panel is at room temperature. Cold will make the plastic brittle and may cause damage upon removal.
1. Open the trunk conventionally.
2. Remove the trunk rear trim. 1.
3. Peel back the trunk weather-strip enough to free the side trim.
4. Loosen the cargo shield bracket nuts (3) as necessary to slide the side trim tab out from under the bracket.
5. Using a trim tool or equivalent, carefully remove the pushpin (1) from the side shield.
6. By applying pressure at the back of the trim panel, between the plastic and the MOAB, use an abrupt force perpendicular to the side trim panel to
disengage the spring clip retainer (2).
7. Push in at the bottom of the trim panel and slide the tab out from under the cargo shield bracket.
8. Right side only, disconnect the electrical connectors.
9. Remove the side trim from the vehicle.