
Avenger L4-2.4L (2009)
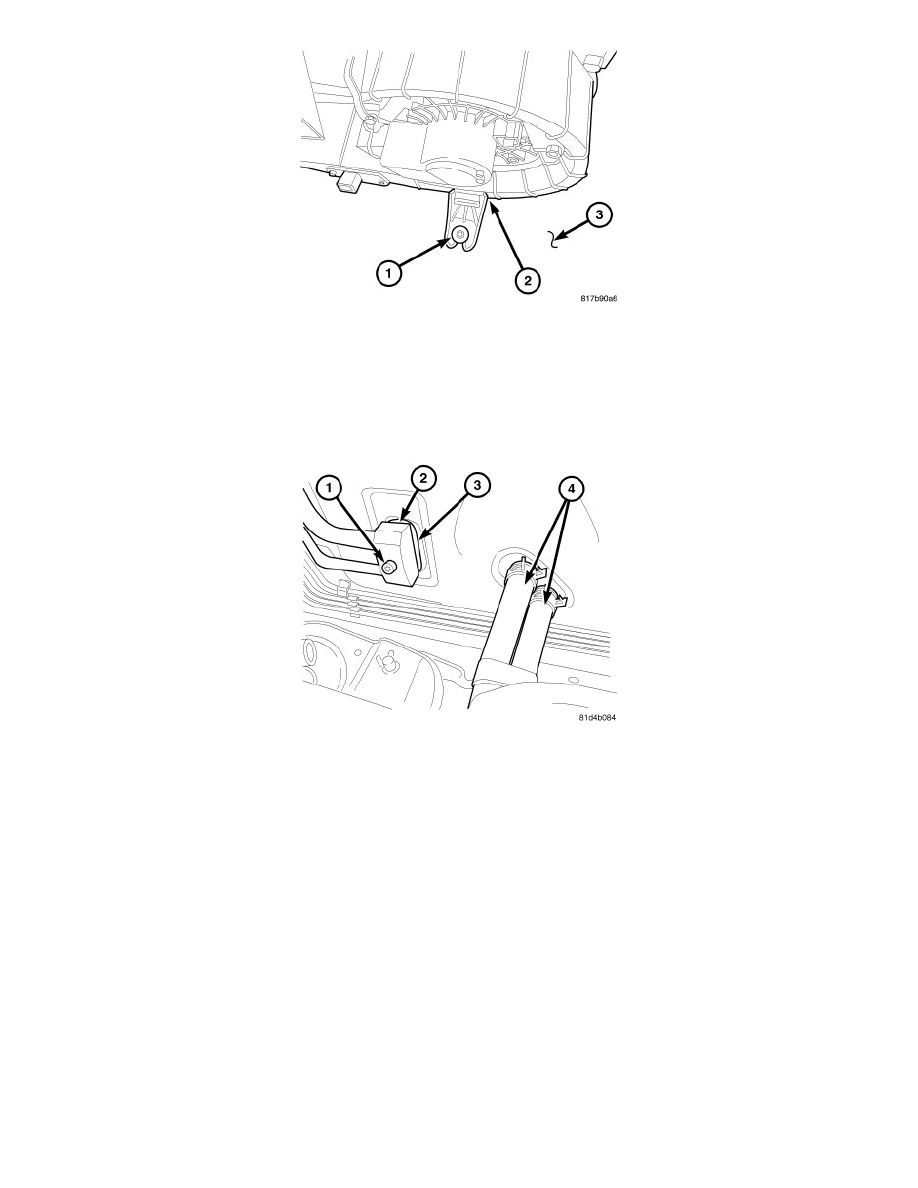
1. Position the HVAC housing assembly (2) to the dash panel (3). Be certain that the passenger side of the HVAC housing is correctly located over
the dash panel mounting stud.
2. Install the nut (1) that secures the HVAC housing to the passenger compartment side of dash panel. Tighten the nut to 4.5 Nm (40 in. lbs.).
3. Install the condensation drain tube See: Evaporator Drain Tube/Service and Repair/Condensation Drain Tube - Installation.
4. Install the rear floor ducts See: Air Duct/Service and Repair/Floor Distribution Duct - Installation.
5. Install the instrument panel See: Body and Frame/Interior Moulding / Trim/Dashboard / Instrument Panel/Service and Repair/Instrument Panel -
Installation.
6. Remove the previously installed plugs or caps and connect the heater hoses (4) to the heater core tubes.
7. Remove the tape or plugs from the refrigerant line fittings and the evaporator ports.
8. Lubricate the rubber O-rings on new dual-plane seals with clean refrigerant oil and install the seals onto the liquid and suction line fittings. Use
only the specified seals as they are made of special materials compatible to the R-134a system. Use only refrigerant oil of the type recommended
for the A/C compressor in the vehicle.
9. Connect the A/C liquid and suction line assembly (2) to the A/C evaporator (3).
10. Install the bolt (1) that secures the A/C liquid and suction line assembly to the A/C evaporator. Tighten the bolt to 25 Nm (18 ft. lbs.).