
Avenger L4-2.4L (2009)
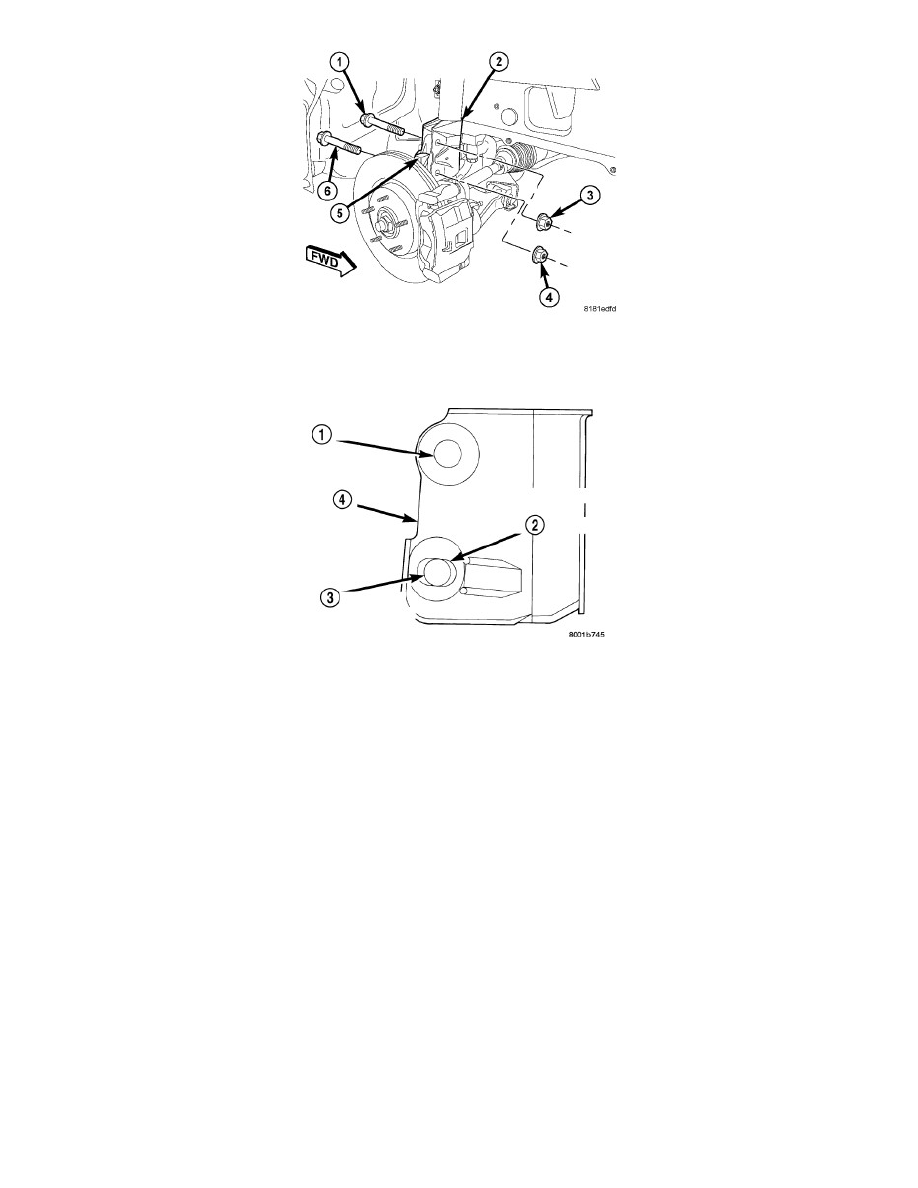
3. Remove the original nuts (3, 4) and upper (1) and lower (6) bolts attaching the strut clevis bracket (2) to the knuckle (5).
4. Separate the knuckle (5) from the strut clevis bracket (2) and position knuckle so it is out of the way of the strut. Use care not to overextend the
brake flex hose or axle half shaft.
CAUTION: When slotting the bottom mounting hole (3) on the strut clevis bracket (4), do not enlarge the hole beyond the indentations (2) on
the sides of the strut clevis bracket.
5. Using an appropriate grinder and grinding wheel, slot the bottom hole (3) in both sides of the strut clevis bracket (4).
CAUTION: After slotting the strut clevis bracket hole, do not install the original attaching bolts. Only the service package bolts and dog bone
washers must be used to attach the knuckle to the strut once the mounting hole is slotted.
6. Position the strut clevis bracket in line with the upper end of the knuckle, aligning the mounting holes. Install the two service package bolts. Be
sure to place the bolt with the eccentric cam in the bottom (slotted) hole on strut clevis bracket.
7. Install the dog bone washers provided in the service package and nuts on the replacement bolts. Tighten each nut just enough to hold the knuckle
in position while adjusting camber, but still allows the knuckle to move in the clevis bracket.