
Avenger L4-2.4L (2009)
8. Lower the vehicle.
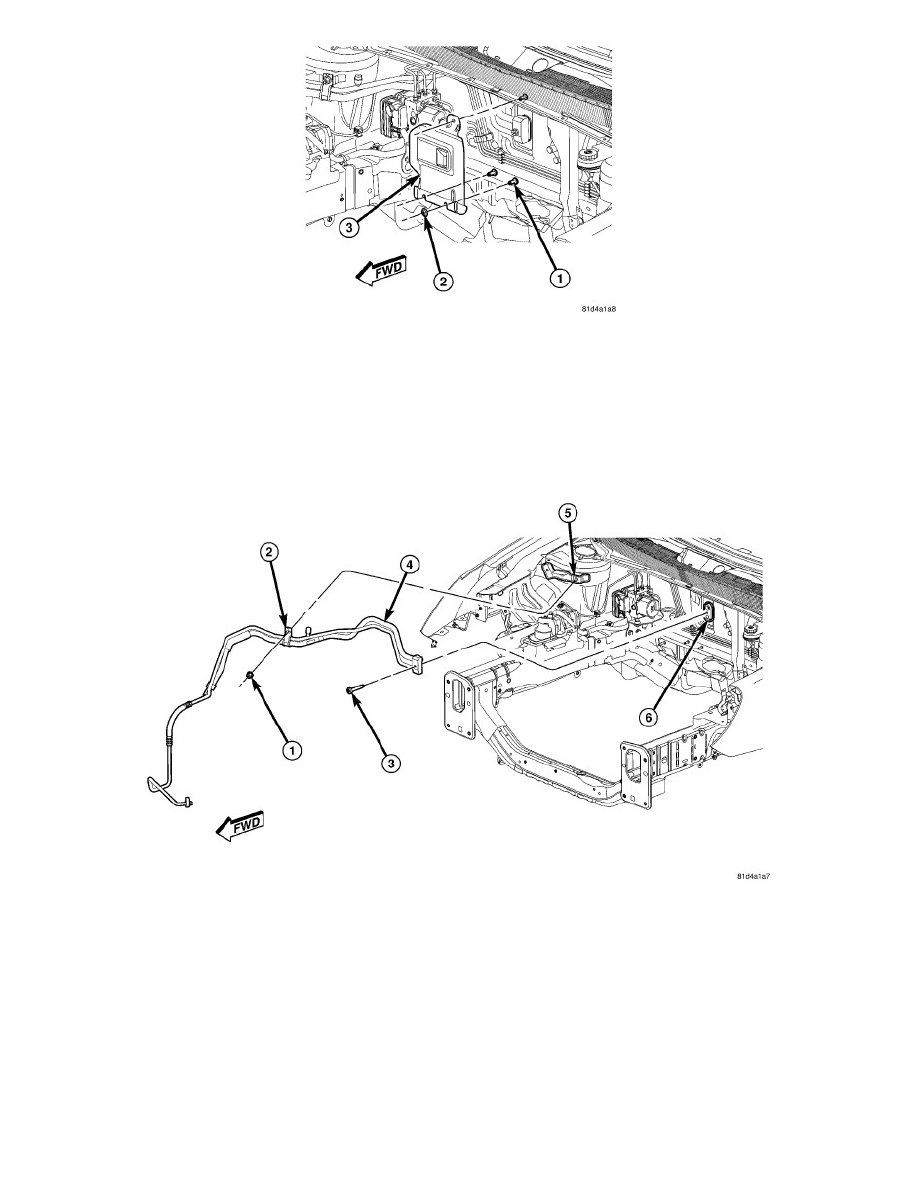
9. Remove the top nut (2) that secures the heat shield (3) to the stud (1) located on the dash panel.
NOTE: Two slots are provided at the bottom of the heat shield to aid in heat shield removal. Complete removal of the two bottom heat shield
retaining nuts is not required.
10. Reach behind the engine and remove the two bottom nuts the that secure the heat shield to the studs located on the dash panel and remove the heat
shield. Rotate and tilt the heat shield as required.
NOTE: It is only necessary to position the power steering fluid reservoir and engine coolant reservoir out of the way. Draining of the power
steering fluid and engine coolant is not required.
11. Remove the power steering fluid reservoir and the engine coolant reservoir and position them out of the way.
12. Remove the nut (1) that secures the refrigerant line retaining bracket (2) to the right front strut tower (5).
13. On RHD models, disengage the retainers that secure the power brake booster vacuum supply hose to the dash panel and position the vacuum line
out of the way.
14. Remove the bolt (3) that secures the A/C liquid and suction line assembly (4) to the A/C evaporator (6).
15. Disconnect the A/C liquid and suction line assembly from the A/C evaporator and remove and discard the dual-plane seals.
16. Install plugs in, or tape over the opened refrigerant line fittings and the evaporator ports.
17. Remove the A/C liquid and suction line assembly from the engine compartment.
A/C Liquid Line - Installation