
Avenger V6-2.5L VIN N (1998)
INSTALLATION SERVICE POINTS
Auto Tensioner Installation
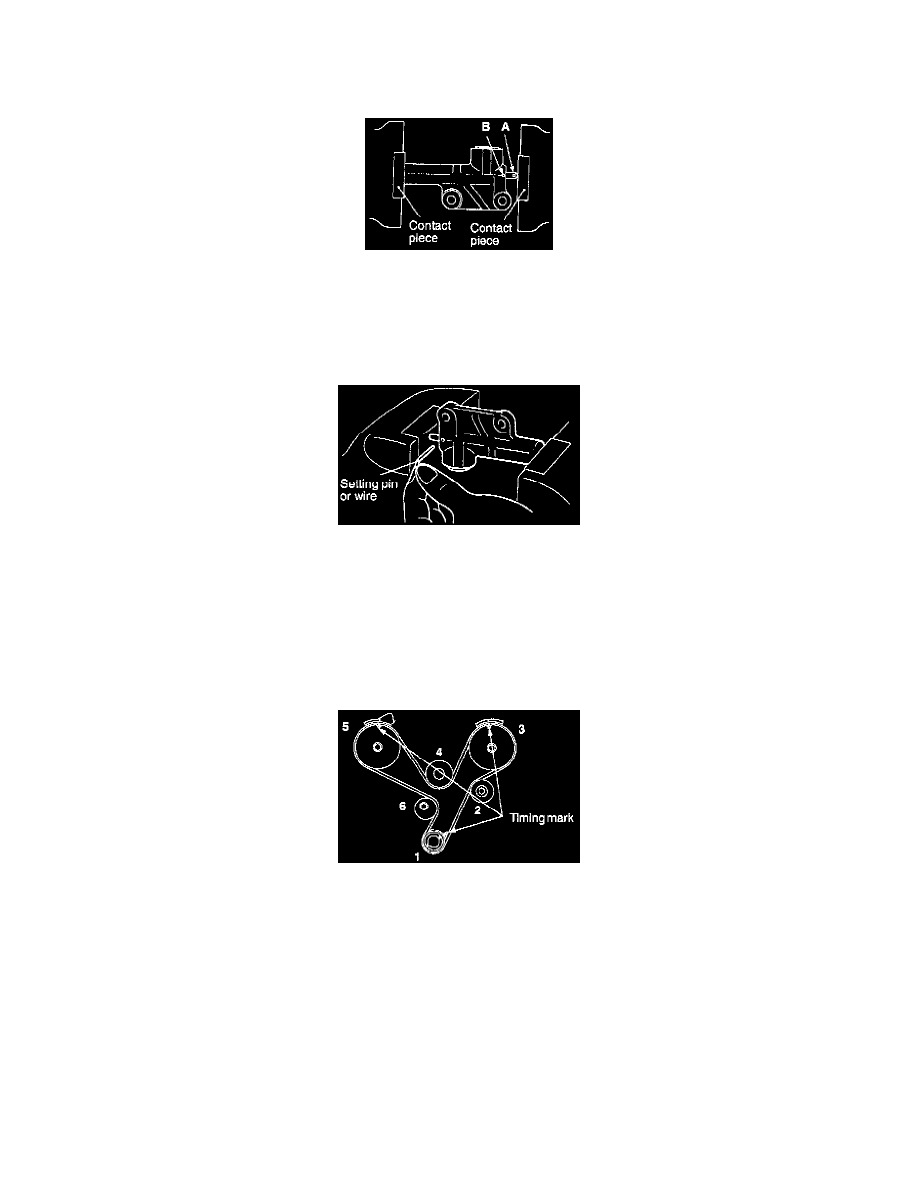
(1) Use a press or vise to compress the push rod of the auto tensioner as slowly as possible. Then align pin hole A of the push rod with pin hole B of
the tensioner cylinder.
Caution
1. Place the auto tensioner at a right angle to the pressing surface of the press or vise.
2. Push in the rod slowly to prevent the push rod from being damaged.
(2) Insert setting pin or wire with a diameter of 1.4 mm (0.06 inch) into the aligned pin holes.
NOTE The wire should be as stiff as possible (such as piano wire, etc.), and should be bent into the shape of an "L".
(3) Install the auto tensioner to engine.
Caution Leave the setting pin or wire installed in the auto tensioner.
Timing Belt Installation
(1) Align the timing marks of each sprocket.
NOTE At this time, No. 1 cylinder should be at top dead center, on compression stroke.
(2) Use bulldog clips to fix the timing belt in the following procedure to prevent the belt from slacking.
1. Crankshaft sprocket
2. Idler pulley
3. Front bank side camshaft sprocket
4. Water pump pulley
5. Rear bank side camshaft sprocket
6. Tensioner pulley
Caution Since the camshaft can turn by the reaction of the valve springs be careful not to get your fingers caught between the sprocket and timing
belt.