
Avenger V6-2.7L (2008)
NOTE: LHD model shown. RHD model similar.
1. Disconnect and isolate the negative battery cable.
2. Remove the glove box bin See: Body and Frame/Interior Moulding / Trim/Glove Compartment/Service and Repair/Instrument Panel Glove Box -
Removal.
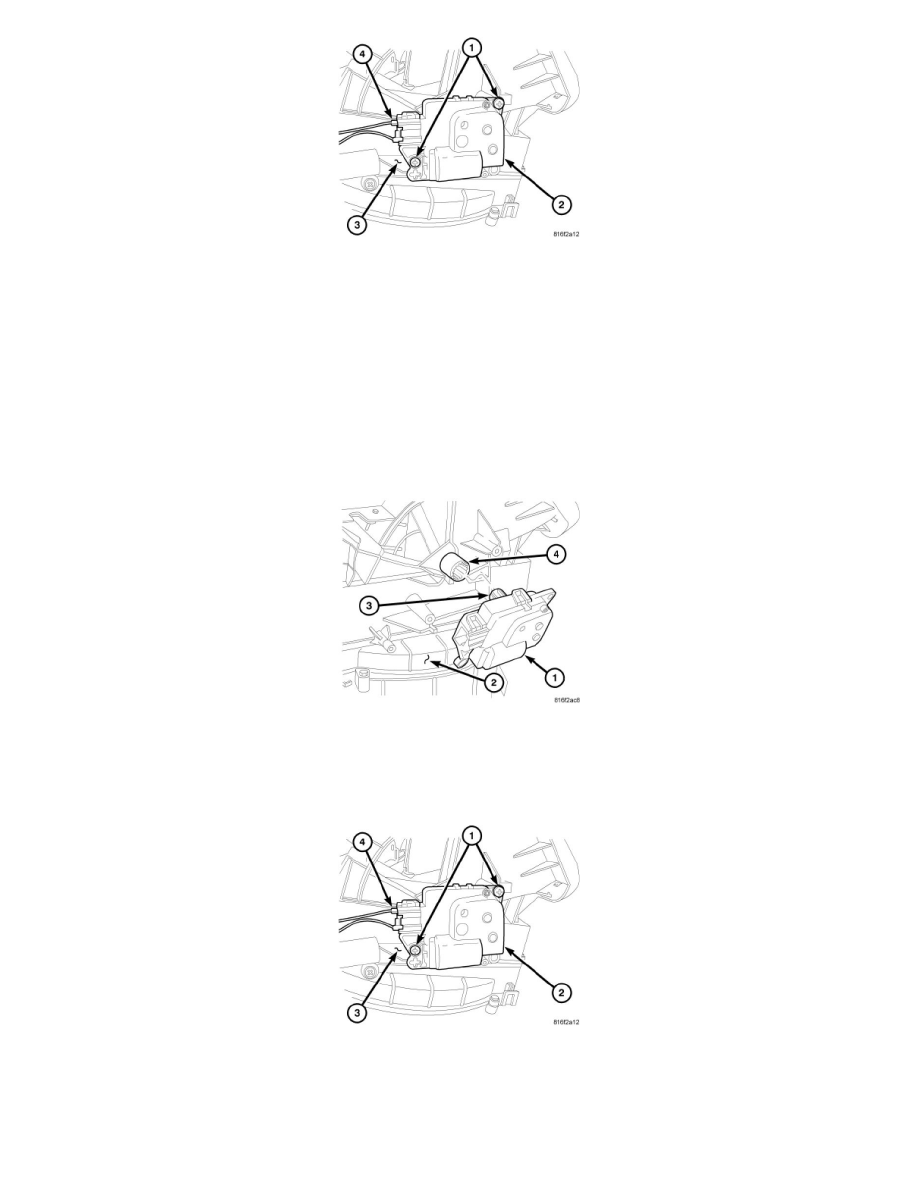
3. Reach through the glove box opening in the instrument panel and remove the screws (1) that secure the recirculation door actuator (2) to the right
side of the HVAC air inlet housing (3).
4. Disconnect the wire harness connector (4) from the recirculation door actuator and remove the actuator.
Recirculation Door Actuator - Installation
INSTALLATION
NOTE: Illustrations shown with instrument panel removed for clarity.
NOTE: LHD model shown. RHD model similar.
1. Position the recirculation door actuator (1) to the right side of the HVAC air inlet housing (2).
2. Install the recirculation door actuator onto the air inlet housing. If necessary, rotate the actuator slightly to align the splines on the actuator output
shaft (3) with those on the recirculation door pivot shaft adapter (4).
3. Install the screws (1) that secure the recirculation door actuator (2) to the air inlet housing (3). Tighten the screws to 2 Nm (17 in. lbs.).
4. Connect the instrument panel wire harness connector (4) to the recirculation door actuator.
5. Install the glove box binSee: Body and Frame/Interior Moulding / Trim/Glove Compartment/Service and Repair/Instrument Panel Glove Box -
Installation.
6. Reconnect the negative battery cable.
7. Initiate the Actuator Calibration function using a scan tool See: Testing and Inspection/Component Tests and General Diagnostics/HVAC System