
Avenger V6-2.7L (2008)
Ball Joint: Service and Repair
Front Lower Ball Joint - Installation
INSTALLATION
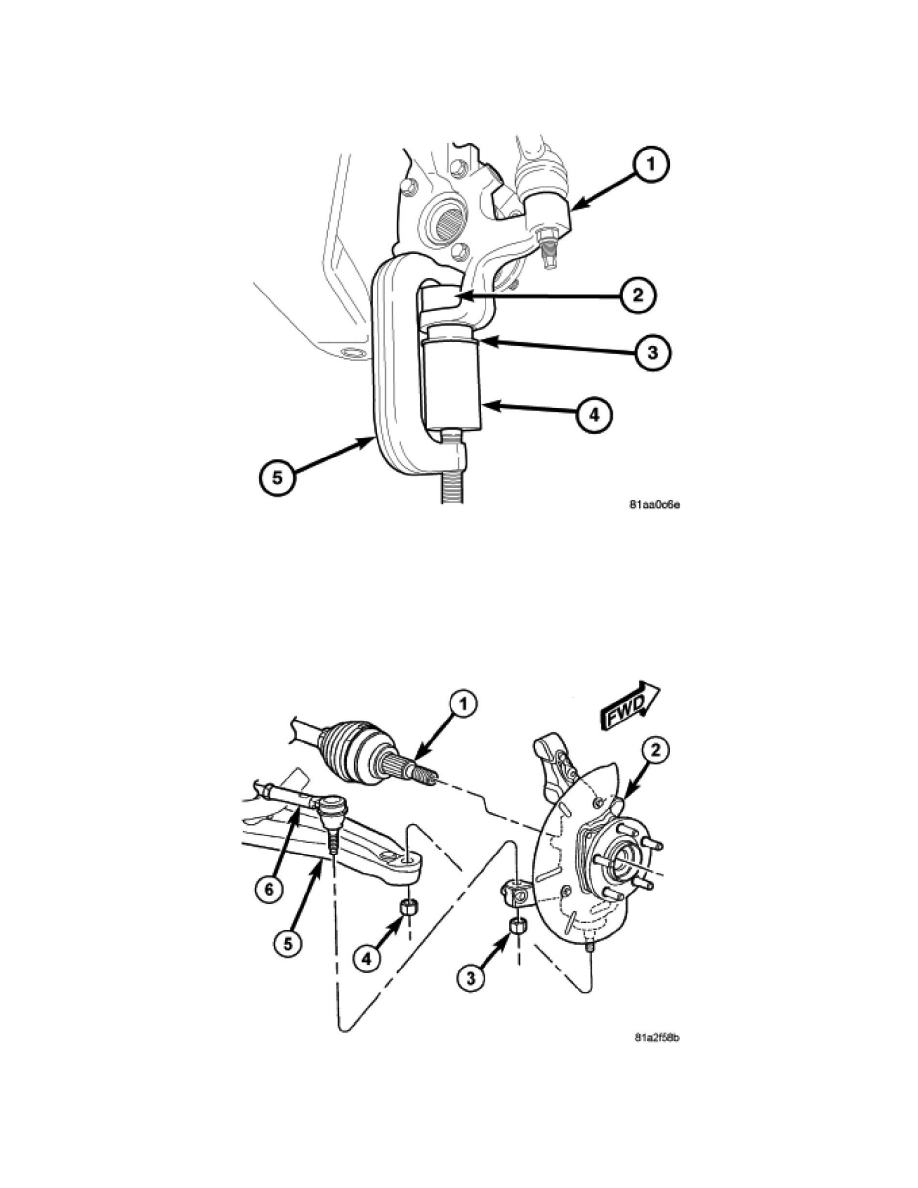
1. Install Installer (2), Special Tool 9964-1, and Installer (4), Special Tool 9964-2 on Remover/Installer (5), Special Tool 8441-1. Place a new ball
joint (stem down) into Installer 9964-2.
2. Position the assembly onto the knuckle as shown, then hand tighten the screw-drive.
3. Using hand-tools, tighten the screw-drive forcing the ball joint (3) into the knuckle (1). Continue to install the ball joint until the flange on the ball
joint comes to a stop against the bottom of the knuckle.
4. Loosen the screw-drive and remove the tools.
5. Install a NEW snap-ring into the groove in the ball joint using a drift punch.
6. Slide the hub and bearing in the knuckle (2) onto the splines of the half shaft outer C/V joint (1).
7. Insert the lower ball joint stud into the mounting hole in the lower control arm.
8. Install a NEW ball joint stud nut (4). Tighten the nut to 95 Nm (70 ft. lbs.).