
Avenger V6-2.7L Flex Fuel (2009)
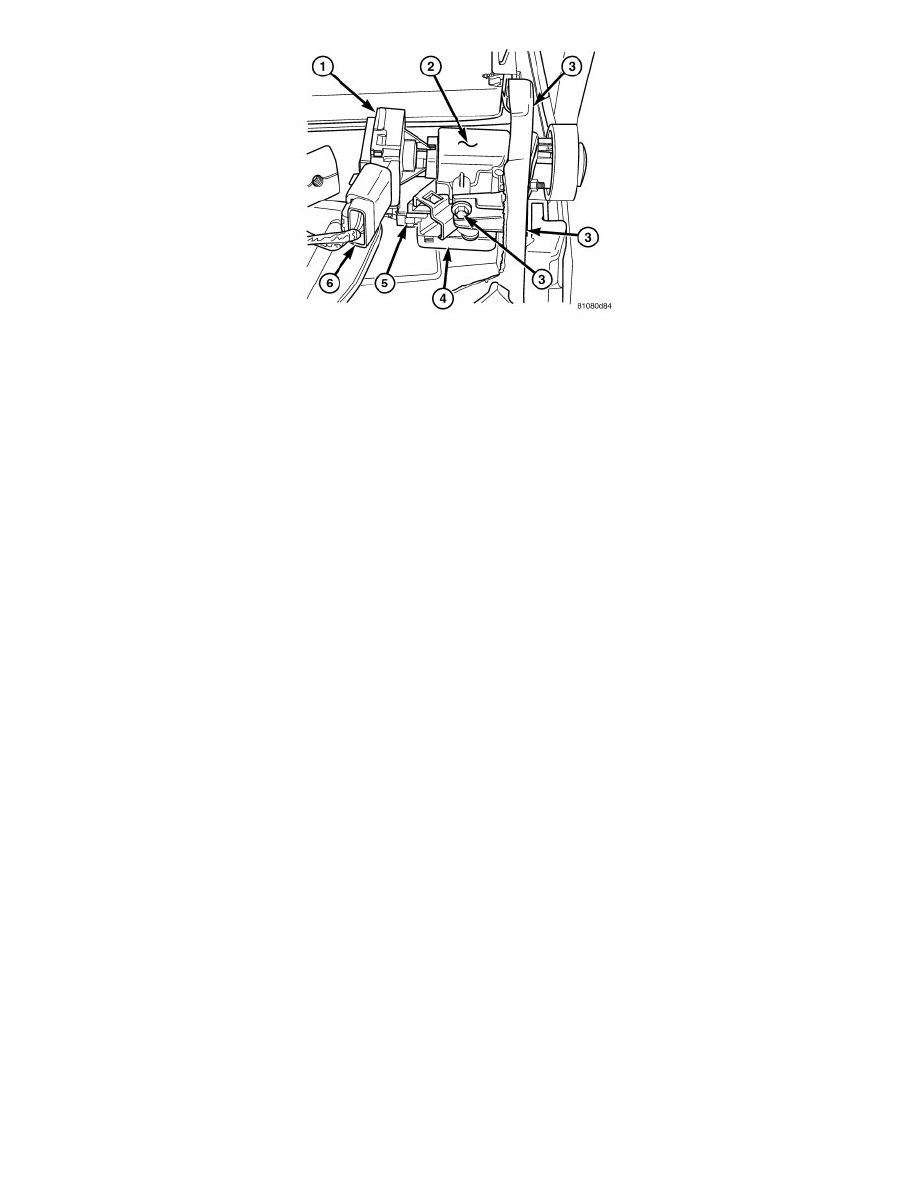
8. Reach up behind the left side of the center stack and connect the ignition switch electrical connector (6) and the WCM electrical connector (5).
9. Install the instrument cluster See: Instrument Panel, Gauges and Warning Indicators/Instrument Cluster / Carrier/Service and Repair/Instrument
Cluster - Installation.
10. Install the drivers surround bezel See: Body and Frame/Interior Moulding / Trim/Dashboard / Instrument Panel/Service and Repair/Instrument
Panel Bezel - Installation.
11. Install the instrument cluster trim bezel See: Body and Frame/Interior Moulding / Trim/Dashboard / Instrument Panel/Service and
Repair/Instrument Cluster Bezel - Installation
12. Install the three screws from the lower steering column shroud and secure the upper and lower shroud to the steering column.
13. Install the radio See: Radio, Stereo, and Compact Disc/Radio/Stereo/Service and Repair/Removal and Replacement/Radio - Installation
14. Install the upper center instrument panel trim bezel See: Body and Frame/Interior Moulding / Trim/Dashboard / Instrument Panel/Service and
Repair/Instrument Panel Bezel - Installation
15. Install the center console trim bezel See: Body and Frame/Interior Moulding / Trim/Console/Service and Repair/Center Console Bezel -
Installation.
16. Connect battery negative cable.