
Avenger V6-2.7L Flex Fuel (2009)
Drink Holders: Service and Repair
Heated/Cooled Cupholder - Installation
Heated/Cooled Cupholder
HEATED/COOLED CUPHOLDER
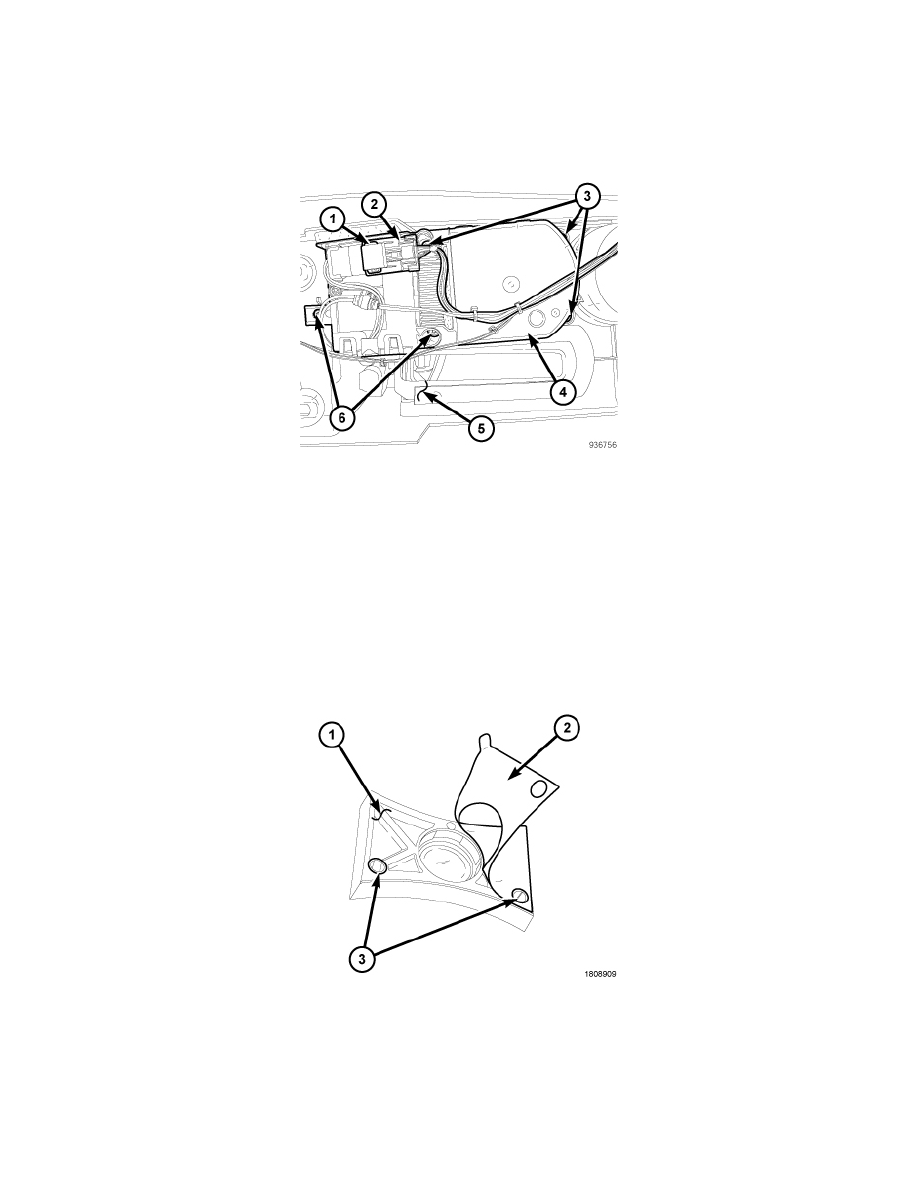
1. Position the heated/cooled cupholder (4) to the bottom of the center floor console (5) and install the five retaining screws (3 and 6). Tighten the
screws to 2 Nm (17 in. lbs.).
2. Connect the wire harness connector (2) to the heated/cooled cupholder and engage the locking tab (1).
3. Install the center floor console See: Trim Panel/Service and Repair/Shifter Housing - Installation.
4. Reconnect the negative battery cable.
Indicator Lens
INDICATOR LENS
CAUTION: The surface around the heated/cooled cupholder Light Emitting Diode (LED) may have some remaining adhesive residue once the
indicator lens has been removed. Do not attempt to use cleaning fluids to remove any remaining adhesive as this may damage
other nearby plastic decorative surfaces or the LED itself See: Heated/Cooled Cupholder - Removal .
1. Remove the paper backing (2) from the new indicator lens (1) to expose the self adhesive.
2. Align the two holes (3) on the back of the indicator lens with the two posts that protrude from the top of the heated/cooled cupholder.