
Avenger V6-2.7L Flex Fuel (2009)
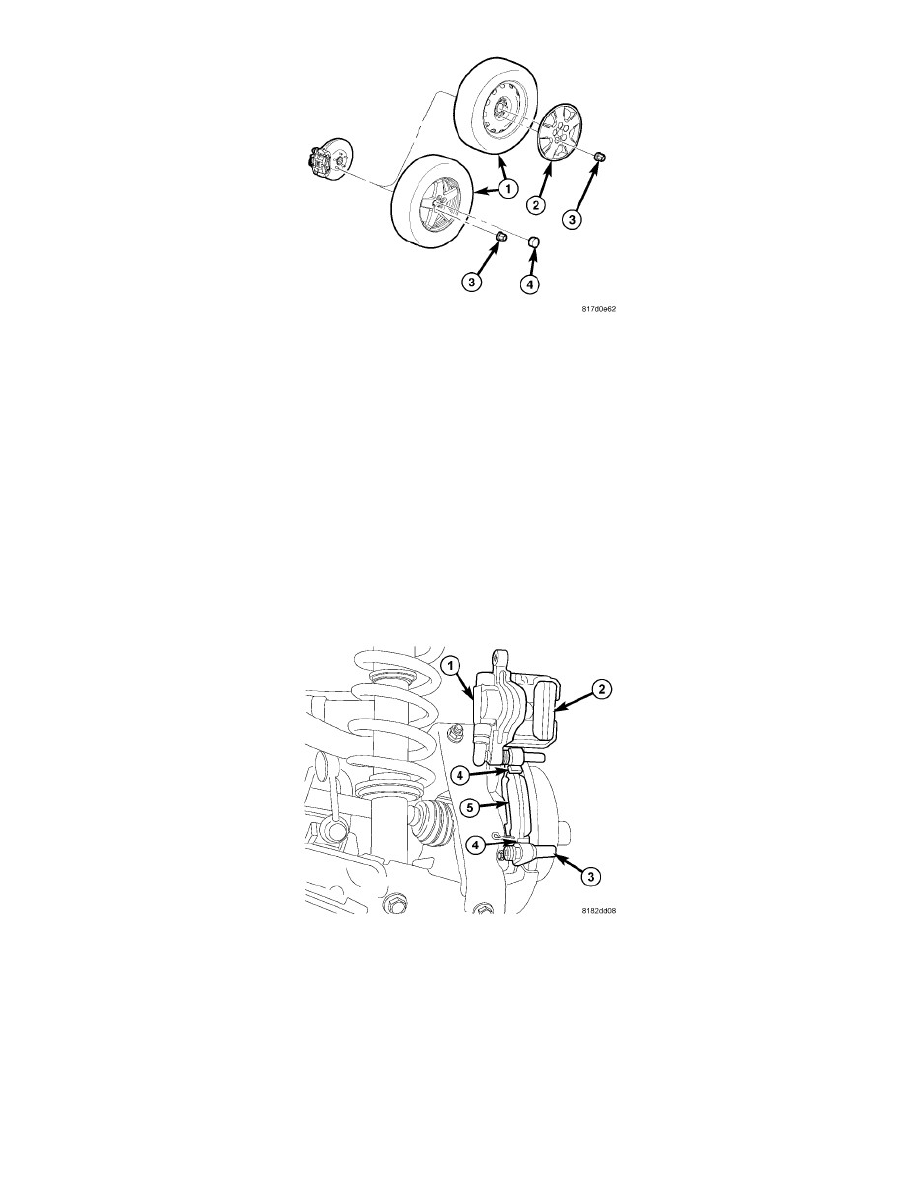
5. Install tire and wheel assembly (1) See: Maintenance/Wheels and Tires/Service and Repair/Removal and Replacement/Tires and Wheels -
Installation. Install and tighten wheel mounting nuts (3) to 135 Nm (100 ft. lbs.).
6. Lower the vehicle.
7. Pump the brake pedal several times before moving the vehicle to set the pads to the brake rotor.
8. Check and adjust the brake fluid level in the reservoir as necessary.
9. Road test the vehicle and make several stops to wear off any foreign material on the brakes and to seat the brake pads.
Rear
INSTALLATION
NOTE: Perform 1 through 6 on each side of the vehicle to complete pad set installation, then proceed to 7.
1. Completely retract the caliper piston back into the piston bore of the caliper. This is required to gain the necessary pad-to-rotor clearance for the
caliper installation onto the steering knuckle.
NOTE: Place the brake pad with the audible wear indicator attached on the inboard side. The audible wear indicator should be positioned at
the bottom when installed.
2. Slide the outboard brake pad (2) onto the caliper (1). Be sure the retaining clip is squarely seated in the depressed areas on the caliper beyond the
raised retaining bead.
3. Place the inboard brake pad (5) in the abutment shims (4) clipped into the disc brake caliper adapter bracket (3) as shown (see preceding note).
CAUTION: Use care when installing the caliper onto the adapter bracket to avoid damaging the guide pin boot.