
Avenger V6-2.7L Flex Fuel (2009)
6. Remove the tape or plugs from the suction line fitting and the accumulator port.
7. Lubricate a new rubber O-ring seal with clean refrigerant oil and install it and new gasket onto the suction line fitting. Use only the specified
O-ring as it is made of a special material for the R-134a system. Use only refrigerant oil of the type recommended for the A/C compressor in the
vehicle.
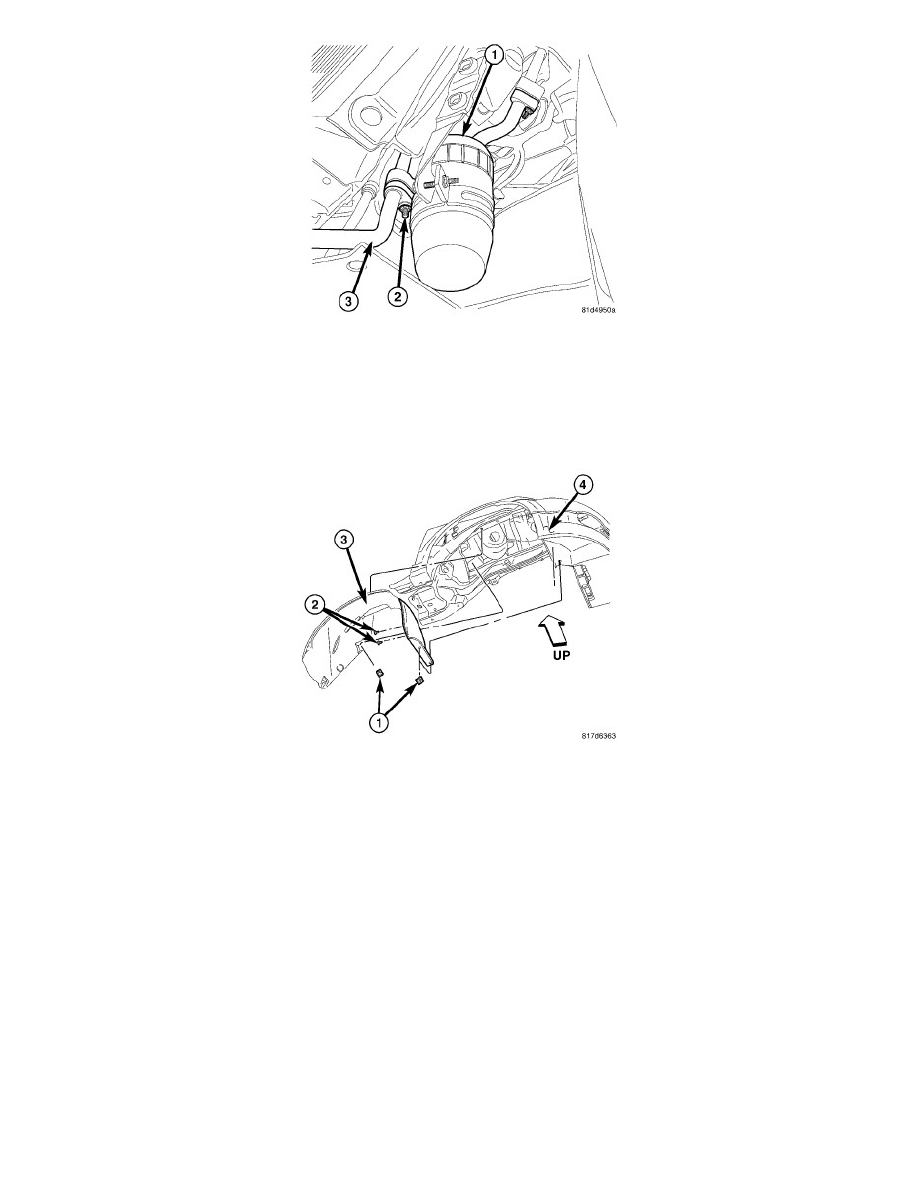
8. Connect the lower A/C suction line (3) to the A/C accumulator (1).
9. Install the nut (2) that secures the lower A/C suction line to the A/C accumulator. Tighten the nut to 25 Nm (18 ft. lbs.).
10. Reposition the front of the right front wheel house splash shield (3) to the body (4) and install the three push-pin retainers (1) and the three screws
(2). Tighten the screws securely.
11. Install the right front wheel See: Maintenance/Wheels and Tires/Service and Repair/Removal and Replacement/Tires and Wheels - Installation.
12. Lower the vehicle.
13. Reconnect the negative battery cable.
CAUTION: Do NOT run the engine with a vacuum pump in operation or with a vacuum present within the A/C system. Failure to follow this
caution will result in serious A/C compressor damage.
14. Evacuate the refrigerant system See: Service and Repair/Refrigerant System Evacuate.
15. Adjust the refrigerant oil level See: Service and Repair/Refrigerant Oil Level.
16. Charge the A/C system See: Service and Repair/Refrigerant System Charge.