
Avenger V6-2.7L Flex Fuel (2009)
4. Center the power steering gear rack in its travel as necessary.
NOTE: When installing the front suspension crossmember (1) back in the vehicle, it is very important that the crossmember be attached to the
body in exactly the same spot as when it was removed. Otherwise, the vehicle's wheel alignment settings (caster and camber) will be
lost making wheel alignment more difficult.
NOTE: While raising the steering gear into place, it is not necessary to install the intermediate shaft coupling on the steering gear pinion shaft
at this time. It can be installed once the vehicle is lowered. Make sure the coupling does not interfere with steering gear/dash seals at
this time.
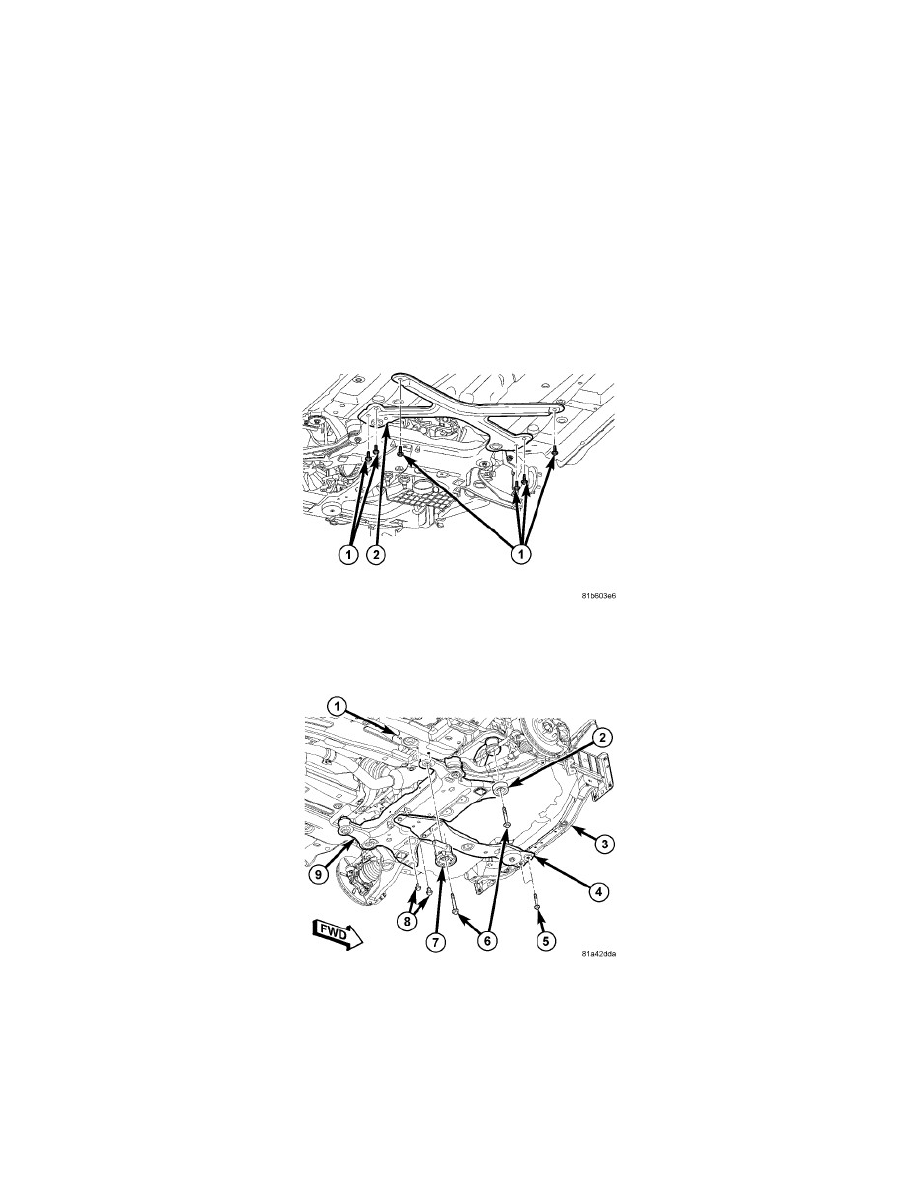
5. Slowly raise the crossmember (9) into mounted position using the transmission jack matching the crossmember to the marked locations on the
body made during removal.
6. Check the positioning of the seals at the dash panel and adjust as necessary.
7. If equipped, position the front crossmember reinforcement brackets (7) (one each side of vehicle) over the crossmember rear mounting bushings
and install the mounting screws (8), but do not tighten at this time.
8. If equipped, position the front crossbrace/reinforcement bracket (2) over the crossmember rear mounting bushings and body, then install the
mounting screws (1). Do not tighten screws at this time.
9. Install the four mounting bolts (6) securing the front crossmember (1) to the body. Tighten the crossmember mounting bolts to 135 Nm (100 ft.
lbs.).
10. If equipped, tighten the crossmember reinforcement bracket mounting screws (8) to 50 Nm (37 ft. lbs.).