
Avenger V6-2.7L Flex Fuel (2009)
Rear Knuckle Alignment Link: Service and Repair
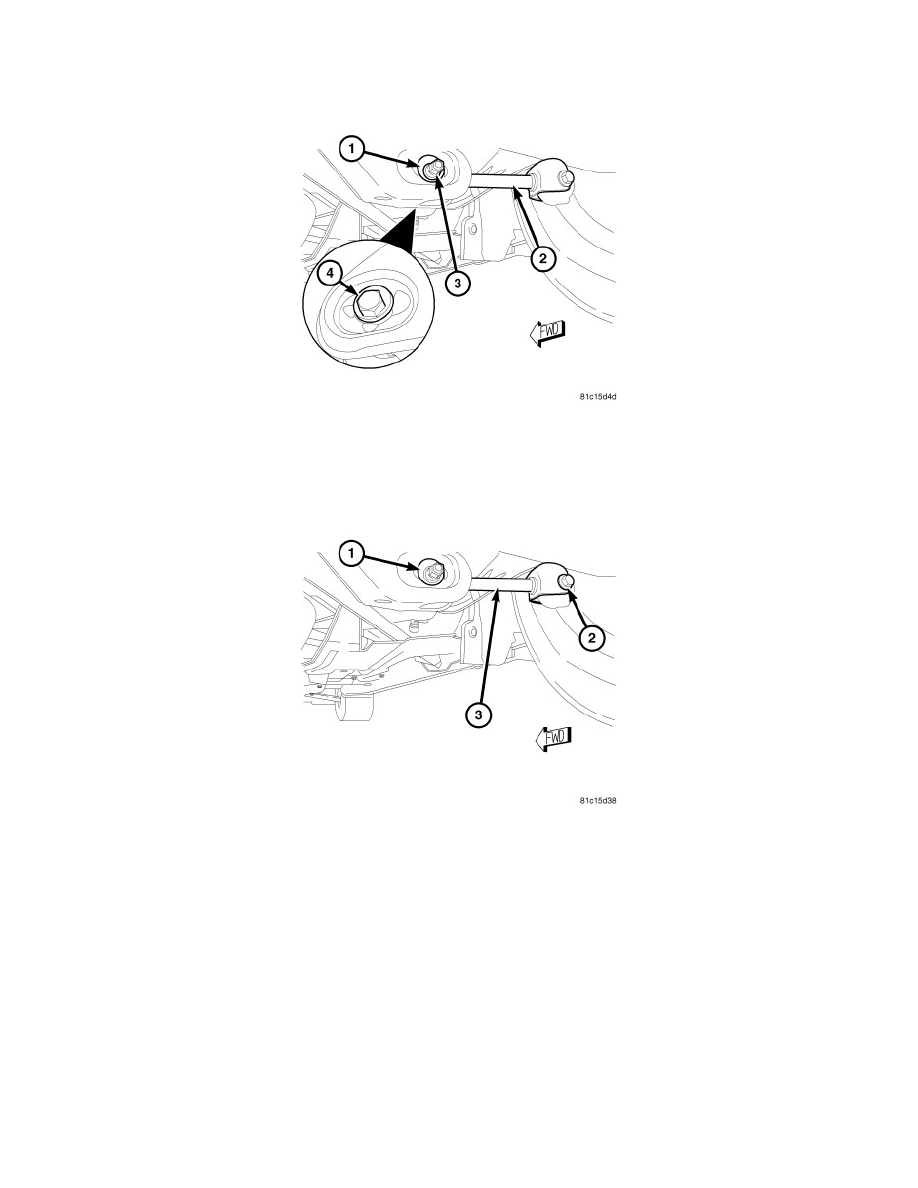
Rear Toe Link - Installation
INSTALLATION
CAUTION: When installing the cam bolt (4) and washer make sure the cams stay inside the abutments built into the crossmember. Failure to
do so can damage the abutments and make toe adjustment difficult.
1. Position the toe link (2) and install the cam bolt (4) from the front through the crossmember and link. Match the cam on the bolt to the marks made
during removal or position the top of the cam to the 12 O'clock position.
2. Install the cam washer (1) and nut (3) securing the toe link (2) to the crossmember. Do not tighten at this time.
3. Install the mounting bolt (2) and nut securing the link to the knuckle. To install the bolt it may be necessary to flex the trailing link at the body
mount bushing inward or outward using an appropriate prying tool. Do not tighten at this time.
4. Lower the vehicle.
5. Position the vehicle on an alignment rack/drive-on lift. Raise the vehicle as necessary to access mounting bolts and nuts.
6. Tighten the toe link mounting bolt nut at the knuckle to 105 Nm (77 ft. lbs.).
7. Perform wheel alignment as necessary. See: Alignment/Service and Repair