
Avenger V6-3.5L (2008)
Condenser HVAC: Service and Repair
A/C Condenser - Removal
REMOVAL
WARNING: Refer to the applicable warnings and cautions for this system before performing the following operation See: Service
Precautions/Warning and See: Service Precautions/Caution. Failure to follow the warnings and cautions could result in possible serious or fatal
injury.
CAUTION: Before removing the A/C condenser, note the location of each of the radiator/condenser air seals. These air seals are used to direct
air through the A/C condenser and radiator. The air seals must be reinstalled in their proper locations in order for the A/C and engine cooling
systems to perform as designed.
1. Disconnect and isolate the negative battery cable.
2. Recover the refrigerant from the refrigerant system See: Service and Repair/Procedures/Refrigerant System Recovery.
3. If equipped with the 2.0L diesel engine, remove the front fascia See: Body and Frame/Bumper/Front Bumper/Front Bumper Cover /
Fascia/Service and Repair/Front Fascia - Removal.
NOTE: It is not necessary to remove the hood latch from the upper radiator support on gasoline engine equipped models for A/C
condenser service.
4. If equipped with a gasoline engine, remove the upper radiator mounts from the radiator support See: Engine, Cooling and Exhaust/Cooling
System/Radiator/Service and Repair/Removal and Replacement/Radiator - Removal.
5. On gasoline engine equipped models, carefully push the radiator (6) slightly rearward to gain access to the A/C condenser (2).
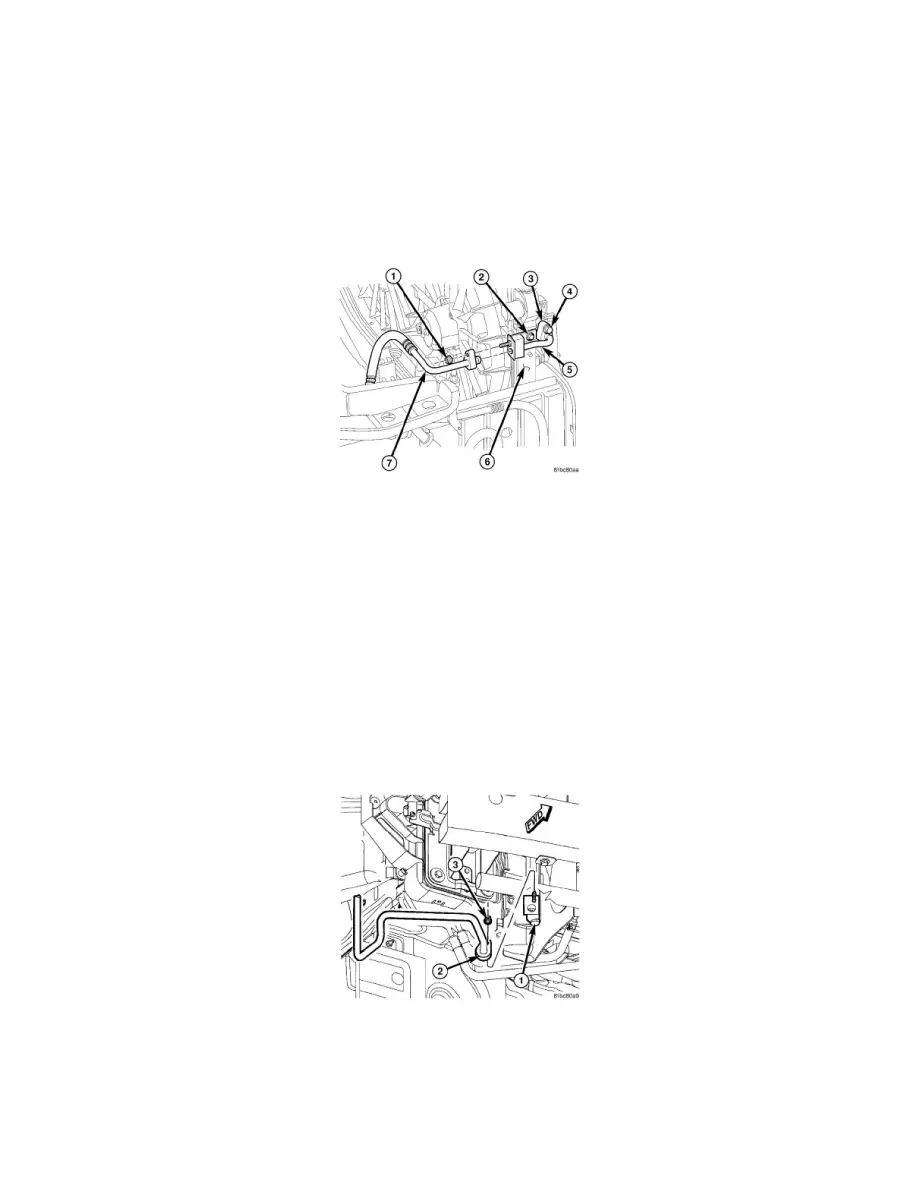
6. Remove the nut (1) that secures the A/C discharge line (7) to the discharge jumper line (5) located on the right side of the A/C condenser (3).
7. Disconnect the A/C discharge line from the discharge jumper line and remove and discard the O-ring seal and gasket.
8. Remove the nut (4) that secures the discharge jumper line to the A/C condenser.
9. Remove the bolt (2) that secures the discharge jumper line to the radiator.
10. Disconnect the discharge jumper line from the A/C condenser and remove and discard the O-ring seal and gasket.
11. Install plugs in, or tape over the opened discharge and jumper line fittings and the condenser port.
NOTE: Illustration shown with front fascia removed for clarity.
12. Raise and support the vehicle.
NOTE: On gasoline engine equipped models, reach up through the opening in the bottom of the front fascia located in the right front
corner of the vehicle to gain access to the A/C liquid line.