
AW 150 Ramcharger V8-360 5.9L (1985)
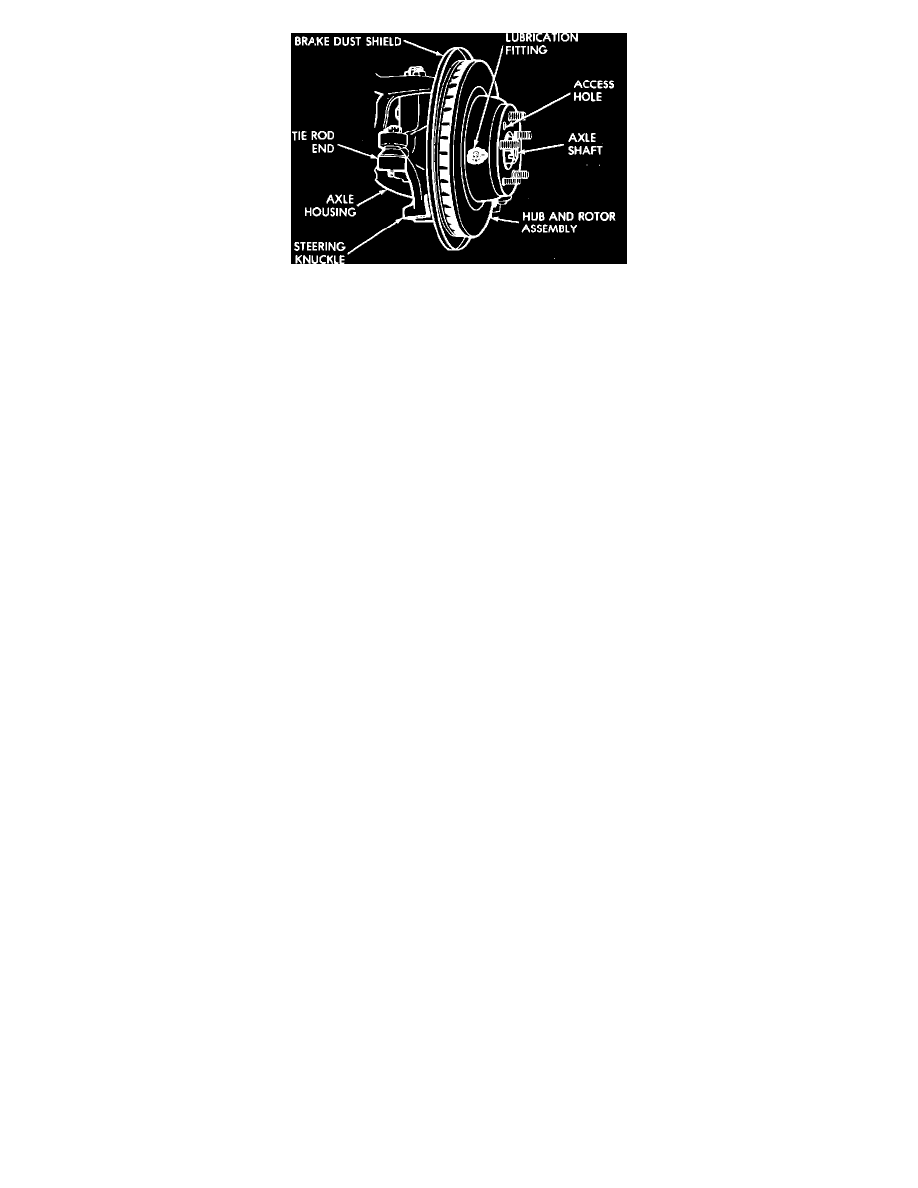
Fig. 16 Bearing retainer positioned with grease fitting facing forward. 44 FBJ Units w/disc brakes. Models w/full time 4WD
4. Install seal cup using adapter, Tool C-4398-2, and driver, Tool No. C-4398-1. Use a small amount of wheel bearing grease on adapter face to hold
cup in position, then drive up until bottomed in knuckle. Do not remove tool at this time.
5. Using a suitable tool, install new outer seal in retainer plate, then locate retainer plate over hub of rotor.
6. Thoroughly pack wheel bearings with Multi-Purpose grease and press outer bearing onto hub using Tool No. C-4246-A and adapters. Remove tool
and place grease coated outer bearing cup over bearing cone followed by spacer, grease coated inner bearing cup and inner bearing cone. Again
use Tool No. C-4246-A and adapters to press components into position. Remove tool.
7. Apply a 1/4 inch bead of RTV sealer to retainer face on the chamfer. This replaces O-ring discarded during disassembly.
8. Carefully remove seal installing tool from knuckle bore so that outer axle shaft remains centered. If shaft is moved, be sure that lip seal is still
riding inside cup. Correct if necessary.
9. Before assembling hub and rotor to knuckle, position bearing retainer in hub so that grease fitting is facing forward, if equipped. Using a crossing
method, torque retainer plate bolts to 30 ft-lbs. Bearing retainers that have a grease fitting must be positioned on knuckle so that fitting is
facing directly forward.
10. Install brake adapter and remove pry bar from universal joint.
11. Install axle shaft washer and nut. Torque nut to 100 ft-lbs, and continue to tighten nut until next slot in nut aligns with hole in axle shaft. Install
cotter pin.
12. Through the access hole in hub, lubricate fitting in bearing retainer with multipurpose grease until grease flows through new inner seal. Seal may
be viewed at the universal joint area. Spin hub several times and lubricate fitting again. Grease must flow from 1/2 of seal diameter.
13. Replace brake caliper assembly and wheel, then lower truck and test operation.
With Part Time 4WD