
B150 1/2 Ton Van V6-239 3.9L (1989)
Evaporator Core: Service and Repair
W/Standard A/C
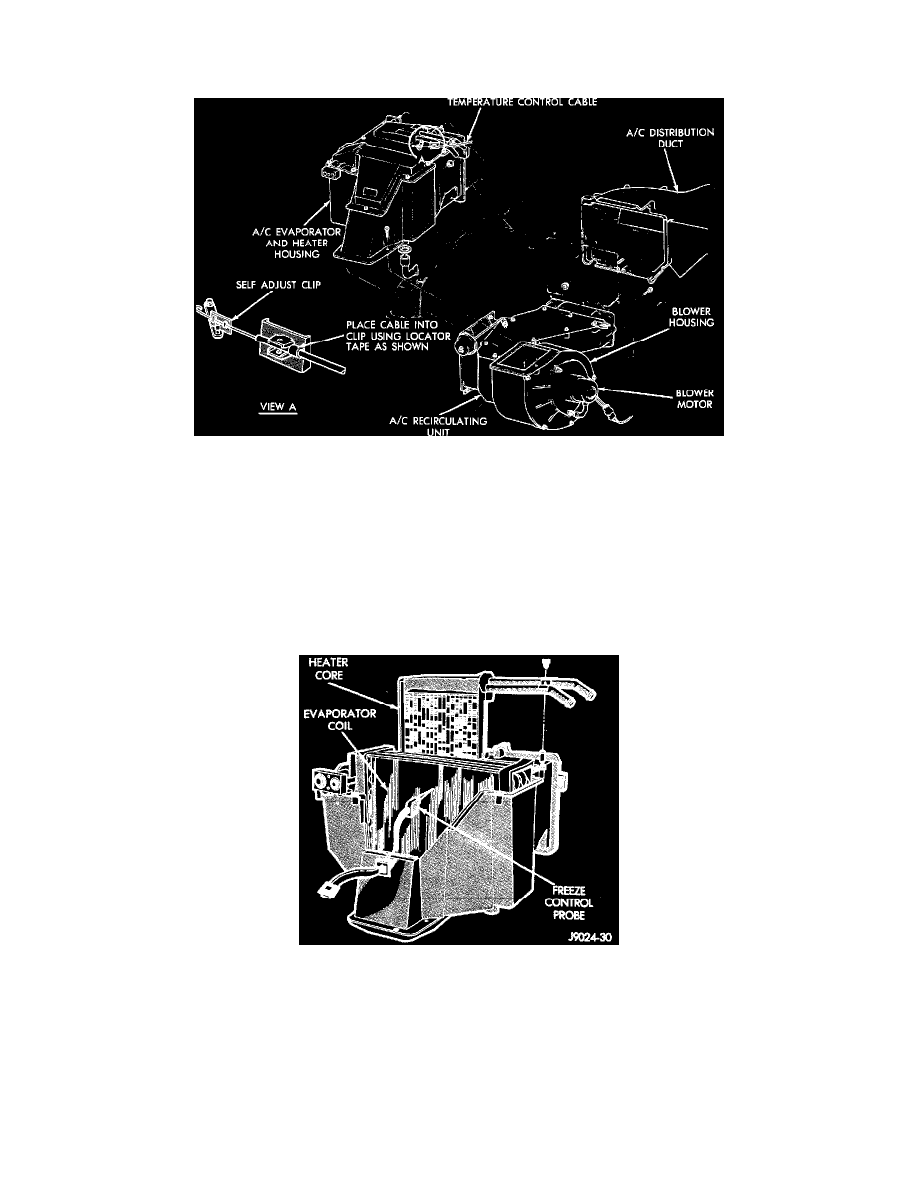
Fig. 18 Heater Assembly. With A/C
1. Discharge refrigerant from system.
2. Disconnect battery ground cable and drain cooling system.
3. Place a waterproof cover over alternator to prevent coolant from spilling over it, then disconnect and plug heater core hoses.
4. Disconnect refrigerant lines at H-valve, then remove two screws from filter drier bracket and position lines aside. Cap all refrigerant lines.
Disconnect temperature control cable from cover.
5. From inside vehicle, remove glove box, spot cooler bezel and appearance shield.
6. Through glove box opening and under instrument panel, remove screws and nuts retaining evaporator housing to dash panel.
7. Remove the two screws from flange connection to blower housing. Separate evaporator housing from blower housing and carefully remove
evaporator housing from vehicle.
8. Remove cover from housing, then remove heater core strap retaining screw and remove heater core.
9. Remove freeze control probe from fins.
10. Remove one screw from under the plumbing attachment plate and pull the evaporator coil from the housing.
11. Reverse procedure to install.