
B250 3/4 Ton Van V8-318 5.2L VIN T FI (1992)
Distributor Cap: Testing and Inspection
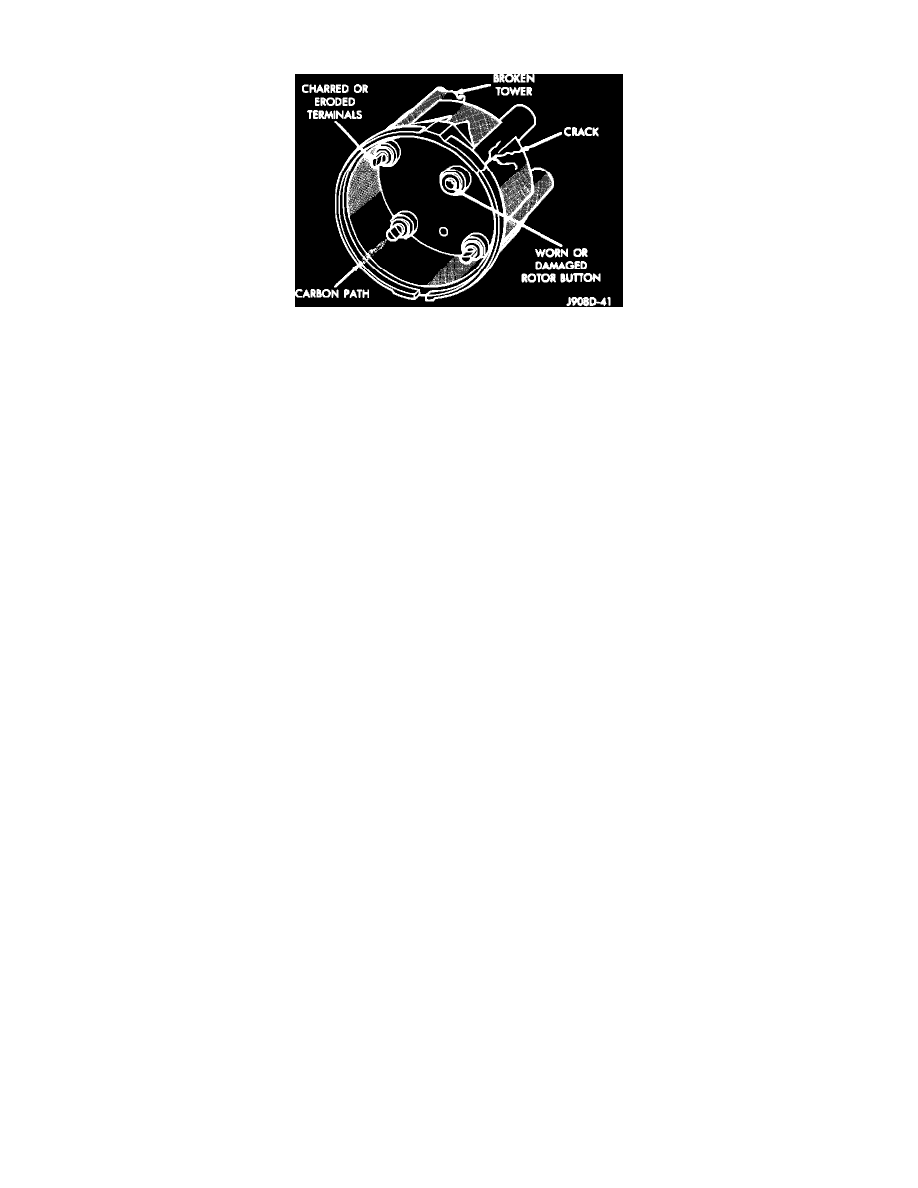
Distributor Cap Inspection
INSPECTION
Remove the distributor cap and wipe it clean with a dry lint-free cloth. Visually inspect cap for cracks, carbon paths, broken towers, and white
deposits on the inside (caused by condensation entering cap through cracks). Also check for damaged rotor button. The machined surface of a
terminal end (faces toward rotor) will indicate some evidence of erosion from normal operation. The residue can be removed with a sharp knife.
Examine the terminal ends for evidence of mechanical interference with the rotor tip.
A cap that is greasy or dirty, or has a powder-like substance on the inside, should be cleaned. Use a solution of warm water and a mild detergent.
Scrub with a soft brush, thoroughly rinse, and dry with a clean soft cloth.
If replacement of the distributor cap is necessary, transfer spark plug cables from original cap to the new cap. Do this one at a time. Be sure that
each cable is installed to the tower of the new cap that corresponds to its tower position in the original cap. Fully seat the cables to the towers. If
necessary, refer to the appropriate engine firing diagram.