
B350 1 Ton Van V8-360 5.9L (1994)
3.
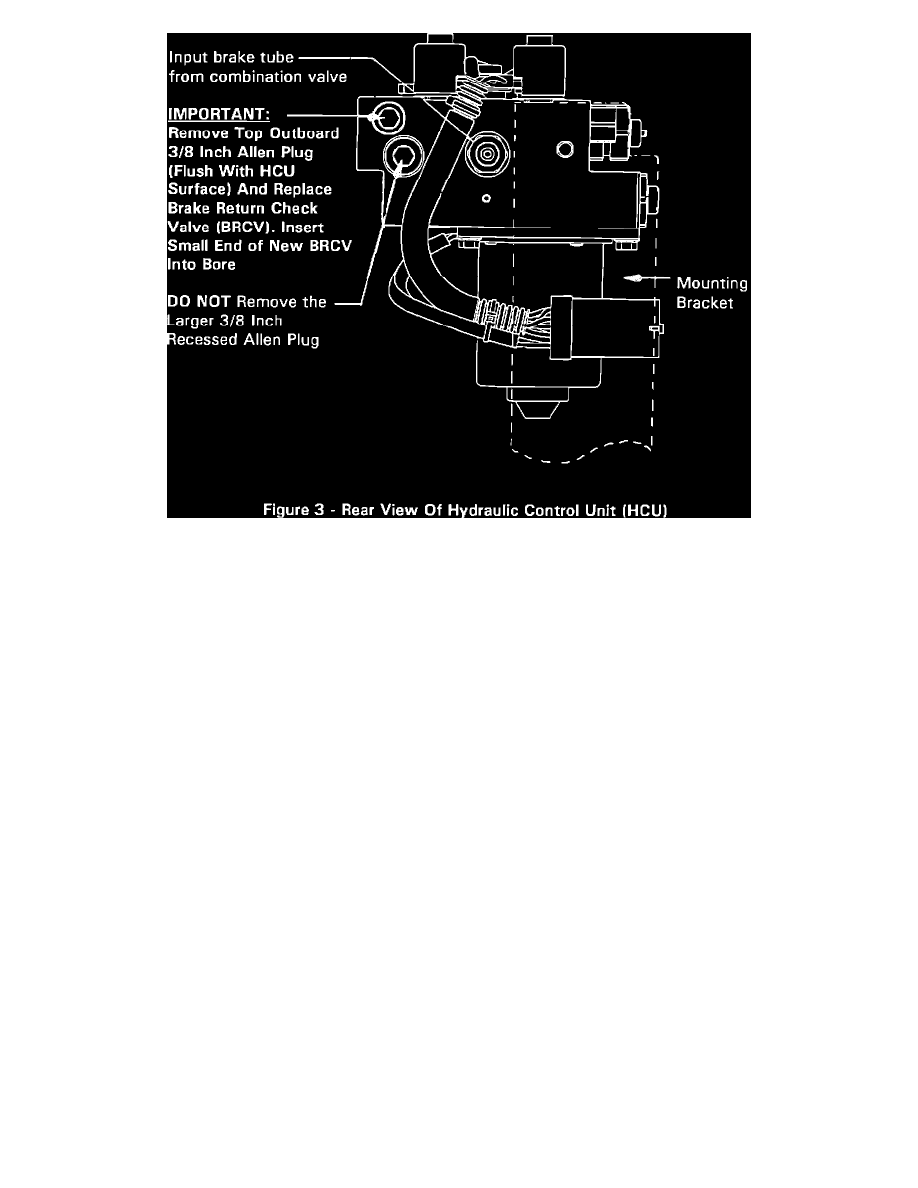
Thoroughly clean the top rear outboard surface of the HCU (the BRCV allen plug area) using Mopar Brake Parts Cleaner PN 4318037 (Figure 3).
Note:
The BRCV is mounted on the back side of HCU (facing the rear of the vehicle) and is not visible from the working area (front of the engine
compartment) on AB-body models. While the procedure for BRCV replacement is the same on all models, a mirror will be required on
AB-body models to assure that the correct 3/8 inch allen plug is removed and that the area is properly cleaned prior to valve replacement.
4.
Remove the top outboard 3/8 inch allen plug (this plug is flush with surface) on the rear side of the HCU (Figure 3).
Caution:
There are two 3/8 inch allen plugs on the rear side of the HCU. Make sure that you remove the smaller top outboard allen plug.
DO NOT remove the larger 3/8 inch recessed allen plug.
5.
Thoroughly clean the allen plug bore thread of the HCU using Mopar Brake Parts Cleaner PN 4318037 and shop air. Inspect the entire area to
ensure it is free of all debris.
6.
Place a shop towel over the HCU to avoid potential brake fluid spray and keep fingers clear of valve area.
7.
Using an assistant, apply moderate pressure on the brake pedal until the large end of the BRCV is forced out of the HCU bore. Remove and
discard the original valve. As brake fluid is lost, a slight amount of brake pedal drop will be experienced when the valve unseats.
Caution:
The assistant must hold the brake pedal until the BRCV is removed and the new BRCV is installed. Releasing pedal pressure before the BRCV
is removed may pull the BRCV back into the bore along with air, making BRCV removal more difficult.
Note:
The original BRCV has a hole in the large end of the valve. This hole was removed from the new valve as a means of positive identification.
8.
Insert the small end of the new BRCV into the HCU bore until the O-ring meets the lead-in chamfer of the bore. Using a socket or other blunt tool,
apply additional force on the large end of the valve until a snap occurs, indicating the valve is fully seated. The assistant may now release the brake
pedal.
Caution:
Cleanliness is critical for proper operation. Handle the new valve with the provided lint free towel to avoid contamination (order additional
towels PN 4636968 as necessary). The new valve is prelubricated and ready for installation. If the BRCV becomes contaminated, do not