
B350 1 Ton Van V8-360 5.9L VIN W 4-bbl (1988)
Instrument Panel Trim
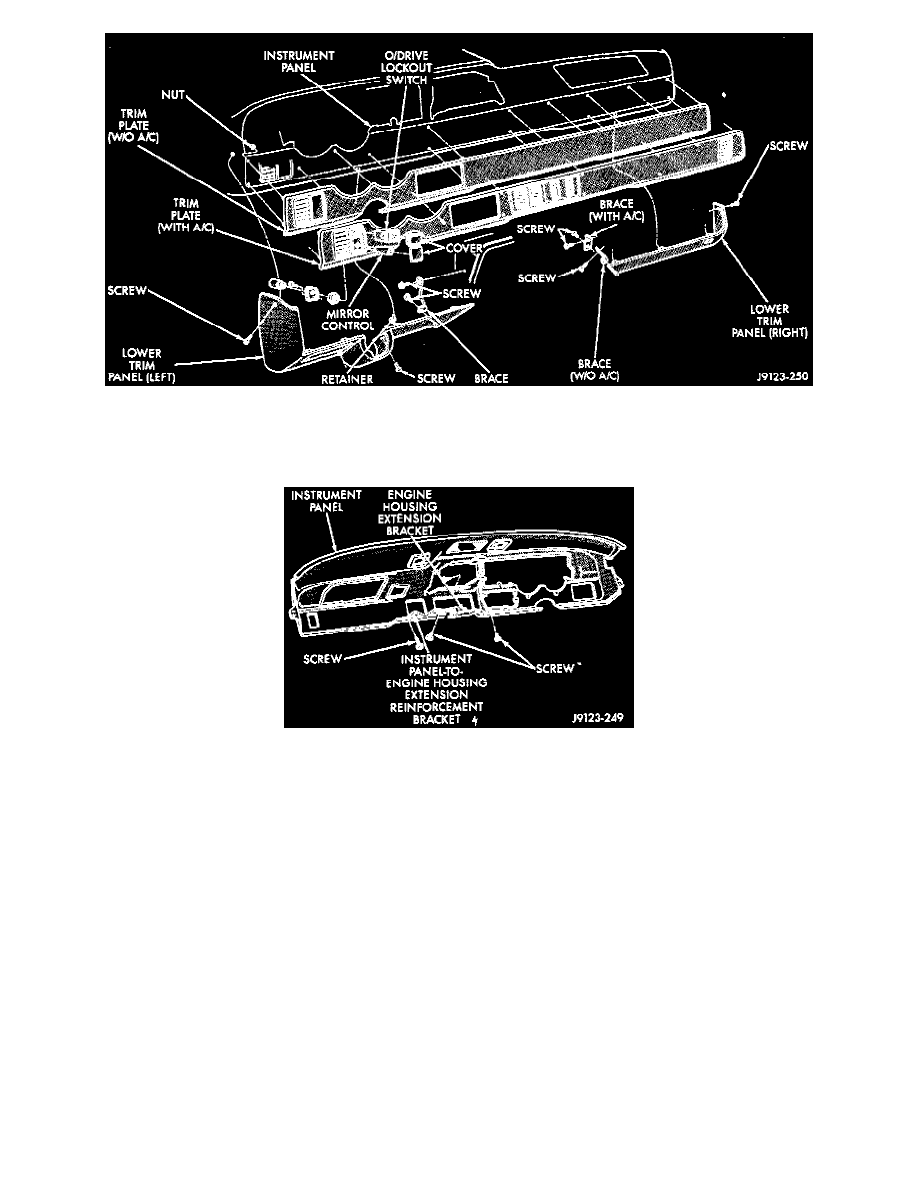
2. Remove the left, lower trim panel from the instrument panel.
3. Remove the instrument panel retaining screws from the each A-pillar.
4. Remove the engine housing bracket retaining screws from the instrument panel.
5. Pull the instrument panel outward from the dash panel for clearance and disconnect the:
-
wire harness connectors,
-
defroster tubes,
-
speedometer cable,
-
heat/vent tube,
-
PRNDL cable, and
-
HEVAC temperature control cable from the instrument panel.
6. Remove the instrument panel from the dash panel and the engine housing.
Installation
1. Position the instrument panel at the dash panel and engine housing.
2. Connect the wire harness connectors, defroster tubes, speedometer cable, heat/vent tube, PRNDL cable, and HEVAC temperature control cable to
the instrument panel.
3. Align the screw holes and install the engine housing bracket retaining screws to the instrument panel. Tighten the screws with 2 Nm (17 in. lbs.)
torque.
4. Install the instrument panel retaining screws. Tighten the screws with 4 Nm (35 in. lbs.) torque.
5. Position the left, lower trim panel on the instrument panel. Install and tighten the retaining screws with 2 Nm (20 in. lbs.) torque.