
B350 1 Ton Van V8-5.9L VIN Z (1992)
Valve Body
12.
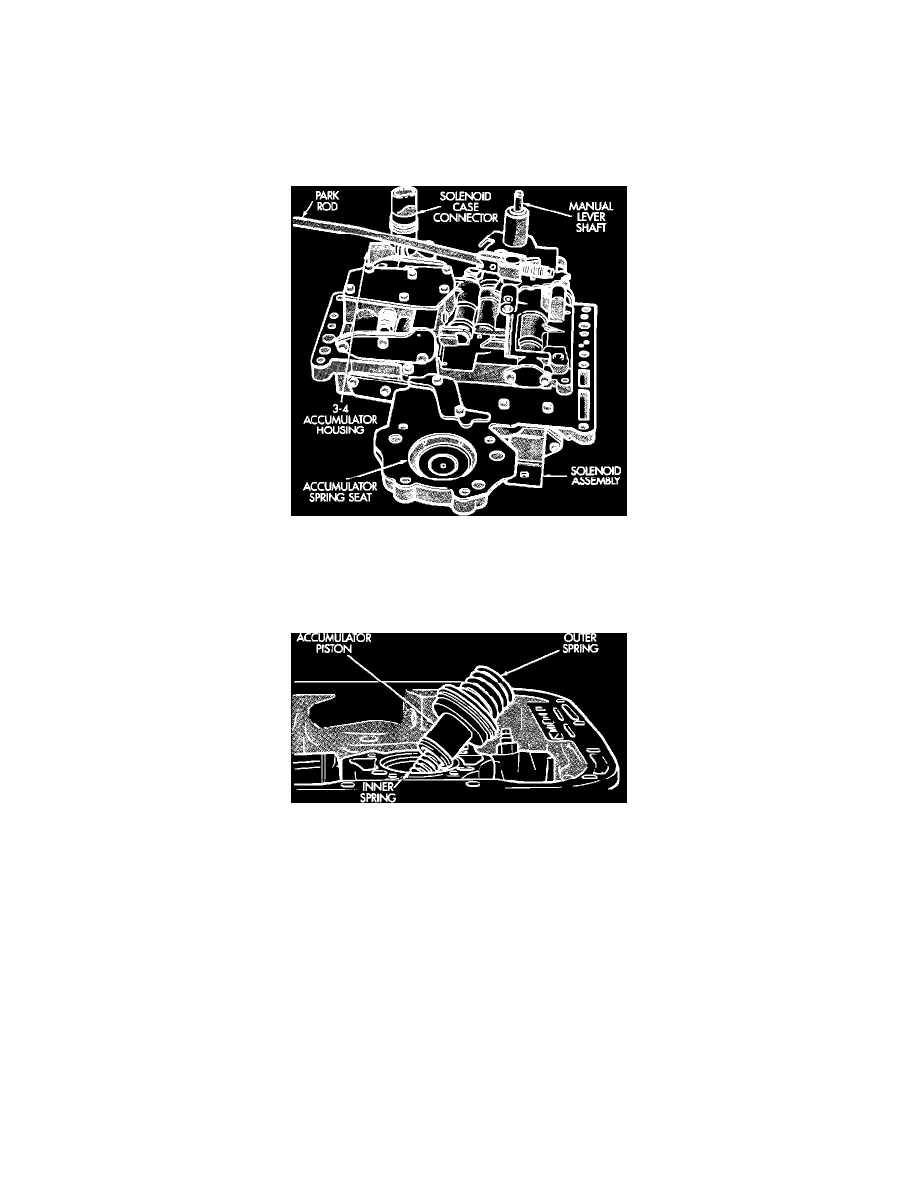
Push the manual lever shaft and solenoid case connector out of the transmission case. Lower the valve body, rotate it away from the case, pull the
park rod out of the sprag and remove the valve body.
INSTALLATION
1.
Verify that the neutral safety switch has not been installed. The valve body cannot be installed with the switch in place.
Valve Body
2.
Check the condition of the seals on the valve body solenoid case connector, and replace if they are cut or worn.
3.
Check the condition of the manual lever shaft seal. Remove the seal if the lip is cut, or worn. Do not install a new seal at this time.
Accumulator Piston And Springs
4.
Check the condition of the seals on the accumulator piston. Install new piston seals if necessary.
5.
Install the accumulator inner spring and the accumulator piston. A small amount of petroleum jelly can be used to hold the piston in the bore.
6.
Place the valve body manual lever in low (1 position) so that the ball on the park lock rod can be installed in the sprag.
7.
Lubricate the shaft of the manual lever with petroleum jelly. This will ease inserting the shaft through the seal in the case.
8.
Lubricate the seal rings on the solenoid case connector with petroleum jelly.
9.
Position the accumulator piston outer spring on the valve body.
10.
Raise the valve body and work the end of the park lock rod into and through the sprag. Use a screwdriver to align the sprag if necessary.
11.
Align the accumulator springs, manual lever shaft and solenoid case connector. Then seat the valve body on the case and install one or two bolts
to hold the valve body in place.