
Caliber L4-2.0L (2008)
5. The directional arrow stamped on the piston should face toward the front of the engine.
6. Rotate crankshaft so that the connecting rod journal is on the center of the cylinder bore. Lubricate connecting rod journal with clean engine oil.
NOTE: There are three different size rod bearings, perform rod bearing selection procedure.
NOTE: The rod bearing sizes are indicated on the nose of the crankshaft.
7. Install connecting rod upper bearing half into connecting rod.
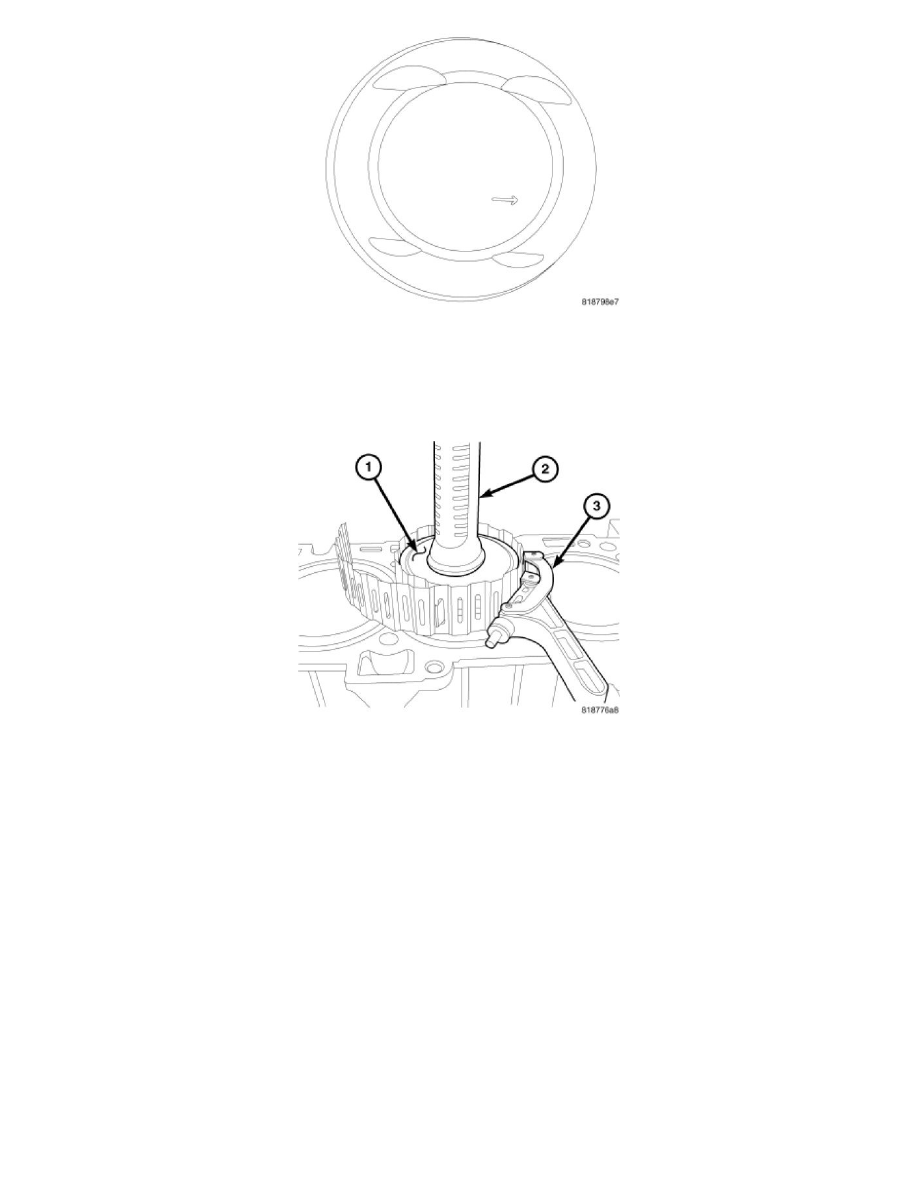
8. Install ring compressor (3).
9. Tap the piston (1) down in cylinder bore, using a hammer handle (2). At the same time, guide connecting rod into position on connecting rod
journal.
NOTE: The connecting rod cap bolts should NOT be reused.
10. Before installing the NEW bolts, the threads should be coated with clean engine oil.
11. Install connecting rod lower bearing half into connecting rod cap. Install connecting rod cap.
12. Install each bolt finger tight then alternately torque each bolt to assemble the cap properly.
13. Tighten the connecting rod bolts using the 2 step torque-turn method. Tighten according to the following values:
CAUTION: Do not use a torque wrench for the second step.
-
Tighten the bolts to 20 Nm (15 ft. lbs.).
-
Tighten the connecting rod bolts an additional 90°.