
Caliber L4-2.0L (2008)
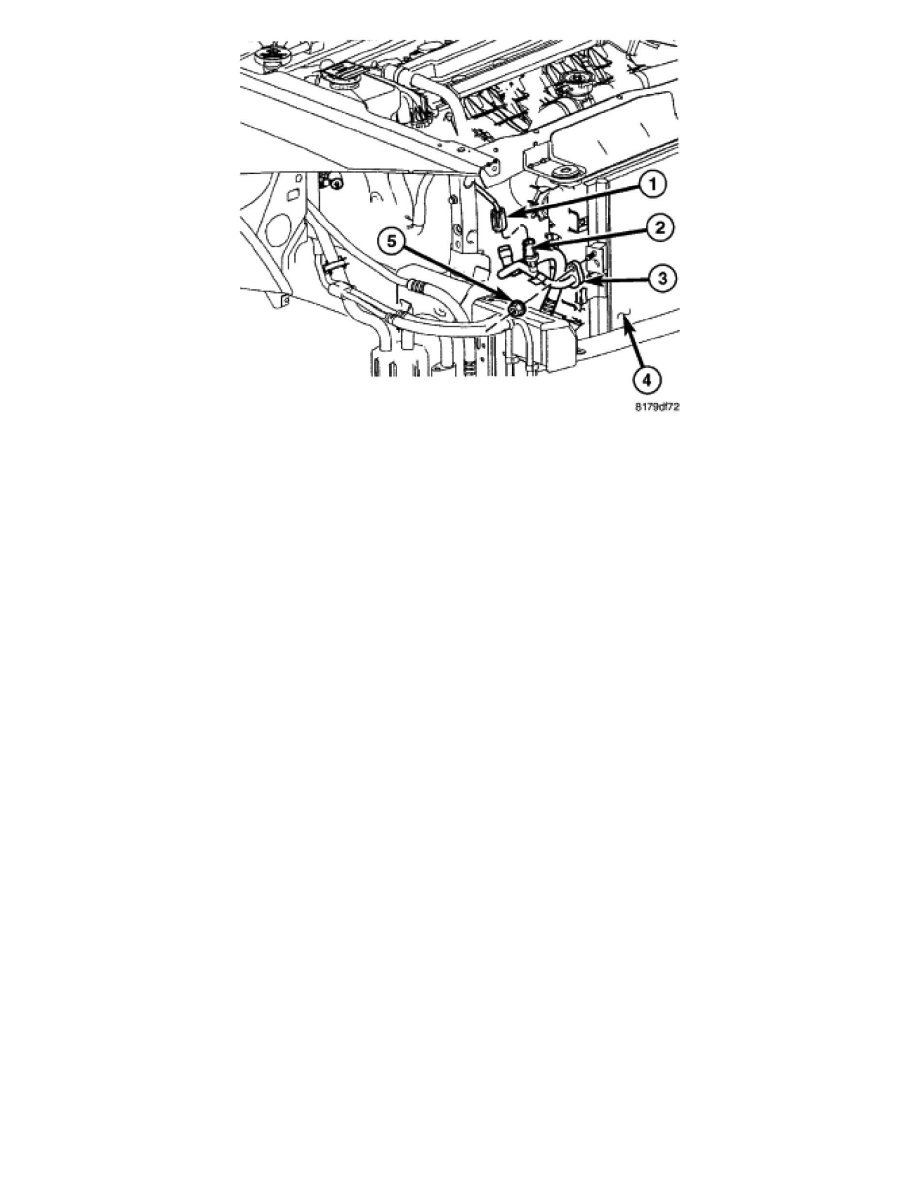
9. Remove the upper radiator closure panel and carefully pull the top of the fascia forward to gain access to the A/C discharge line (3) See: Body and
Frame/Radiator Support/Service and Repair/Removal.
10. Reach down through the opening between the radiator and the front fascia and disconnect the wire harness connector (1) from the A/C pressure
transducer (2).
11. Remove the nut (5) that secures the A/C discharge line to the right side of the A/C condenser (4).
12. Disconnect the A/C discharge line from the A/C condenser and remove and discard the O-ring seal and gasket.
13. Install plugs in, or tape over the discharge line fitting and the condenser port.
14. If necessary, remove the A/C pressure transducer from the A/C discharge line.
Liquid Line
REMOVAL
WARNING: Review safety precautions and warnings before performing this procedure See: Heating and Air Conditioning/Service
Precautions/Warning and See: Heating and Air Conditioning/Service Precautions/Caution. Failure to follow the warnings and cautions could
result in possible personal injury or death.
NOTE: The A/C liquid line is only serviced as an assembly with the upper A/C suction line.
NOTE: LHD model shown in illustrations. RHD model similar.