
Caliber L4-2.0L VIN B (2007)
NOTE: Illustration shown with front fascia removed for clarity.
NOTE: On gasoline engine equipped models, reach up through the opening in the bottom of the front fascia located in the right front corner of the
vehicle to gain access to the A/C liquid line.
6. Remove the tape or plug from the liquid line fitting and the condenser outlet port.
7. Lubricate a new rubber O-ring seal with clean refrigerant oil and install it and a new gasket onto the liquid line fitting. Use only the specified
O-ring as it is made of a special material for the R-134a system. Use only refrigerant oil of the type recommended for the A/C compressor in the
vehicle.
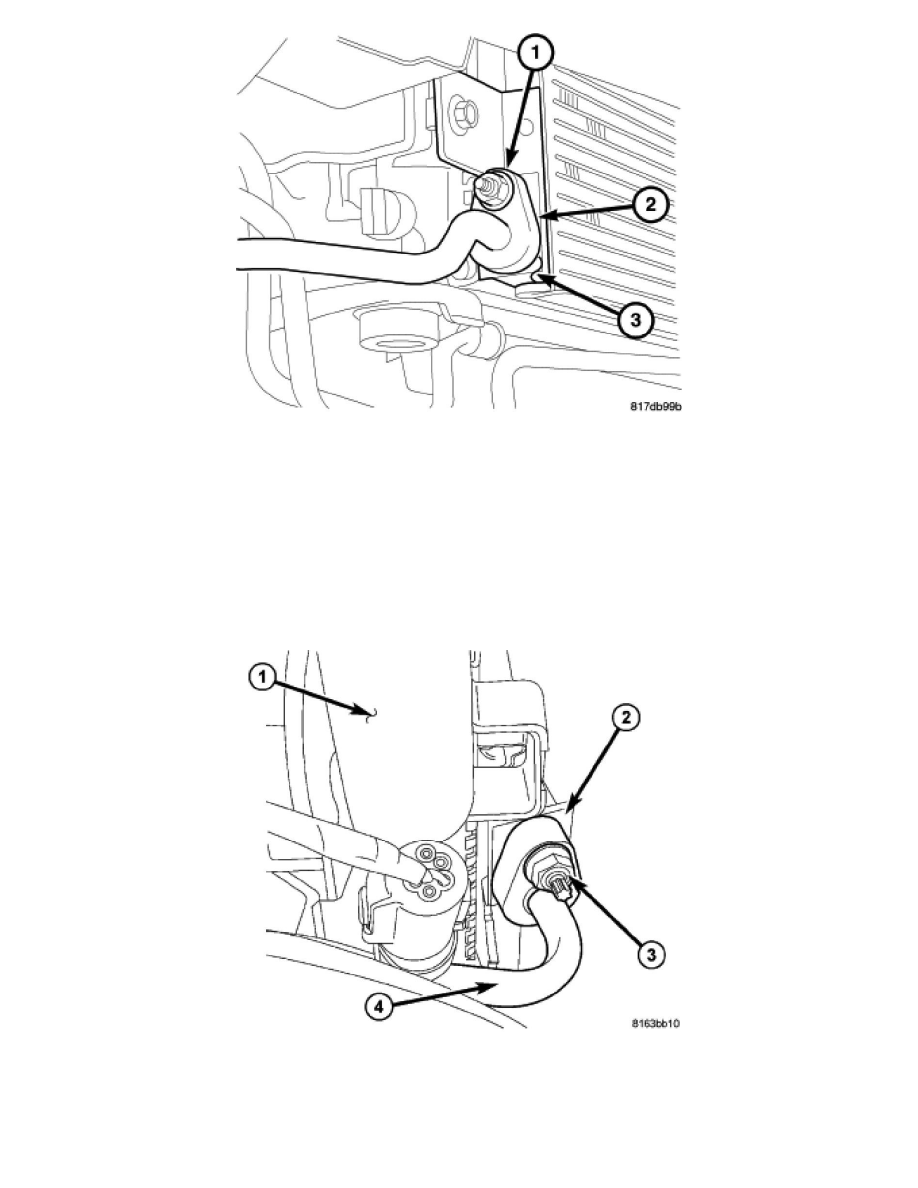
8. Connect the A/C liquid line (2) to the A/C condenser (3) and install the retaining nut (1). Tighten the nut to 5 Nm (44 in. lbs.).
9. Lower the vehicle.
10. Remove the tape or plug from the discharge line fitting and the condenser inlet port.
11. Lubricate a new rubber O-ring seal with clean refrigerant oil and install it and a new gasket onto the discharge line fitting. Use only the specified
O-ring as it is made of a special material for the R-134a system. Use only refrigerant oil of the type recommended for the A/C compressor in the