
Caliber L4-2.0L VIN B (2007)
4.
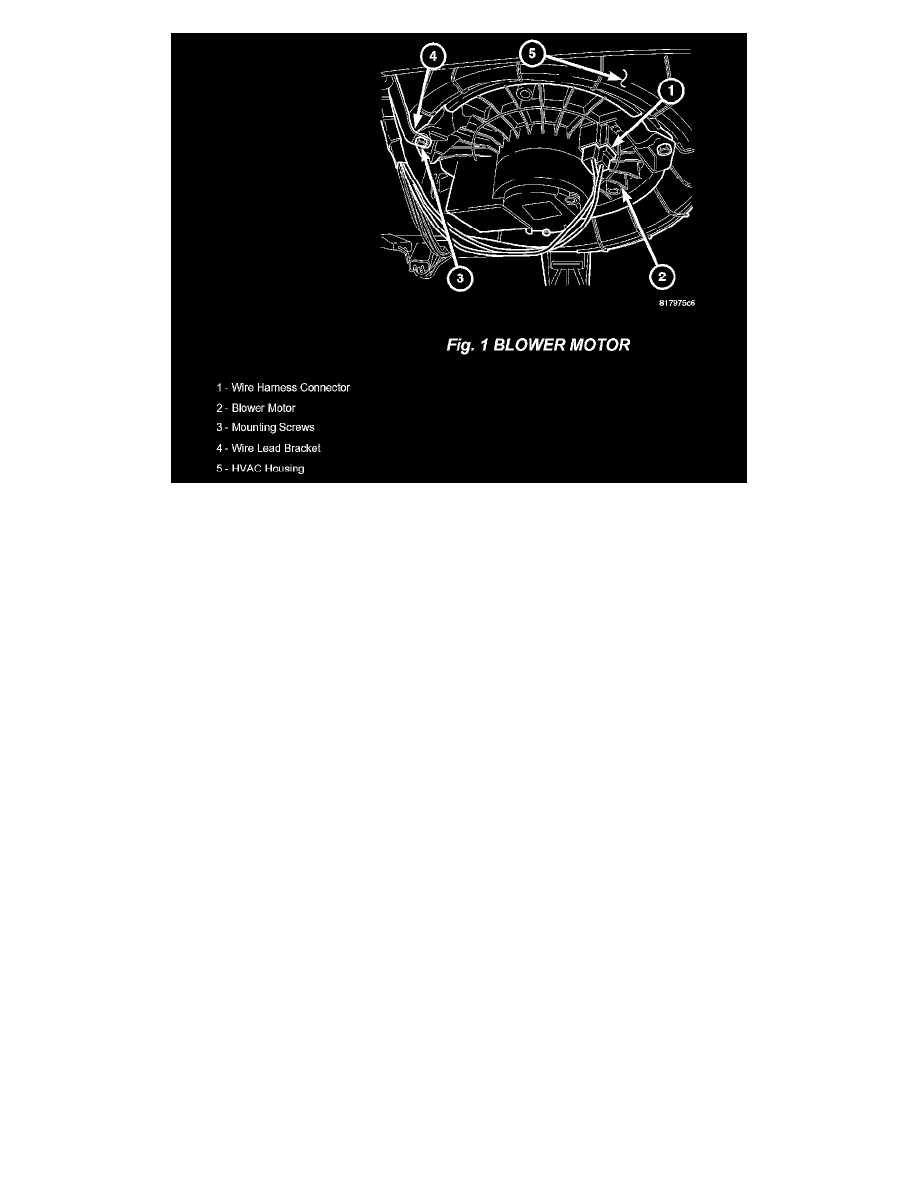
Remove the three screws that secure the blower motor and the wire lead bracket (if equipped) to the bottom of the HVAC housing and remove the
blower motor (Fig. 1).
NOTE:
LHD model shown. RHD model similar.
5.
Clean any debris out of the blower motor. It may be necessary to use shop air to blow it out of the blower motor.
6.
Install the blower motor by positioning the blower motor onto the bottom of the HVAC housing.
7.
Install the three screws that secure the blower motor and the wire lead bracket (if equipped) to the HVAC housing. Tighten the screws to 1.2 N.m
(10 in. lbs.).
8.
Connect the instrument panel wire harness connector to the blower motor and engage the connector lock.
9.
If equipped, install the silencer below the passenger side of the instrument panel.
10.
Open the glove box and carefully use fingers to press inward on the glove box open stops at the top of the bin, to allow the glove box to rotate
down toward the carpet.
11.
Rotate the box down and release the door hinges at the bottom and remove the glove box.