
Caliber L4-2.0L VIN B (2007)
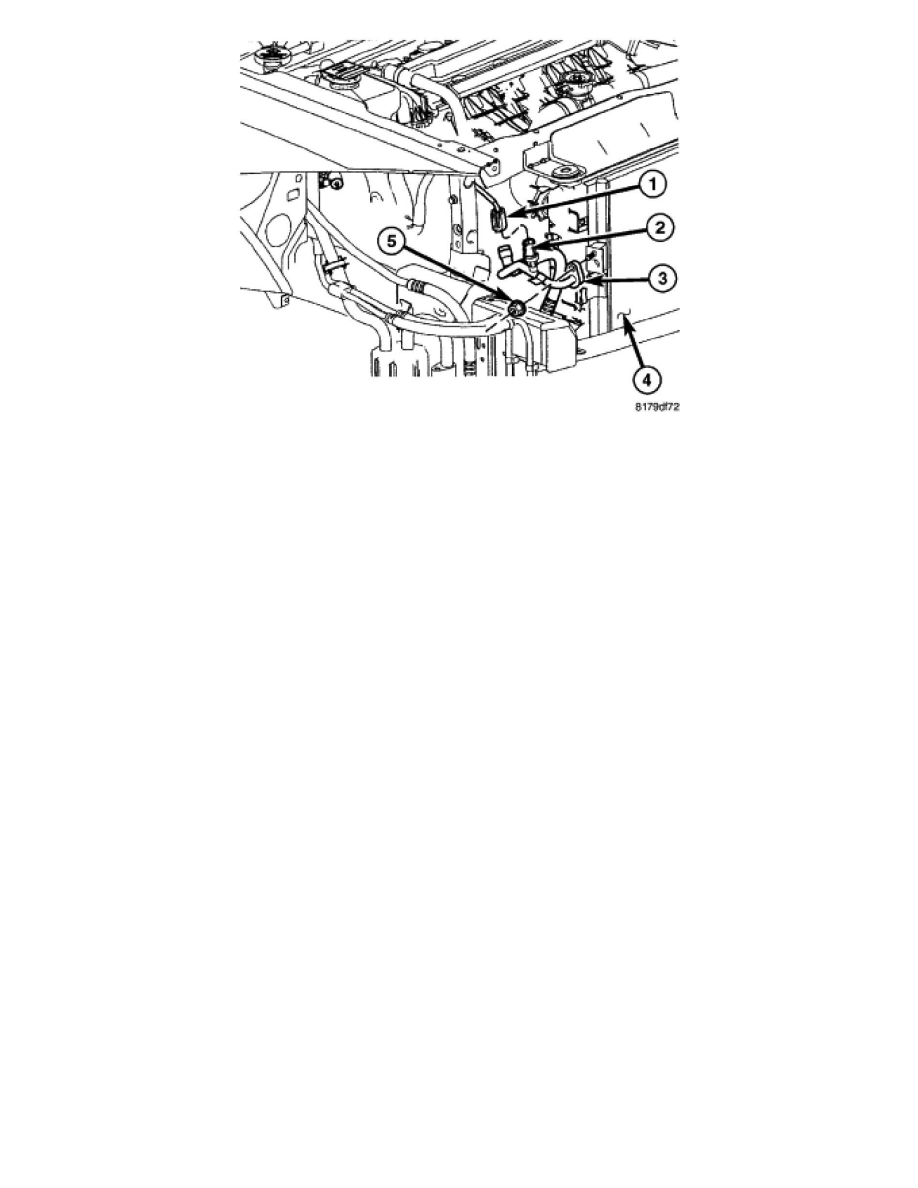
9. Remove the upper radiator closure panel and carefully pull the top of the fascia forward to gain access to the A/C discharge line (3).
10. Reach down through the opening between the radiator and the front fascia and disconnect the wire harness connector (1) from the A/C pressure
transducer (2).
11. Remove the nut (5) that secures the A/C discharge line to the right side of the A/C condenser (4).
12. Disconnect the A/C discharge line from the A/C condenser and remove and discard the O-ring seal and gasket.
13. Install plugs in, or tape over the discharge line fitting and the condenser port.
14. If necessary, remove the A/C pressure transducer from the A/C discharge line.
Installation
INSTALLATION
CAUTION: Be certain to adjust the refrigerant oil level when servicing the A/C refrigerant system. Failure to properly adjust the refrigerant
oil level will prevent the A/C system from operating as designed and can cause serious A/C compressor damage.
NOTE: When replacing multiple A/C system components, refer to the Refrigerant Oil Capacities chart to determine how much oil should be added to
the refrigerant system.
NOTE: Replacement of the refrigerant line O-ring seals and gaskets is required anytime a refrigerant line is opened. Failure to replace the rubber O-ring
seals and metal gaskets could result in a refrigerant system leak.