
Caravan L4-153 2.5L SOHC (1989)
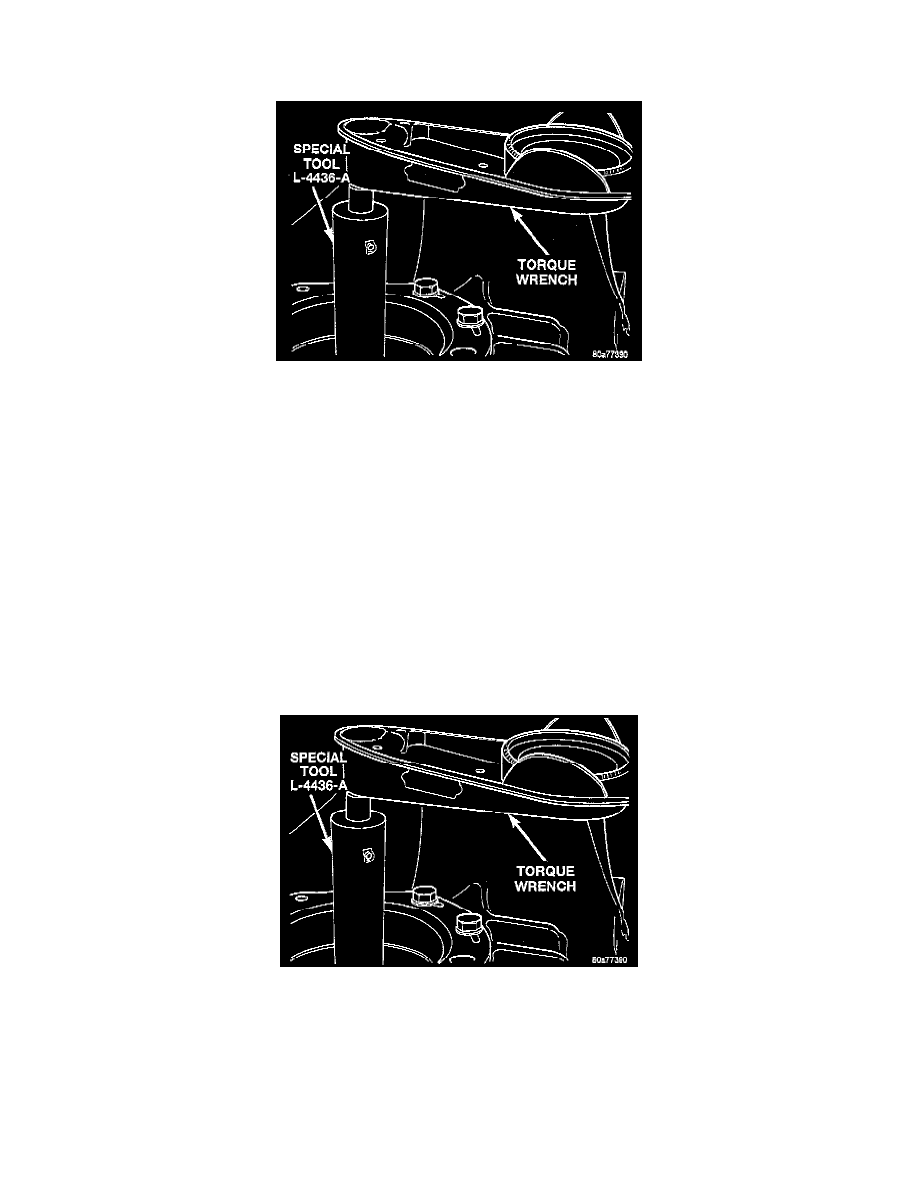
2. Install Tool L-4436A, or equivalent into the differential and onto the pinion mate shaft.
3. Rotate the differential at least one full revolution to ensure the tapered roller bearings are fully seated.
Checking Differential Bearings Turning Torque
4. Using Tool L-4436A, or equivalent and an inch-pound torque wrench, check the turning torque of the differential. The turning torque should be
between
5. If the turning torque is within specifications, remove tools. Setup is complete.
6. If turning torque is not within specifications proceed with the following steps.
a. Remove differential bearing retainer from the transaxle case.
b. Remove the bearing cup from the differential bearing retainer using Tool 6062A, or equivalent.
c. Remove the existing shim from under the cup.
d. Measure the existing shim.
NOTE: If the turning torque was too high when measured, install a 0.05 mm (0.002 inch) thinner shim. If the turning torque is was too low,
install a 0.05 mm (0.002 inch) thicker shim. Repeat until 5 to 18 inch pounds turning torque is obtained. Oil Baffle is not required to be
installed when making shim selection.
e. Install the proper shim under the bearing cup. Make sure the oil baffle is installed properly in the bearing retainer, below the bearing shim and
cup.
f.
Install the differential bearing retainer using Tool 5052 and C-4171, or equivalents. Seal the retainer to the housing with MOPAR Adhesive
Sealant and torque bolts to 28 Nm (250 inch lbs.).
Checking Differential Bearings Turning Torque
7. Using Tool L-4436A, or equivalent and an inch-pound torque wrench, recheck the turning torque of the differential. The turning torque should be
between 5 and 18 inch-pounds. Shim thickness need be determined only if any of the following parts are replaced:
-
Transaxle case
-
Differential carrier
-
Differential bearing retainer
-
Extension housing
8. Attach a dial indicator to the case and zero the dial. Place the tip on the end of Special Tool L-4436-A, or equivalent.