
Caravan V6-181 3.0L VIN 3 FI (1988)
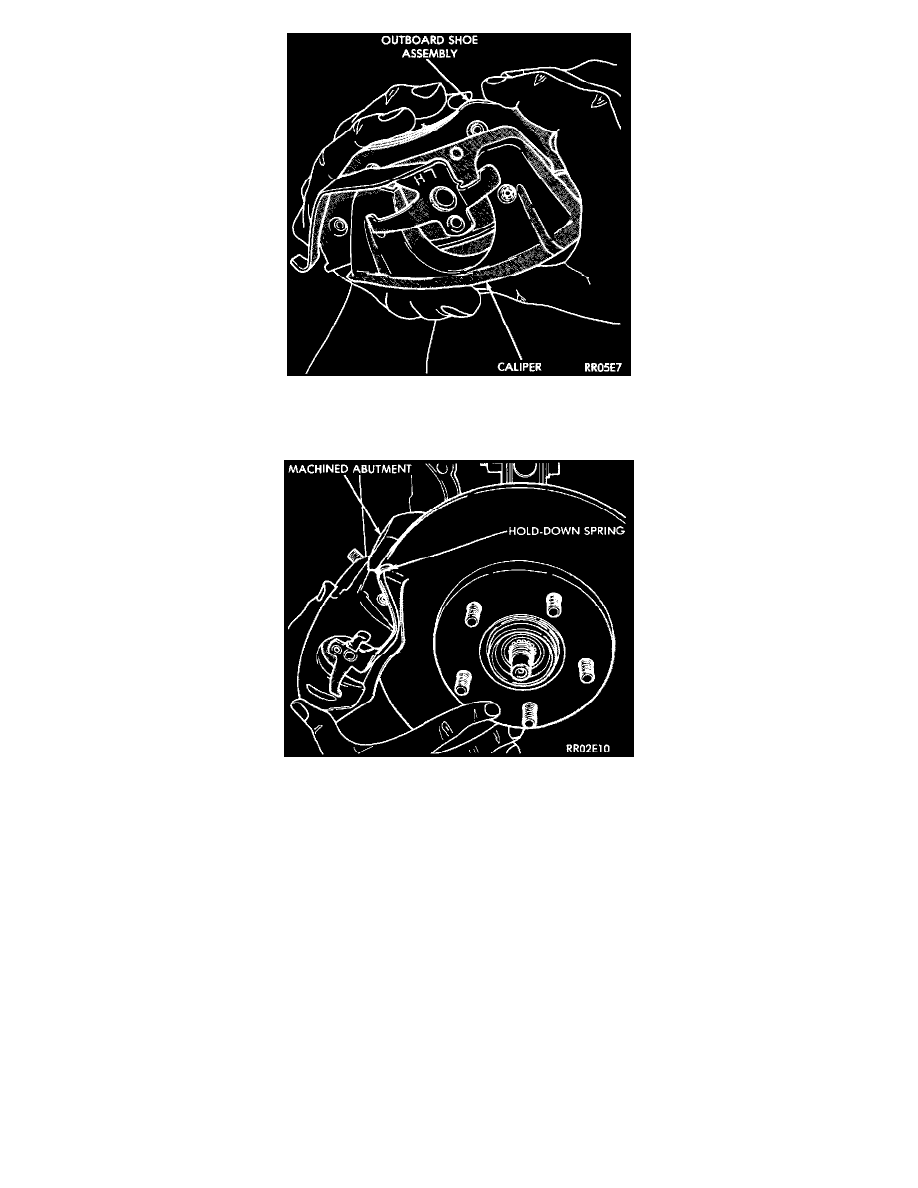
Fig 6 Installing Outboard Shoe Assembly Onto Caliper
3. Remove protective paper from the noise suppression gasket and position the properly marked outboard shoe hold-down spring onto caliper.
Fig 7 Guiding Hold-down Spring Under Machined Abutment
4. Carefully lower caliper over braking disc and guide end of hold-down spring under machined abutment on knuckle assembly.
5. Install guide pins and tighten to 25-35 Nm (18-26 ft lb). When installing guide pins, use extreme caution not to cross the threads.
6. Install wheel and tire assembly.
7. Tighten stud nuts in proper sequence until all nuts are torqued to half specification. This is important. Then repeat sequence to full specification.
8. Remove jackstands or lower hoist.
9. Before moving vehicle, be sure it has a firm pedal.
10. Road test vehicle and make several stops to wear off any foreign material on the brakes and to seat the linings. The vehicle may pull to one side or
the other if this is not done.
Kelsey-Hayes Single Pin Caliper
For additional information see Installation Notes. See: Fundamentals and Basics