Caravan V6-201 3.3L (1995)

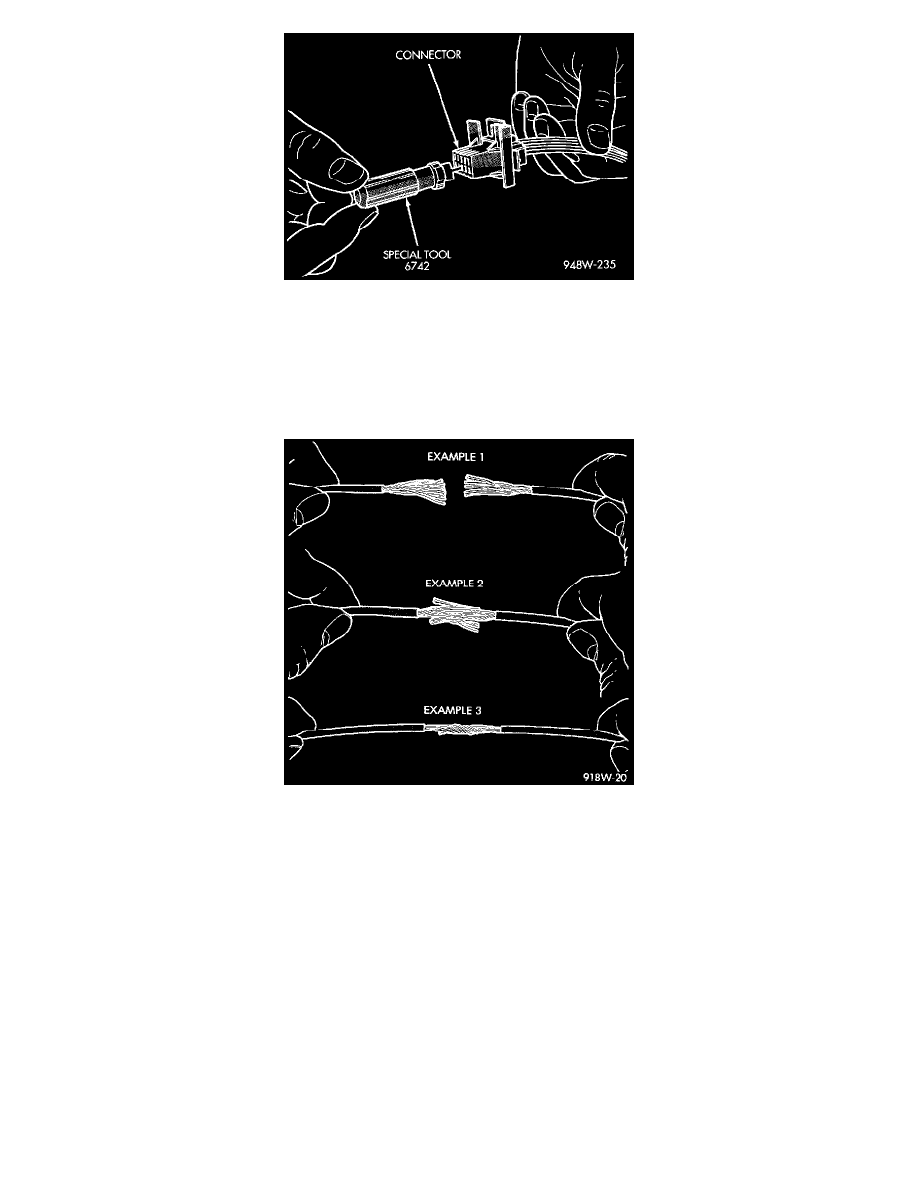
Using Special Tool 6742
4. Using special tool 6742, release the locking fingers on the terminal.
5. Pull on the wire to remove it from the connector.
6. Repair or replace the connector or terminal, as necessary.
Wiring Repair
Wire Repair
When replacing or repairing a wire, it is important that the correct gauge be used as shown in the wiring diagrams. The wires must also be held securely
in place to prevent damage to the insulation.
1. Disconnect the battery negative cable.
2. Remove 1 inch of insulation from each end of the wire.
3. Place a piece of heat-shrink tubing over one side of the wire. Be sure the tubing will be long enough to cover and seal the entire repair area.
4. Spread the strands of the wire apart on each part of the exposed wires (Example 1).
5. Push the two ends of wire together until the strands of wire are close to the insulation (Example 2).
6. Twist the wires together (Example 3).
7. Solder the connection together using rosin core solder only. Do not use acid core solder.
8. Center the heat-shrink tubing over the joint and heat using a heat gun. Heat the joint until the tubing is tightly sealed and sealant comes out of both
