
Caravan FWD V6-3.3L VIN 3 Flex Fuel (2001)
INSPECTION
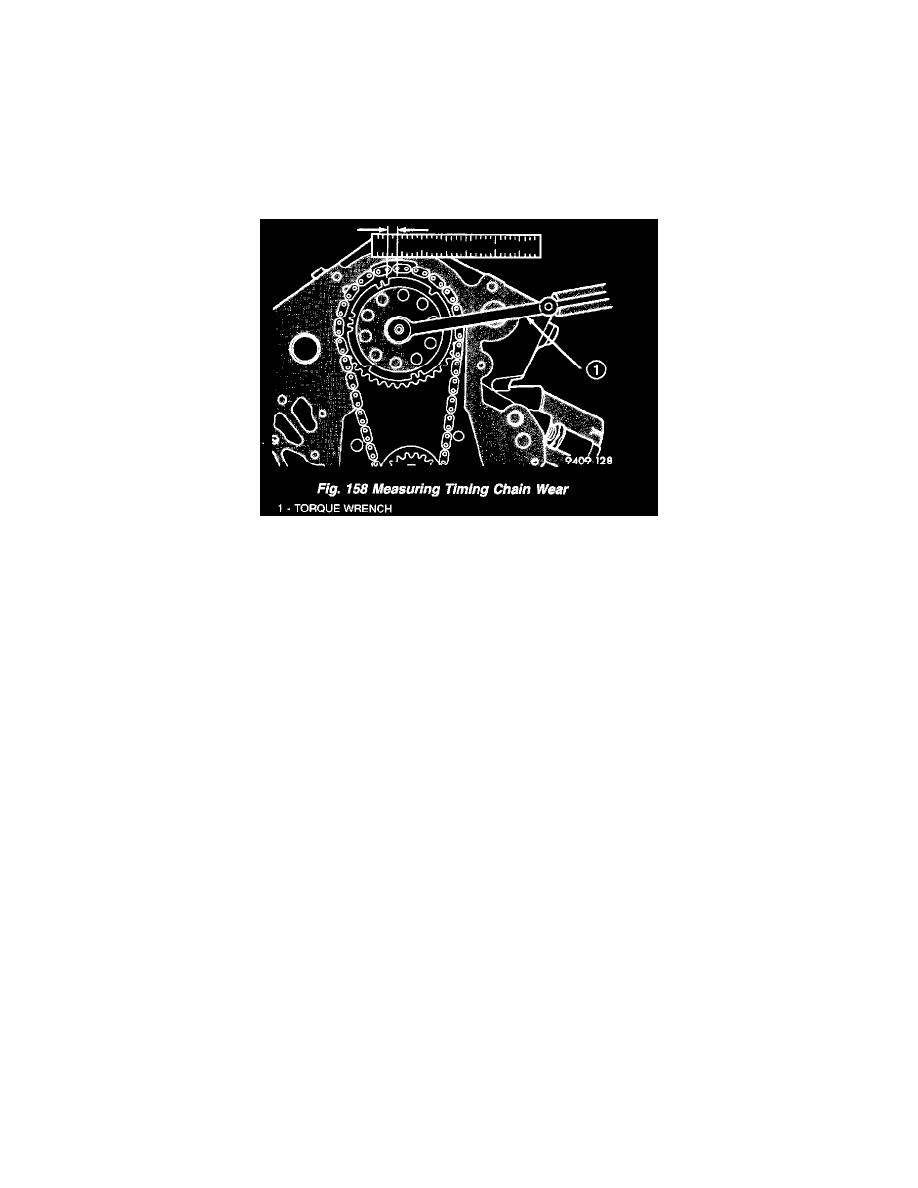
1. Position a scale next to timing chain so that any movement of chain may be measured.
2. Position a torque wrench and socket on the camshaft sprocket attaching bolt. Apply force in the direction of crankshaft rotation to take up slack to
the following torque:
-
41 Nm (30 ft. lbs.) with cylinder heads installed
-
20 Nm (15 ft. lbs.) with cylinder heads removed
NOTE: With torque applied to the camshaft sprocket bolt, crankshaft should not be permitted to move. It may be necessary to block crankshaft to
prevent rotation.
3. Holding a measuring scale along edge of chain links (Fig. 158).
4. Apply force in the reverse direction to the following torque:
-
41 Nm (30 ft. lbs.) with cylinder heads installed
-
20 Nm (15 ft. lbs.) with cylinder heads removed
5. Measure amount of sprocket/chain movement.
6. Install a new timing chain and sprockets if movement exceeds 3.175 mm (1/8 inch).
INSTALLATION - TIMING CHAIN AND CAMSHAFT SPROCKET
1. Rotate crankshaft so the timing arrow is to the 12 o'clock position (Fig. 156).
NOTE: Lubricate timing chain and sprockets with clean engine oil before installation.
2. While holding camshaft sprocket and chain in hand, place timing chain around the sprocket, aligning the plated link with the dot on the sprocket.
Position the timing arrow to the 6 o'clock position (Fig. 156).
3. Place timing chain around crankshaft sprocket with the plated link lined up with the dot on the sprocket. Install camshaft sprocket into position.
4. Use a straight edge to check alignment of timing marks.
5. Install camshaft sprocket bolt and washer. Tighten bolt to 54 Nm (40 ft. lbs.).
6. Rotate crankshaft 2 revolutions and check timing mark alignment (Fig. 156). If timing marks do not line up, remove camshaft sprocket and realign.
7. Install the timing chain cover.
8. Connect negative cable to battery.
INSTALLATION - CRANKSHAFT SPROCKET
1. Position the sprocket on the crankshaft (timing mark out) with the timing slot aligned with the timing pin.