
Caravan FWD V6-3.3L VIN 3 Flex Fuel (2001)
2. With the lower control arm held securely in a vise, install bushing on lower control arm. Install bushing by pushing and rocking the bushing until it
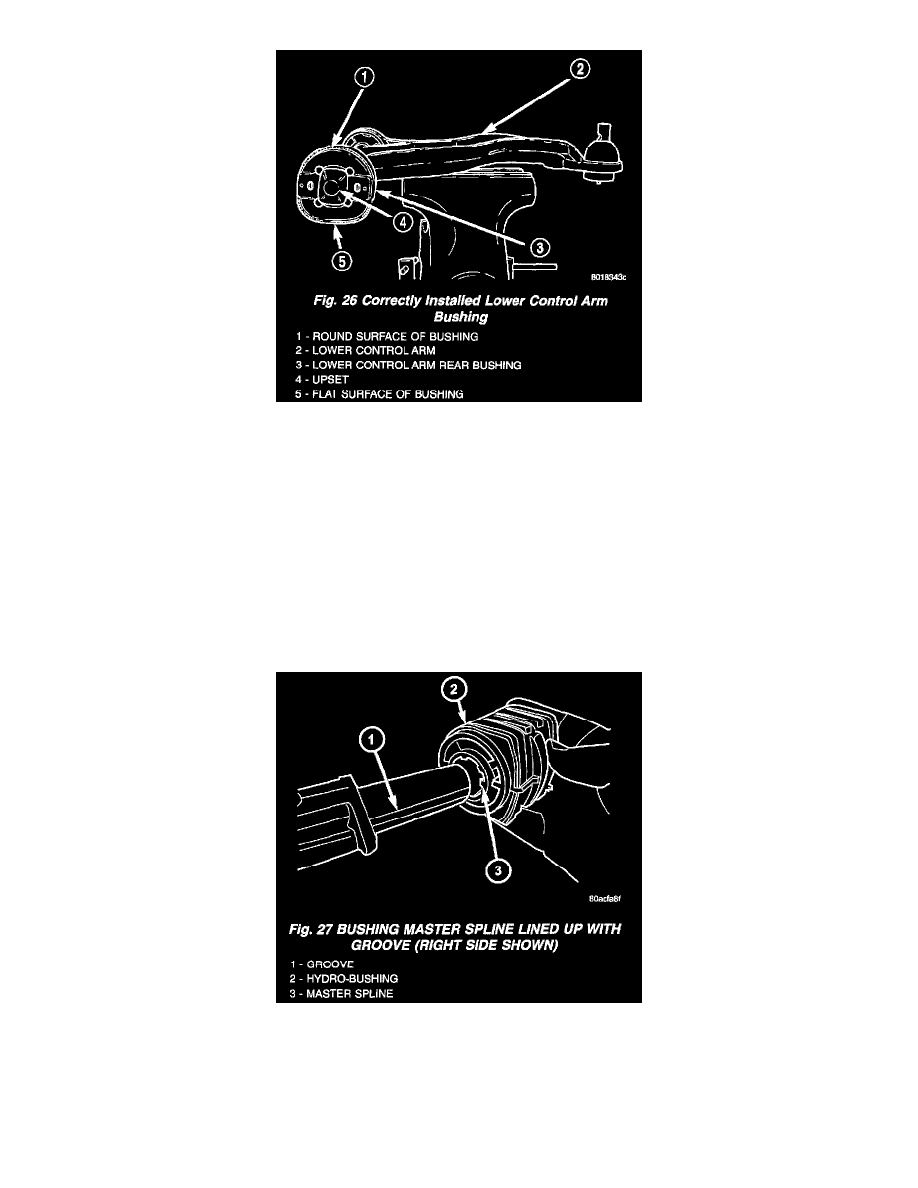
is fully installed on lower control arm. Be sure that when bushing is installed it is past the upset on the end of the lower control arm.
3. The rear bushing of the lower control arm, when correctly installed, is to be positioned on the lower control arm as shown.
4. Install lower control arm on vehicle.
ASSEMBLY-LOWER CONTROL ARM (REAR BUSHING-HYDRO)
CAUTION: Do not apply grease or any other type of lubricant to the arm stem where the bushing is to be mounted. Such action will reduce proper
bushing adhesion to arm.
1. Secure lower control arm in a vise.
NOTE: Hydro bushings and grooves on control arm stems are unique for right and left sides. Left side bushing master spline and control arm groove
are on the top (when mounted on vehicle). Right side bushing master spline and control arm groove are on the bottom (when mounted on vehicle).
2. Align master spline on bushing inner sleeve with groove on lower control arm rear bushing stem. Start bushing on stem by hand.