
Challenger V6-3.5L (2009)
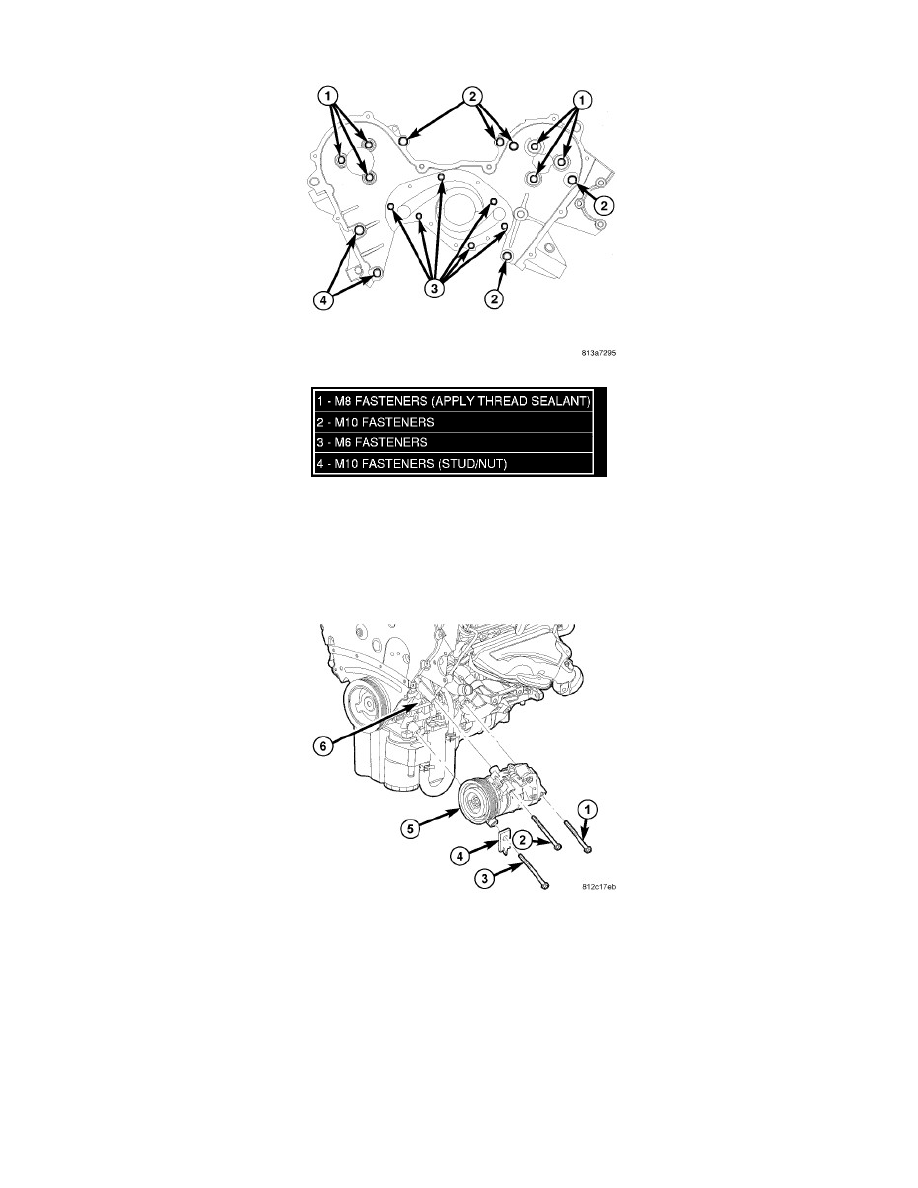
3. Install rear timing belt cover. Tighten nuts (4) and bolts (1, 2) to the following specified torque:
-
M10 (2, 4) - 54 Nm (40 ft. lbs.)
-
M8 (1) - 28 Nm (20 ft. lbs.)
4. Position water pump and new gasket.
5. Install water pump mounting bolts (3). Tighten to 12 Nm (105 in. lbs.).
CAUTION: When equipped, use care not to deform or damage the automatic transmission cooler lines and retaining bracket when
repositioning the A/C compressor.
NOTE: Bolt 3 that secures the A/C compressor and transmission cooler line bracket (when equipped) must be installed through the bracket
and the lower front mounting hole of the compressor prior to final positioning of the compressor to the cylinder block.
6. Loosely install the bolt (3) that secures the A/C compressor and automatic transmission cooler line bracket (4) (when equipped) to the compressor
and position the compressor, bracket and bolt to the cylinder block (6).
7. Loosely install the bolts (1 and 2) that secure the A/C compressor to the cylinder block.
8. Tighten all three bolts that secure the A/C compressor to the engine in the following order to 26 Nm (19 ft. lbs.):
-
Upper front bolt (2).
-
Lower front bolt (3).
-
Rear bolt (1).