
Challenger V8-5.7L (2010)
Rear Cross-Member Bushing: Service and Repair
Rear Crossmember Isolator - Installation
Differential
INSTALLATION
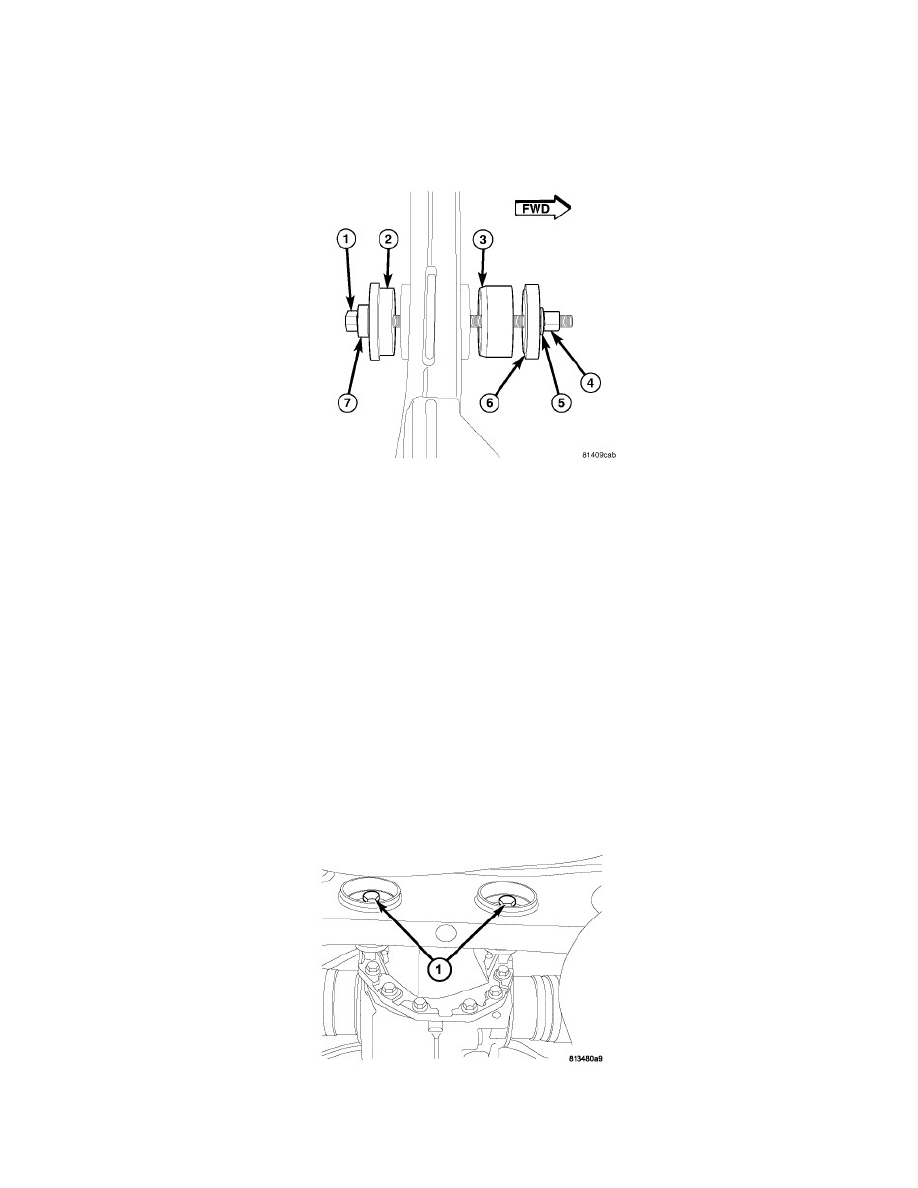
NOTE: It is important that tapered end (3) of bushing be installed first into forward end of crossmember to ease installation.
NOTE: When installing Thrust Bearing (7), be sure to place hardened side toward Bolt head.
1. Insert tapered end of NEW bushing (3) into forward end of crossmember bushing bore.
2. Assemble tools (See following list) through crossmember and bushing as shown.
-
(1) Bolt
-
(2) Disc 9520-1
-
(3) Bushing
-
(4) Nut
-
(5) Washer
-
(6) Installer 9520-2
-
(7) Thrust Bearing
3. Insert Installer (6) into end of bushing and Disc (2) into opposite end of crossmember bushing bore.
4. While holding Nut (4) from rotating, tighten Bolt (1) using hand tools, pressing bushing into crossmember. Stop when Installer (6) bottoms
against bushing bore.
5. Remove tools.
CAUTION: Differential mounting bolts (1) must be installed through bushings prior to crossmember installation in vehicle. Bolts cannot be
inserted through bushings once crossmember is installed.