
Challenger SRT-8 V8-6.1L (2009)
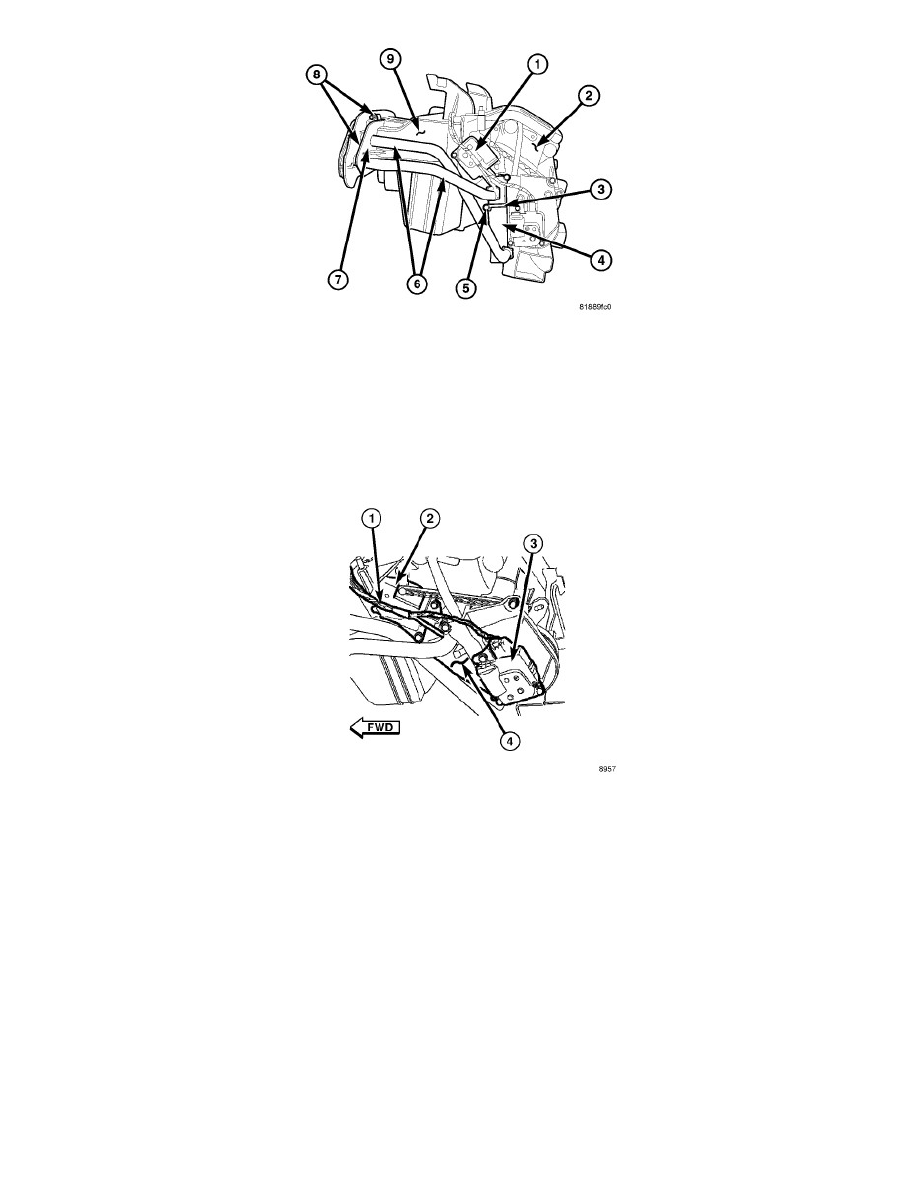
5. Carefully install the heater core (4) into the driver side of the HVAC air distribution housing (2) and position the heater core tubes (6) to the
HVAC housing (9).
6. Install heater core retaining bracket (3) onto the air distribution housing and install the retaining screw (5). Tighten the screw to 2.2 Nm (20 in.
lbs.).
7. Install the flange (7) over the heater core tubes and onto the HVAC housing and install the two flange retaining screws (8). Tighten the screws to
2.2 Nm (20 in. lbs.).
8. Install the blend door actuator (1) to the driver side of the air distribution housing See: Air Door/Air Door Actuator / Motor/Service and
Repair/Blend Door Actuator - Installation.
9. Connect the HVAC wire harness (1) to the mode door actuator (2) and the blend door actuator (3) located on the driver side of the air distribution
housing (4).
10. Install the HVAC housing assembly See: Removal and Replacement/HVAC Housing - Installation
11. Reconnect the negative battery cable.
12. If the heater core is being replaced, flush the cooling system See: Engine, Cooling and Exhaust/Cooling System/Service and Repair.
13. Refill the engine cooling system See: Engine, Cooling and Exhaust/Cooling System/Service and Repair.
14. Evacuate the refrigerant system See: Service and Repair/Refrigerant System Evacuate.
15. Charge the refrigerant system See: Service and Repair/Refrigerant System Charge.
16. Initiate the Actuator Calibration function using a scan tool See: Service and Repair/HVAC Actuator Calibration Procedure.
Air Distribution Housing
HOUSING-AIR DISTRIBUTION