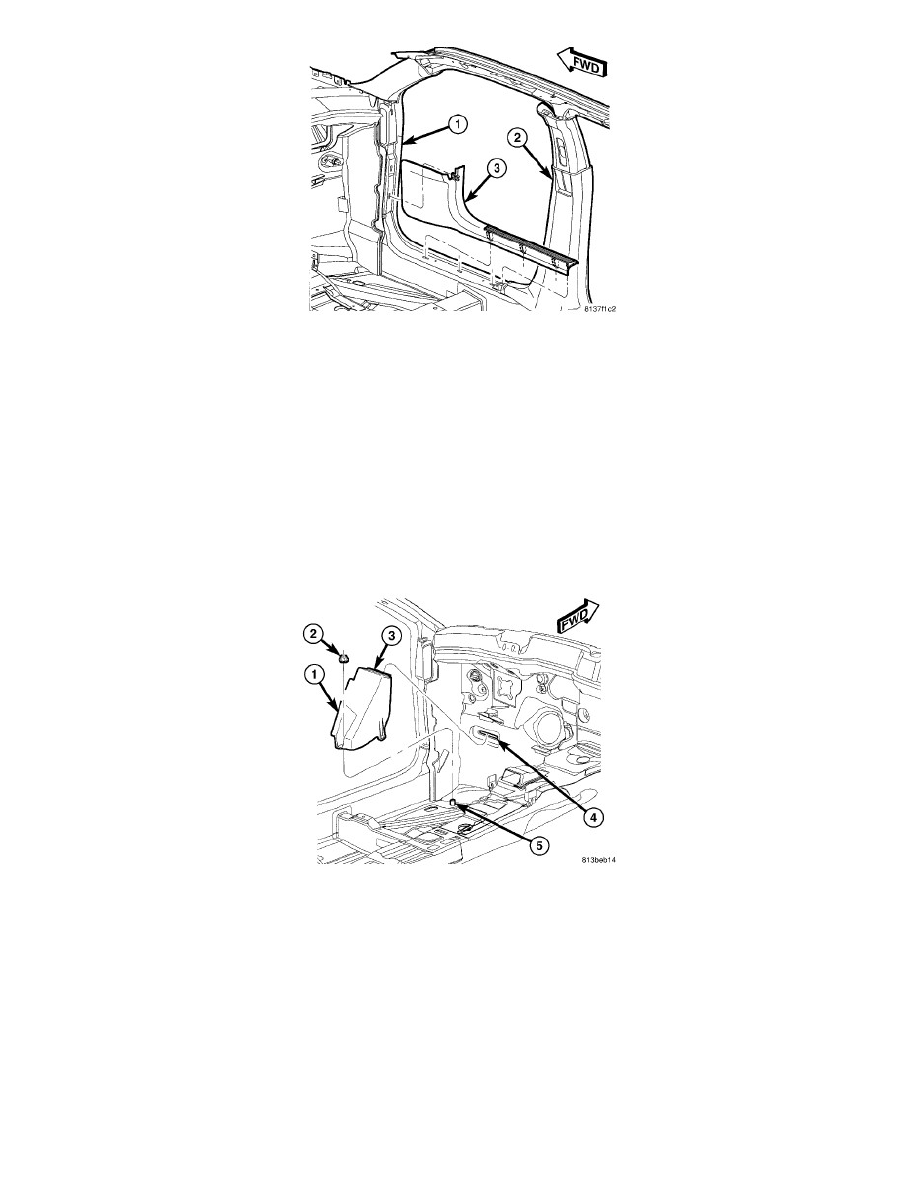
Charger V6-3.5L (2009)

1. Check to be certain that the three plastic nuts are properly installed and in good condition in the slots of the front door opening sill. Replace a
plastic nut if any damage is evident.
2. Position the vertical portion of the lower cowl trim (3) to the cowl (1) at the front of the front door opening.
3. Align the spring clip retainer on the trim with the slot in the cowl (1).
4. Using hand pressure, press firmly and evenly forward on the trim over the spring clip location until the retainer snaps into place.
5. Position the horizontal portion of the lower cowl trim to the front door sill and the B-pillar trim (2).
6. Align the three spring clip retainers on the trim with the slots in the sill.
7. Using hand pressure, press firmly and evenly downward on the trim over each of the spring clip locations until the retainers snap into place.
8. Reinstall the upper cowl trim to the front of the front door opening. See: Cowl Trim Panel - Installation.
Front Floor Foot Rest - Removal
REMOVAL
1. Remove the trim from the driver side lower cowl side inner panel. See: Cowl Trim Panel - Removal.
2. Remove the push-pin fastener that secure the driver side front carpet to the cowl side inner panel and the front door opening sill.
3. Pull the front floor carpet up and away from the foot rest (1) far enough to access and remove the nut (2) that secures the foot rest to the weld stud
(5) on the front floor panel.
4. Lift the base of the foot rest upward far enough to disengage the tab (3) at the top of the foot rest from the slot (4) in the dash panel.
