
Charger V6-3.5L (2009)
2. Install the two nuts (1) that secure the HVAC housing to the passenger compartment side of the dash panel. Tighten the nuts to 3 Nm (26 in. lbs.).
3. Install the defroster ducts See: Air Duct/Service and Repair/Defroster Duct - Installation.
4. Connect the floor distribution ducts See: Air Duct/Service and Repair/Floor Distribution Duct - Installation.
5. Connect the floor console duct See: Air Duct/Service and Repair/Floor Console Duct - Installation.
6. Install the instrument panel See: Body and Frame/Interior Moulding / Trim/Dashboard / Instrument Panel/Service and Repair/Instrument Panel -
Installation.
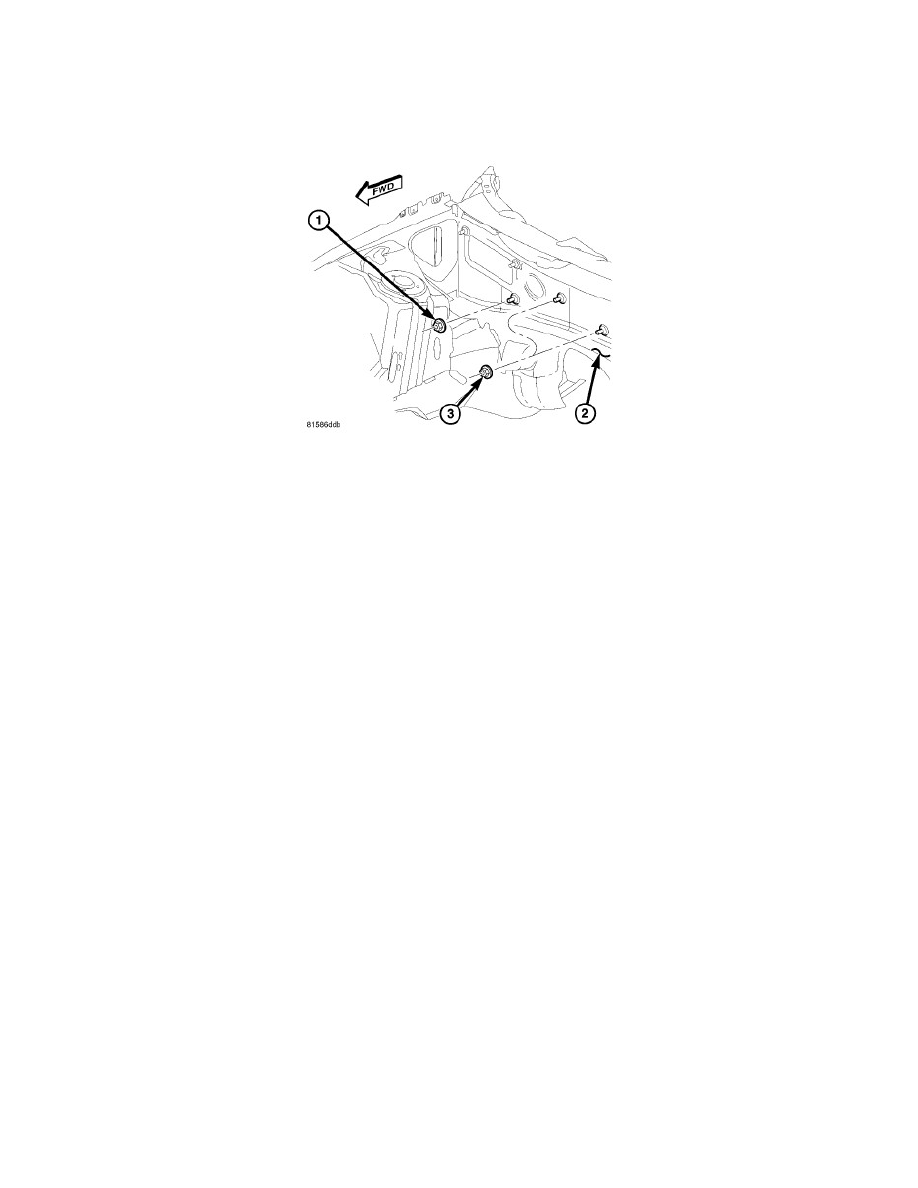
7. Install the three nuts (1 and 3) that secure the HVAC housing to the engine compartment side of the dash panel (2). Tighten the nuts to 7 Nm (62
in. lbs.).
8. Connect the heater hoses to the heater core tubes.
9. Connect the A/C suction line and A/C liquid line to the A/C evaporator See: Hose/Line HVAC/Service and Repair/A/C Liquid Line - Installation.
10. Install the fresh air inlet housing to the engine compartment side of the dash panel. See: HVAC Housing - Installation.
11. Reconnect the negative battery cable.
12. If the heater core is being replaced, flush the cooling system See: Engine, Cooling and Exhaust/Cooling System/Service and Repair.
13. Refill the engine cooling system See: Engine, Cooling and Exhaust/Cooling System/Service and Repair.
14. Evacuate the refrigerant system See: Service and Repair/Refrigerant System Evacuate.
15. Charge the refrigerant system See: Service and Repair/Refrigerant System Charge.
16. Initiate the Actuator Calibration function using a scan tool . See: Testing and Inspection/Component Tests and General Diagnostics/Heating and
Air Conditioning/Heating and A/C Systems