
Charger V6-3.5L (2009)
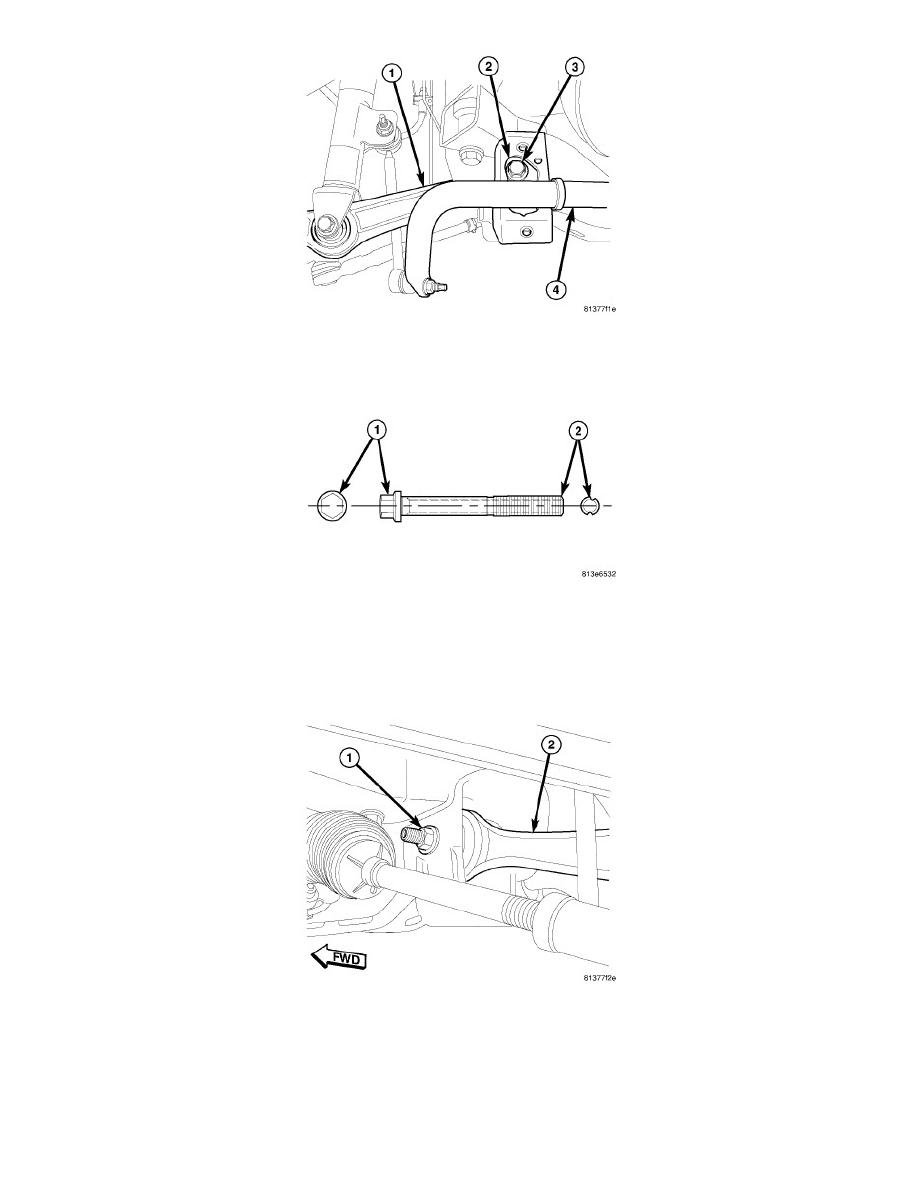
NOTE: In the following step, the lower control arm cradle bolt (3) is accessed through the opening (2) created by removal of the bushing from
the stabilizer bar (4).
CAUTION: If the lower control arm bolt at the engine cradle has a lengthwise grooved shaft (2), it is a special wheel alignment adjustment bolt
and the bolt head (1) must not be rotated in the vehicle or damage to the bolt and engine cradle will result. While holding the bolt
in place with a wrench, remove the nut, then slide the bolt out of the bushing and cradle taking note of bolt positioning in engine
cradle for reassembly purposes. The bolt needs to be installed in the same position as removed to make sure wheel camber and
caster return to adjusted position.
8. Remove bolt and nut (1) securing lower control arm (2) to engine cradle. If bolt has a lengthwise grooved shaft (see above note), remove bolt and
nut by holding the bolt in place with a wrench, removing nut, then sliding bolt out of bushing and cradle while taking note of bolt positioning in
lower control arm bushing for reassembly purposes.