
Charger V6-3.5L VIN G (2006)
2.
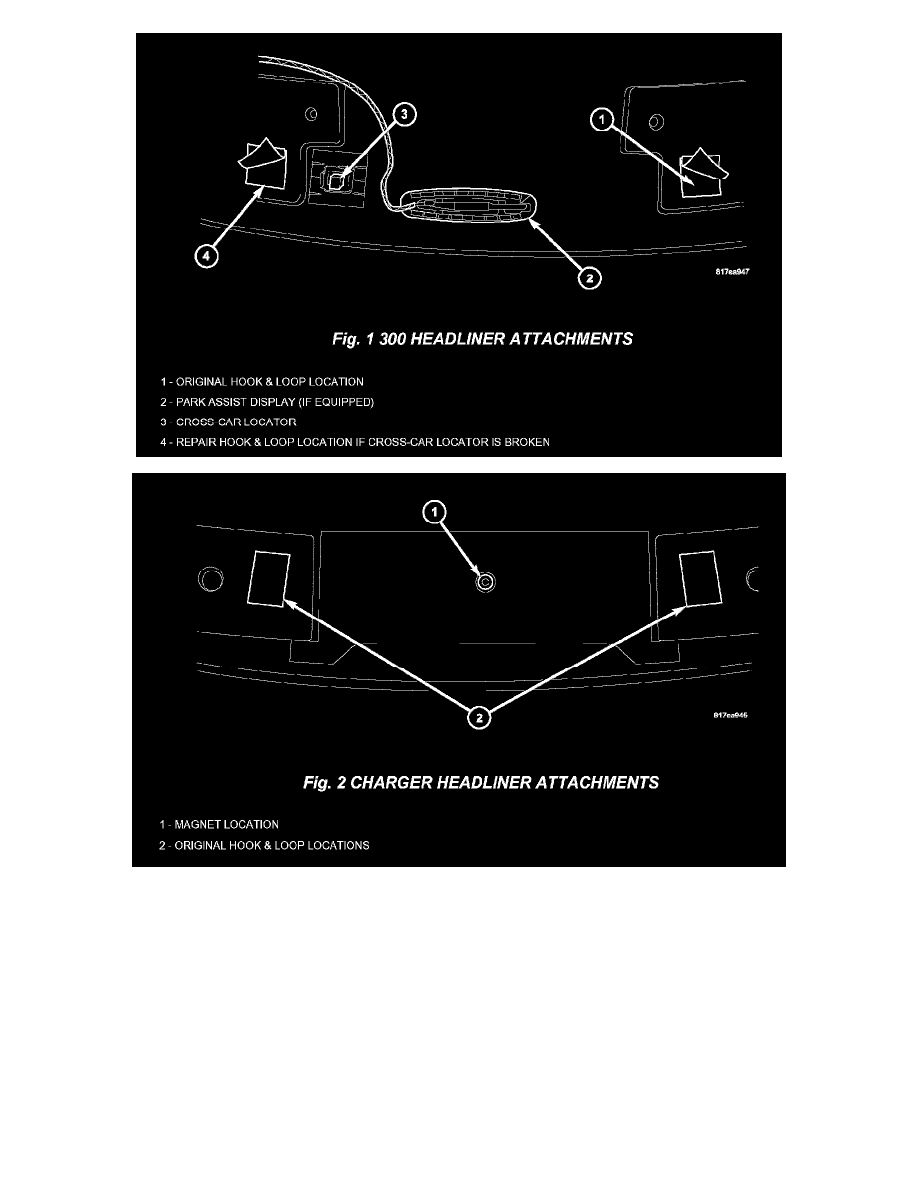
Carefully separate the headliner from roof at both the left rear and right rear areas - 300's are equipped with plastic snap-tab at left rear and hook &
loop patch at right rear, (Fig. 1); Charger's are equipped with 2 hook & loop fasteners and a magnet in the center, (Fig. 2).
3.
If the vehicle is a 300 inspect the top side of the headliner for a broken 2 way clip. Remove and discard any loose or broken portions of the clip. If
the 2 way clip is broken, it will be replaced by a hook and loop fastener placed on the black foam next to the clip location.
4.
Remove all white square patch(es) of hook and loop fastener, located on black foam on the backside of the headliner, and their mating halves from
the roof.
5.
Using a putty knife or similar tool, gently scrape any hardened adhesive residue from black foam and from roof of vehicle at outboard attachment
points as needed.
6.
Apply 3M Automotive Adhesion Promoter 4298 to the areas where the new hook & loop fasteners will be placed on the black foam to prepare
surface for hook and loop fastener(s).