
Charger V6-3.5L VIN G (2006)
b.
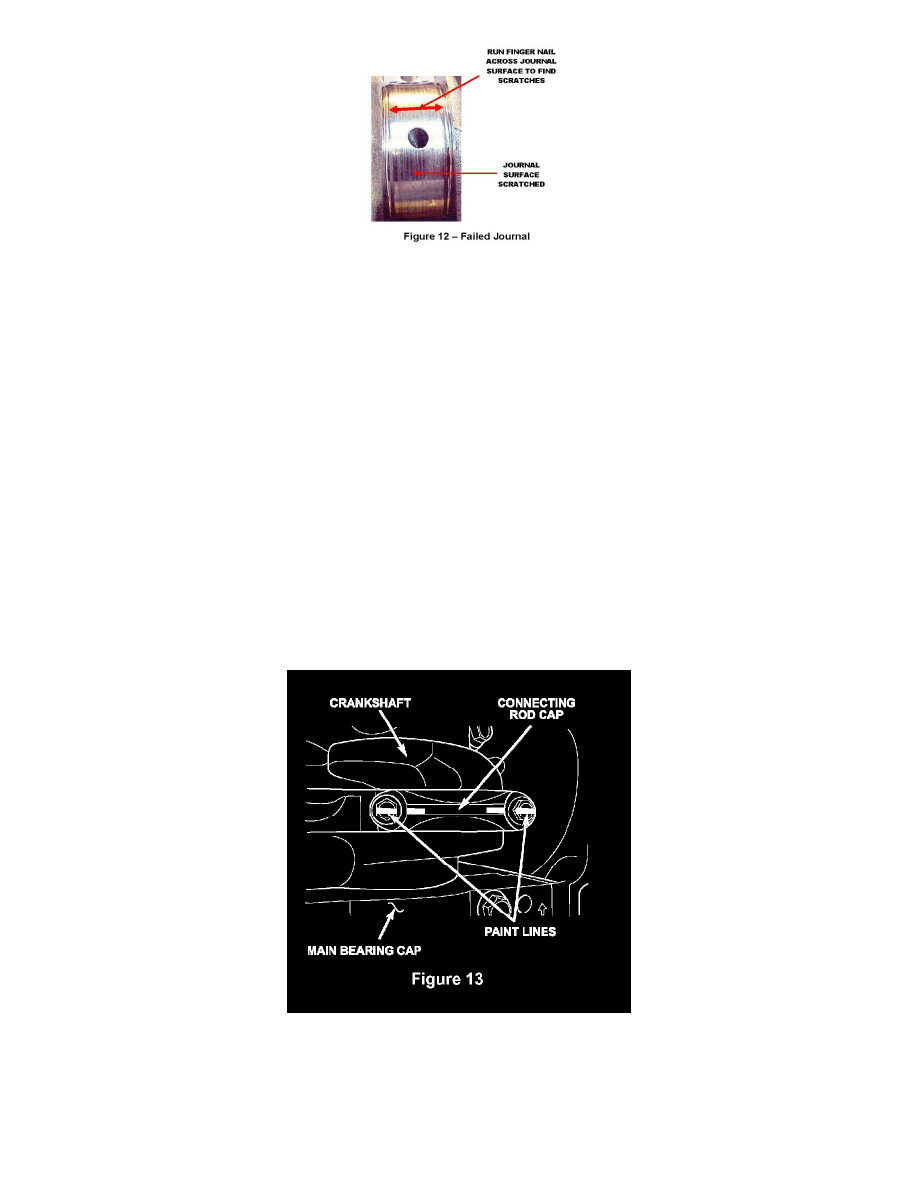
Significant damage to the crankshaft journal for any of the following (Figures 11 & 12):
>
Chips or burrs in the oil hole.
>
Chips or burrs in oil hole chamfer.
>
Finger nail scratch test across the face of the journal surface detects a surface anomaly on an otherwise uniform smooth surface.
NOTE:
For detailed color images of acceptable and failed bearings, view this CSN through TechCONNECT.
29.
Check that the connecting rod bearing in the cap is fully seated and the tab is aligned properly.
NOTE:
The joint face of the connecting rod surface and the bearing must be free of particles.
30.
Check the upper bearing shell that it is correctly seated in the connecting rod and the bearing tab is properly engaged.
NOTE:
Do not nick the polished crankshaft journal with the connecting rod or any tools.
31.
Lubricate the rod bearing with clean 10W30 engine oil.
32.
Install the connecting rod cap to the connecting rod with the paint marks of Step 26 aligned. Hand seat the connecting rod bolts. Tighten the
connecting rod fasteners to 20 ft. lbs. (27 N.m).
33.
Once the proper torque is reached, wipe clean the screw head and connecting rod cap of oil. Draw a line with a paint pen between connecting rod
cap and the connecting rod screw head to indicate that each bolt torque was verified (Figure 13).
34.
Tighten both rod bolts another 90 degrees (1/4 turn).
35.
Install windage tray in the direction noted in Step 24. Lubricate windage tray bolts with engine oil and finger tighten all bolts. Tighten the windage
tray bolts to 20 ft. lbs. (27 N.m).